Adding and Using API Steps in AI Recorder
You can add API steps in AI Recorder to call external APIs directly within your test scenarios. This lets you validate API responses, verify data fields, and even chain API calls for data-driven workflows.
This guide explains how to:
- Add an API step to a scenario
- Configure the API request
- Add response validations
- Save and run the step
- Edit an existing step
- Use API chaining and dynamic parameters
Adding an API Step
Follow these steps to add an API Step in your test:
Step 1. Add an API Step
- Sign In to your BlinqIO account.
- Open the AI Recorder and start recording a scenario.
- Click Add a step and select Add an API step.
- Enter a Name for your step and click Next.
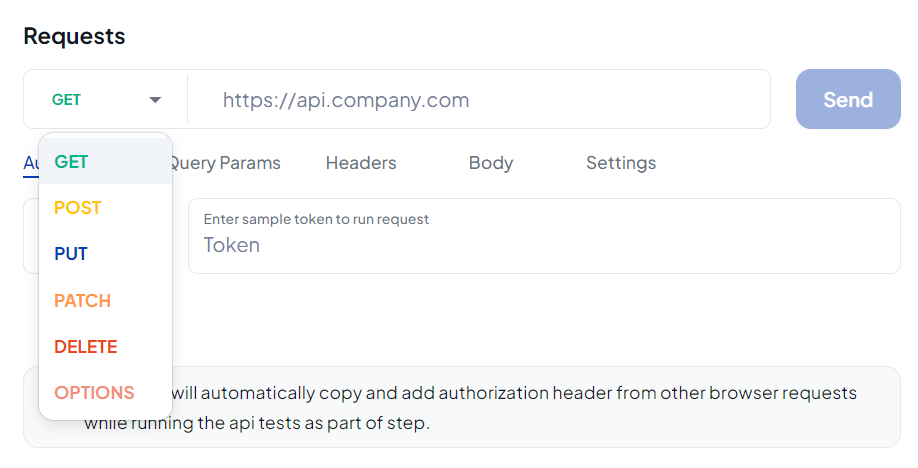
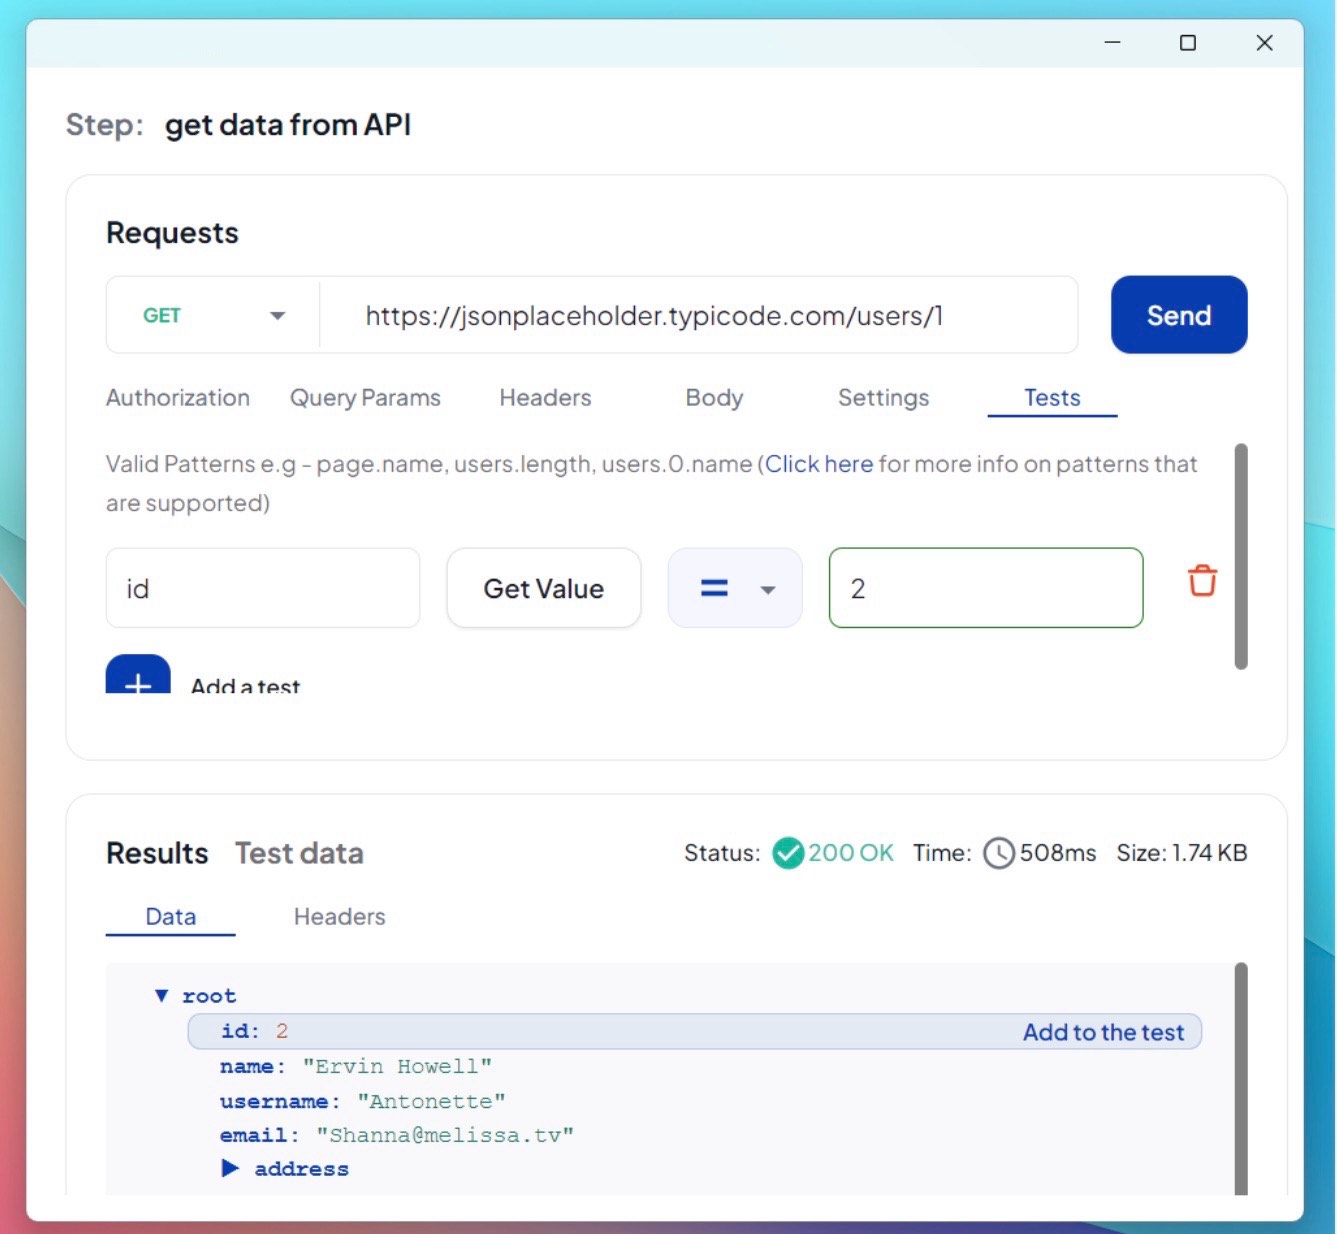
Step 2. Configure the API Request
Once the configuration window appears, set up your request.
Choose an HTTP method: GET, POST, PUT, DELETE.
Click Send to execute the request. The response is displayed, including body content, headers, and status.
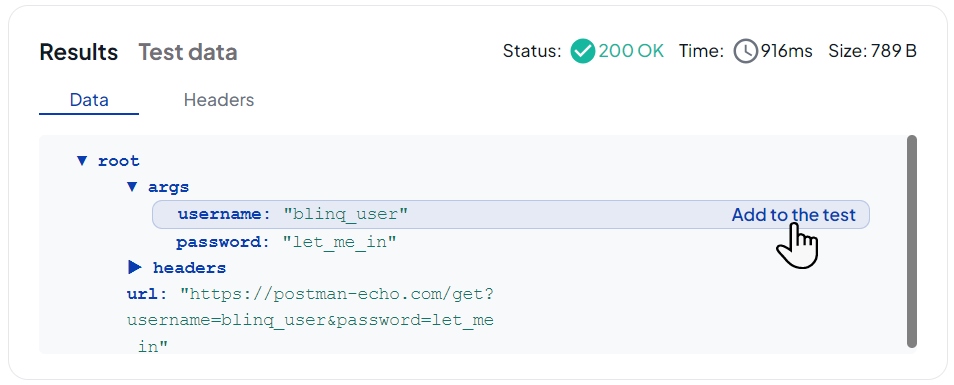
Step 3. Add Tests for Response Fields
You can validate specific response data.
- Switch to the Data section.
- Select a field you want to verify.
- Click Add to Test.
The field is now added as a validation rule for this API step.
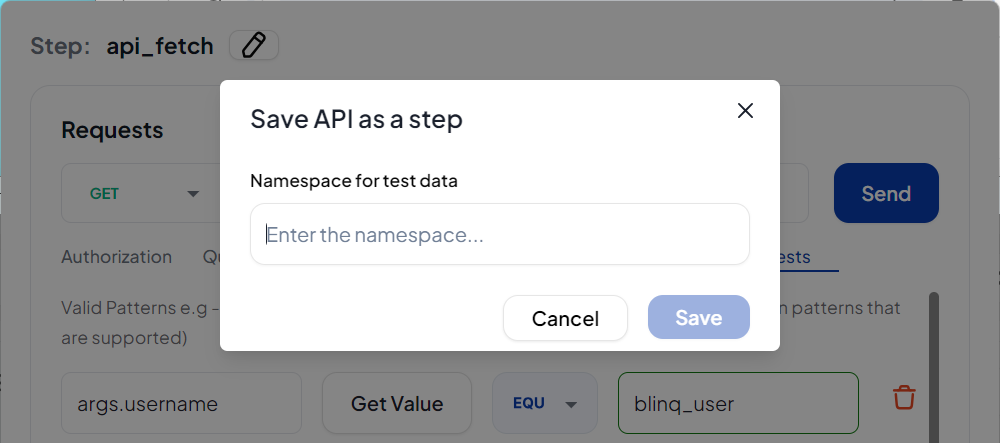
Step 4. Save the API Step
- Click Save.
- (Recommended) Enable Save API response as test data and provide a
namespace.- This makes the response reusable in later steps.
API Step in Run Reports
The test run report includes these details for an API Step that was executed:
- Test results
- Status codes
- Response body and headers
Editing an API Step
- Open the Gherkin file of your scenario.
- Click the API step to reopen its configuration window.
- Make changes to the request, headers, or tests.
- Click Send to preview results.
- Click Save to confirm updates.
If changes are made, a warning appears to indicate that the step is being modified.
API Chaining and Dynamic Parameters
API steps support chaining and dynamic values to create flexible workflows.
What is API Chaining?
Chaining passes response data (IDs, tokens, user details) from one step into another.
For example:
- Use a login token from Step 1 in headers for Step 2.
- Pass a created record ID from Step 1 into Step 2’s URL.
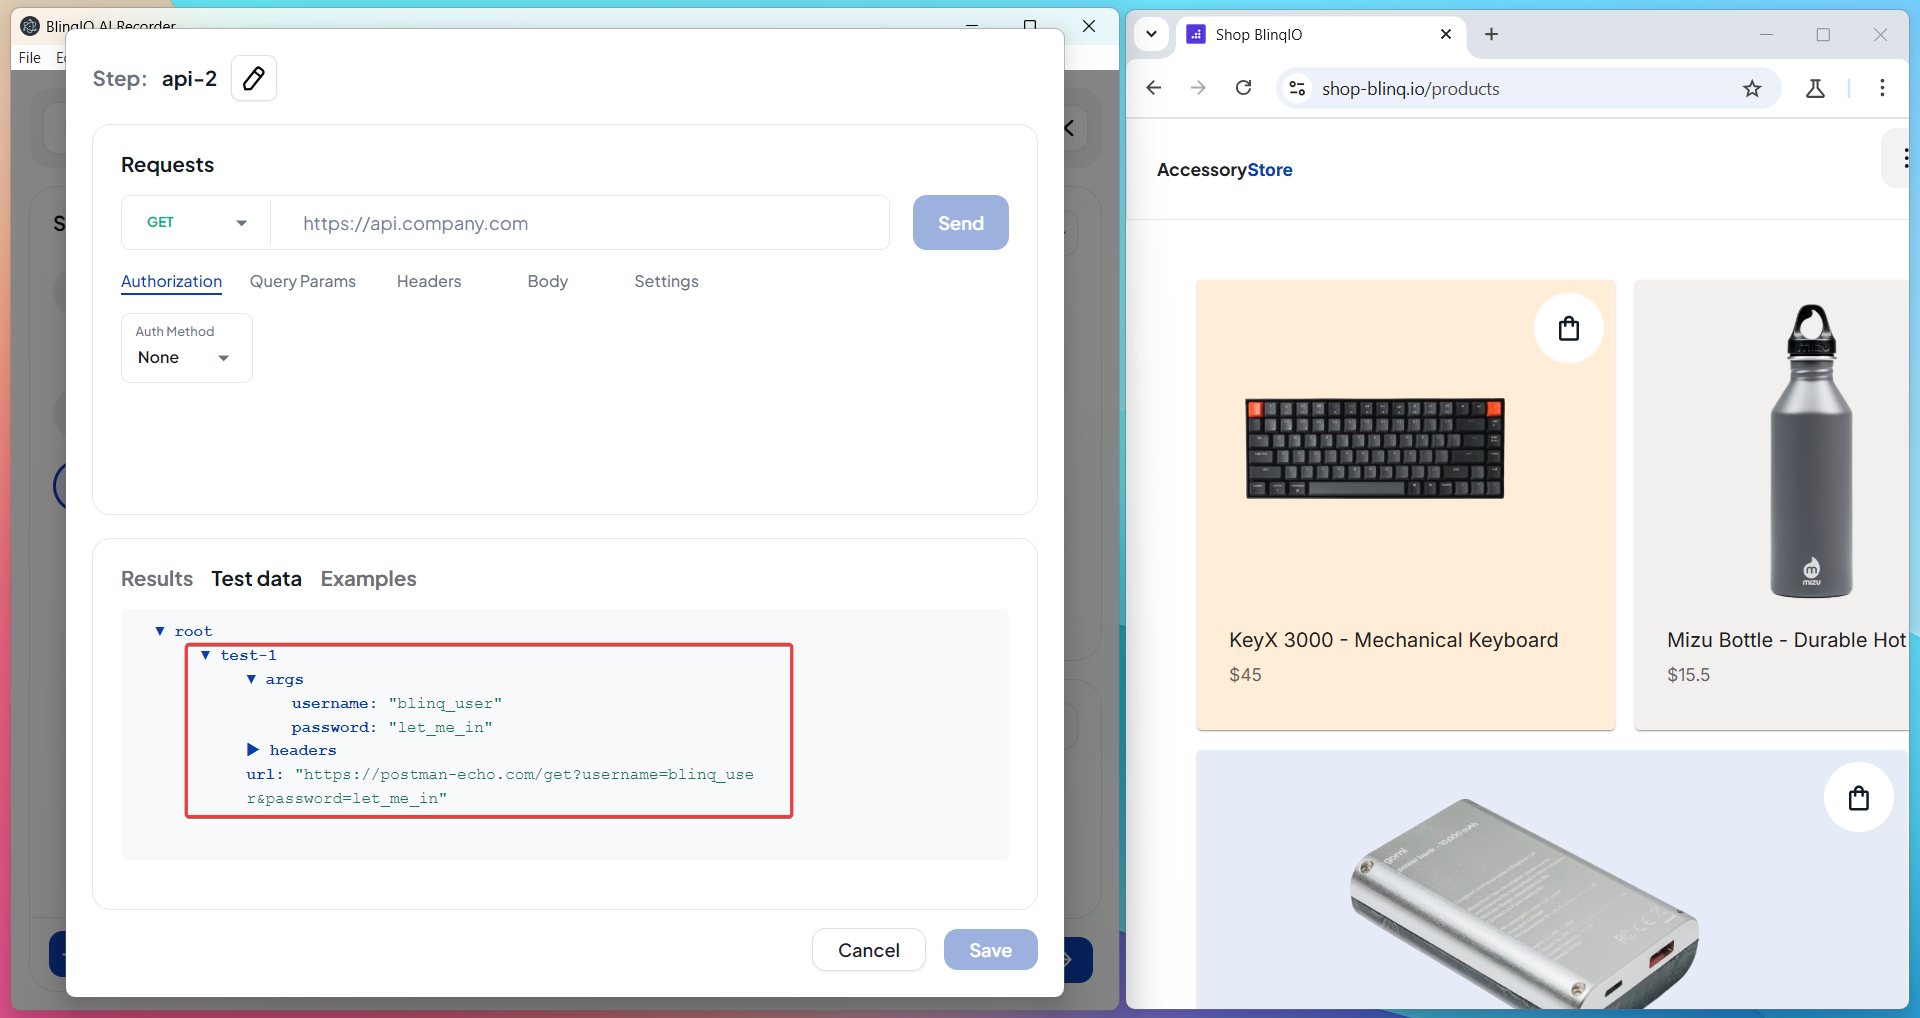
How to Chain API Steps
- Add and save the first API step. Its response fields appear under Test Data.
- Add another API step.
- Open the Test Data section and select a field from the previous step.
- Insert the copied value into URL, headers, query params, or body.
- Send the request and confirm the chained data applies correctly.
Using Dynamic Parameters
You can use:
| Type | Syntax | Source |
|---|---|---|
| Example Variables | <variableName> | Examples table |
| Test Data | {{testDataName}} | Test Data section |
| Chained Response Data | {{step1.responseField}} | Previous API step response |
Dynamic values can be used in:
- URL
- Headers
- Query Parameters
- Request Body
Tip
Copy these values directly from Examples or Test Data instead of typing them manually.
Best Practices
Best Practices for API Steps
- Use descriptive names for each API step.
- Always validate status codes in addition to response body.
- Store responses as test data with a namespace for reusability.
- Secure sensitive data (tokens, credentials) with environment variables instead of hardcoding.
- Chain steps only when necessary to keep scenarios fast and clear.
- Run and validate API steps independently before combining them with UI actions.