Automate your first test with AI Recorder
This guide shows you how to add new tests, automate them using AI Recorder, run the tests, and view reports. By the end, you'll have a working test scenario and a clear understanding of BlinqIO's AI-powered test automation workflow.
Launch the AI Recorder
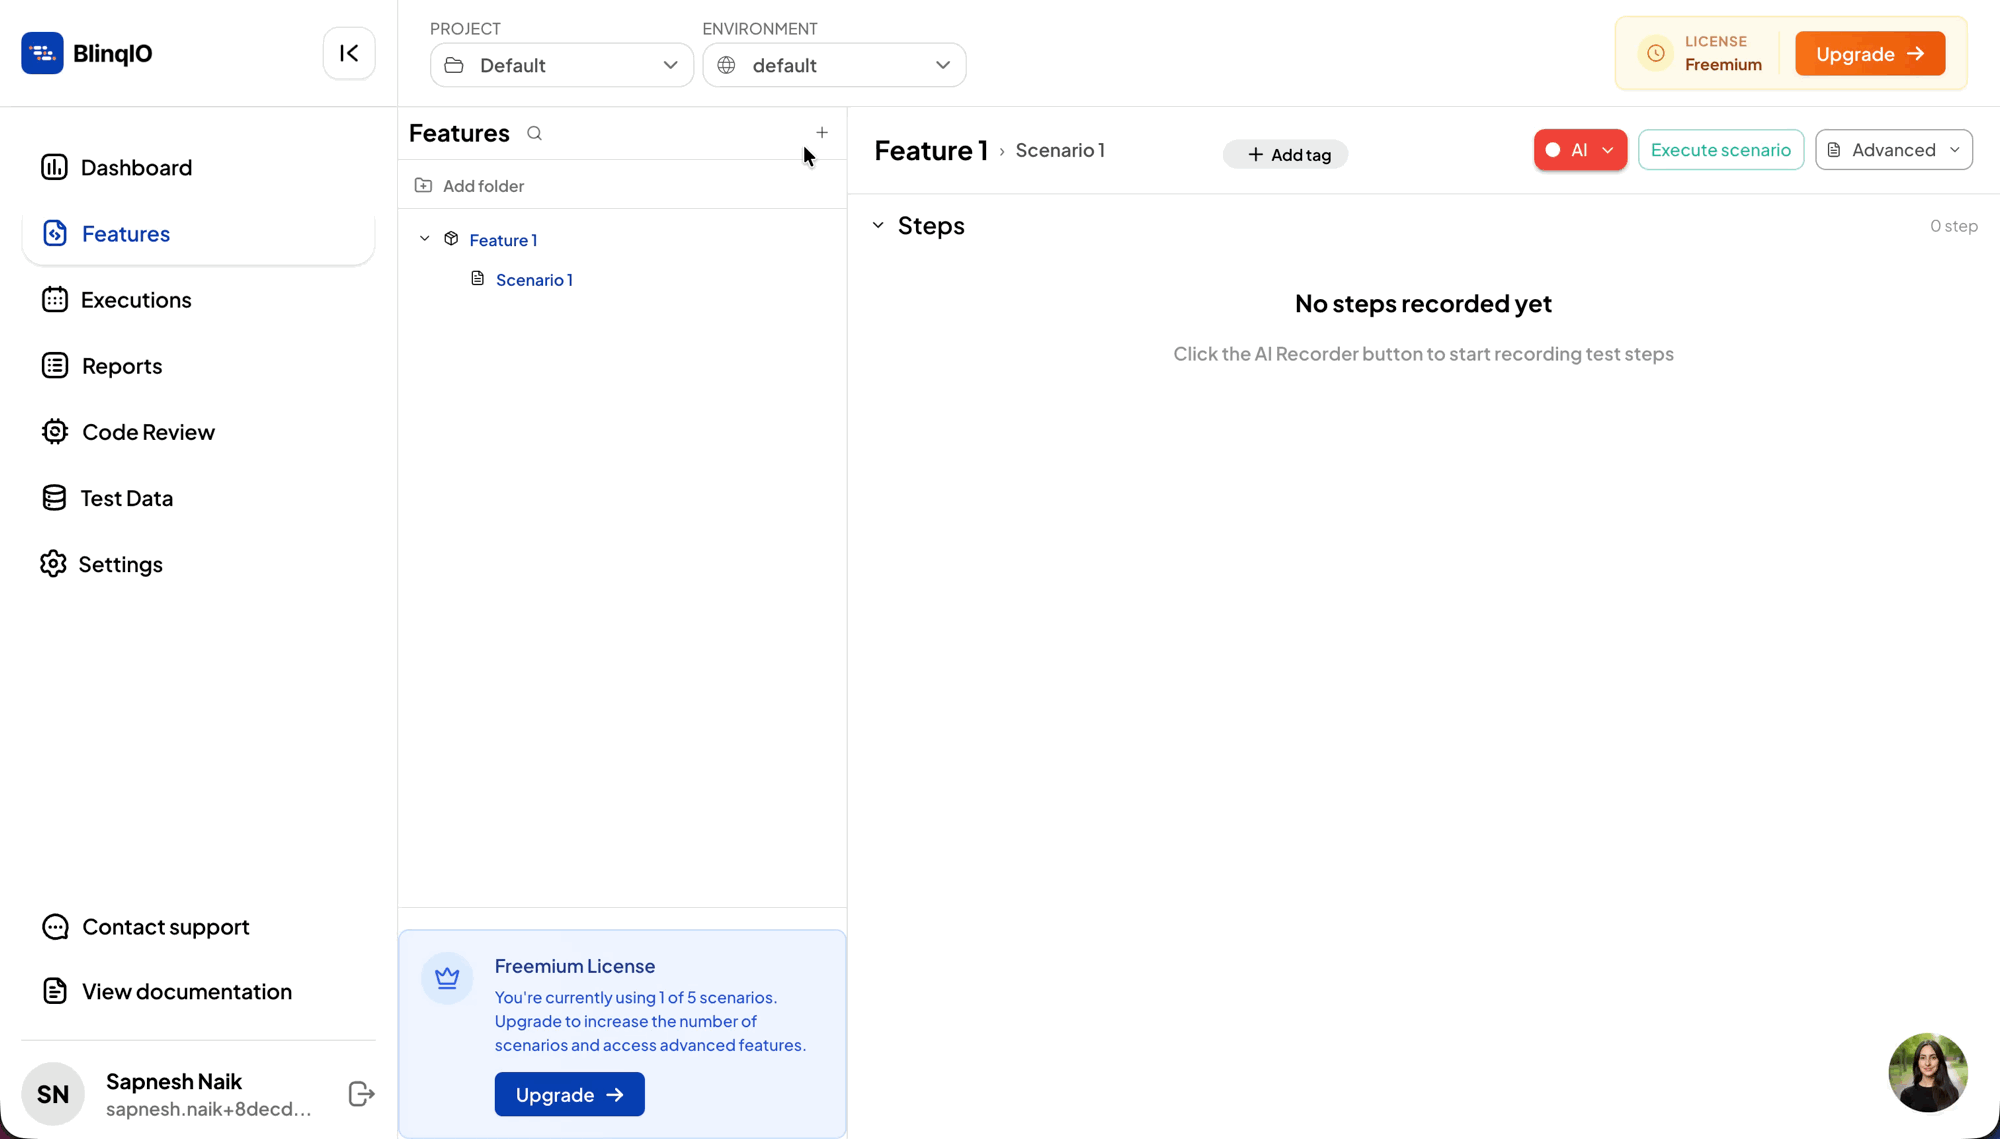
If you signed up for a new BlinqIO account, you will see "Scenario 1" under "Feature 1" on the AI Tests page. Select the scenario and click the AI button to launch the AI Recorder for that scenario.
1 / 3


Record test steps
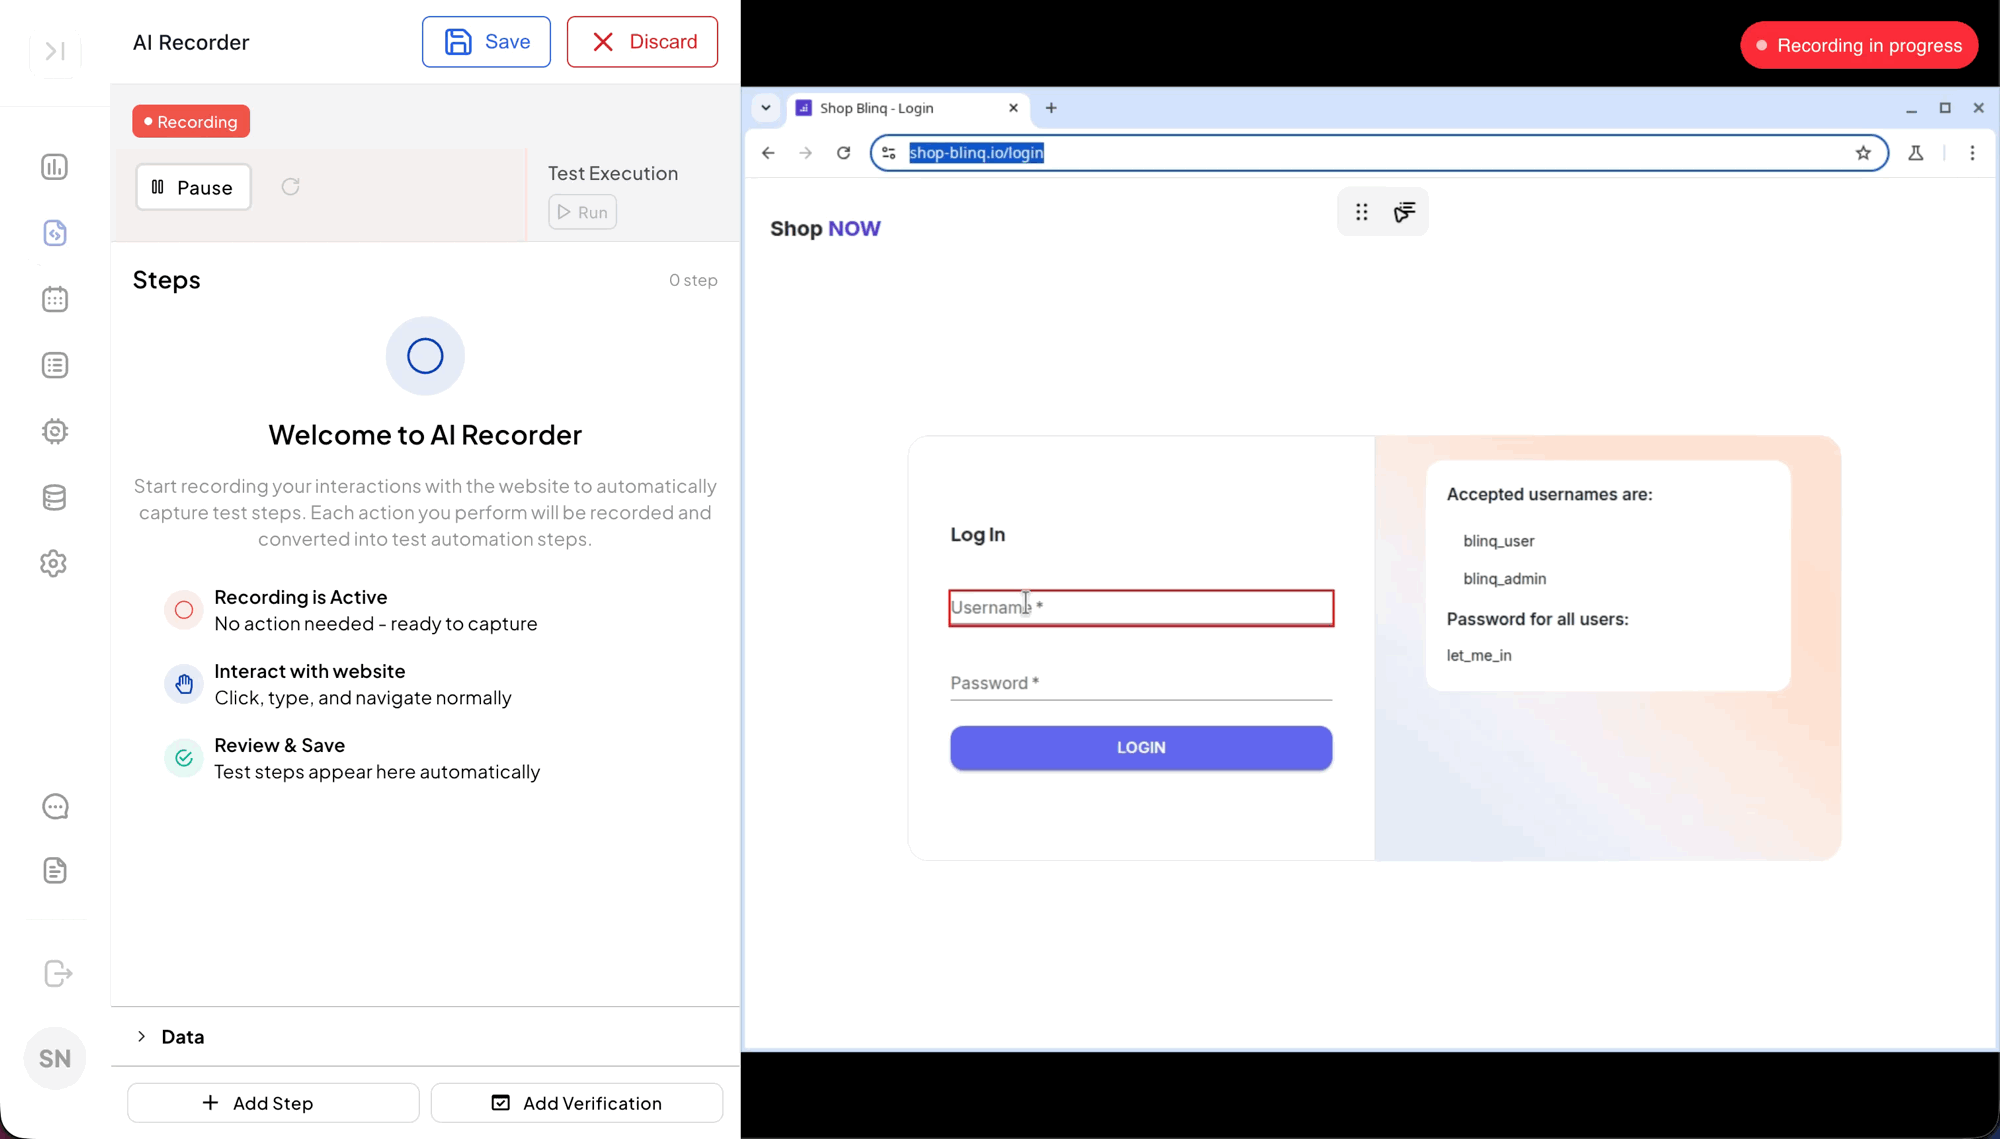
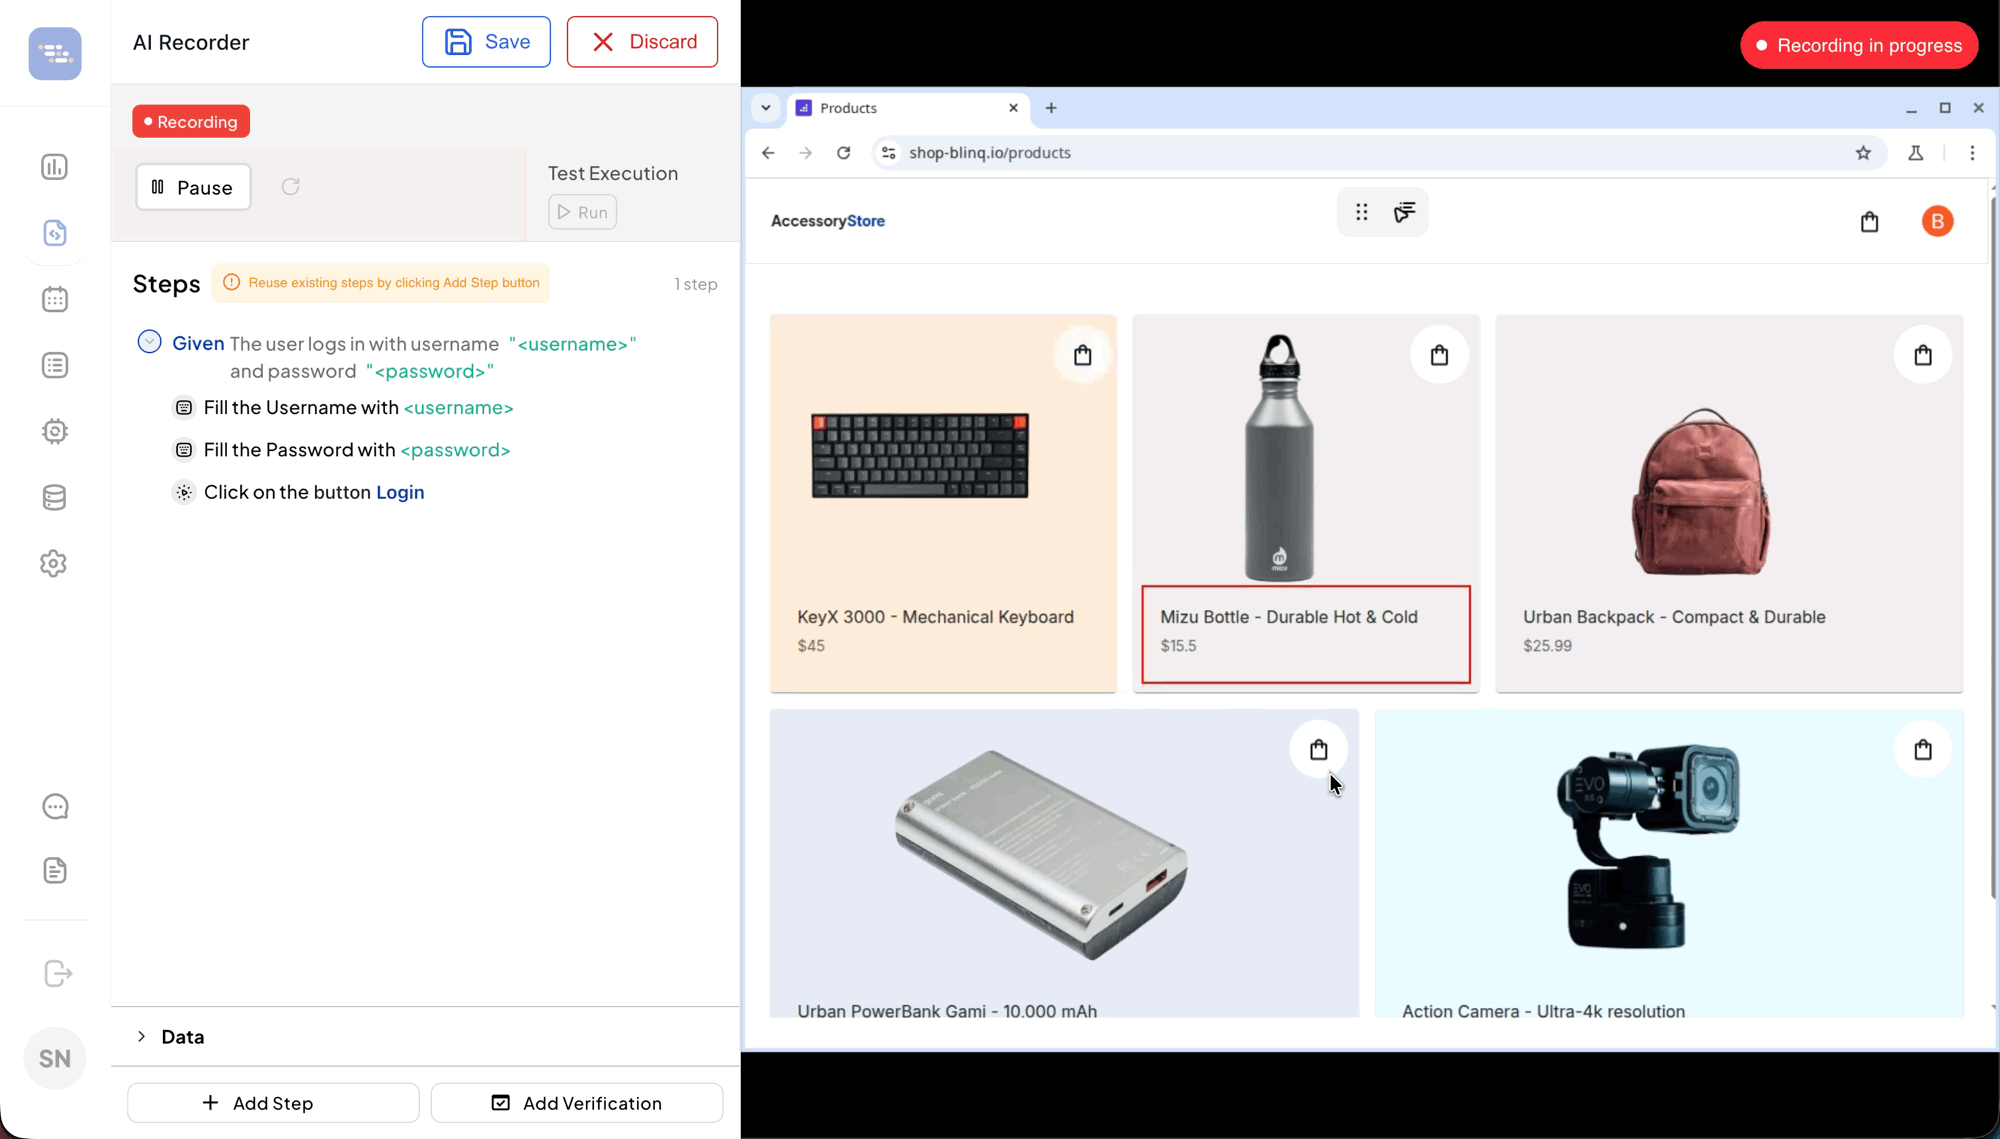
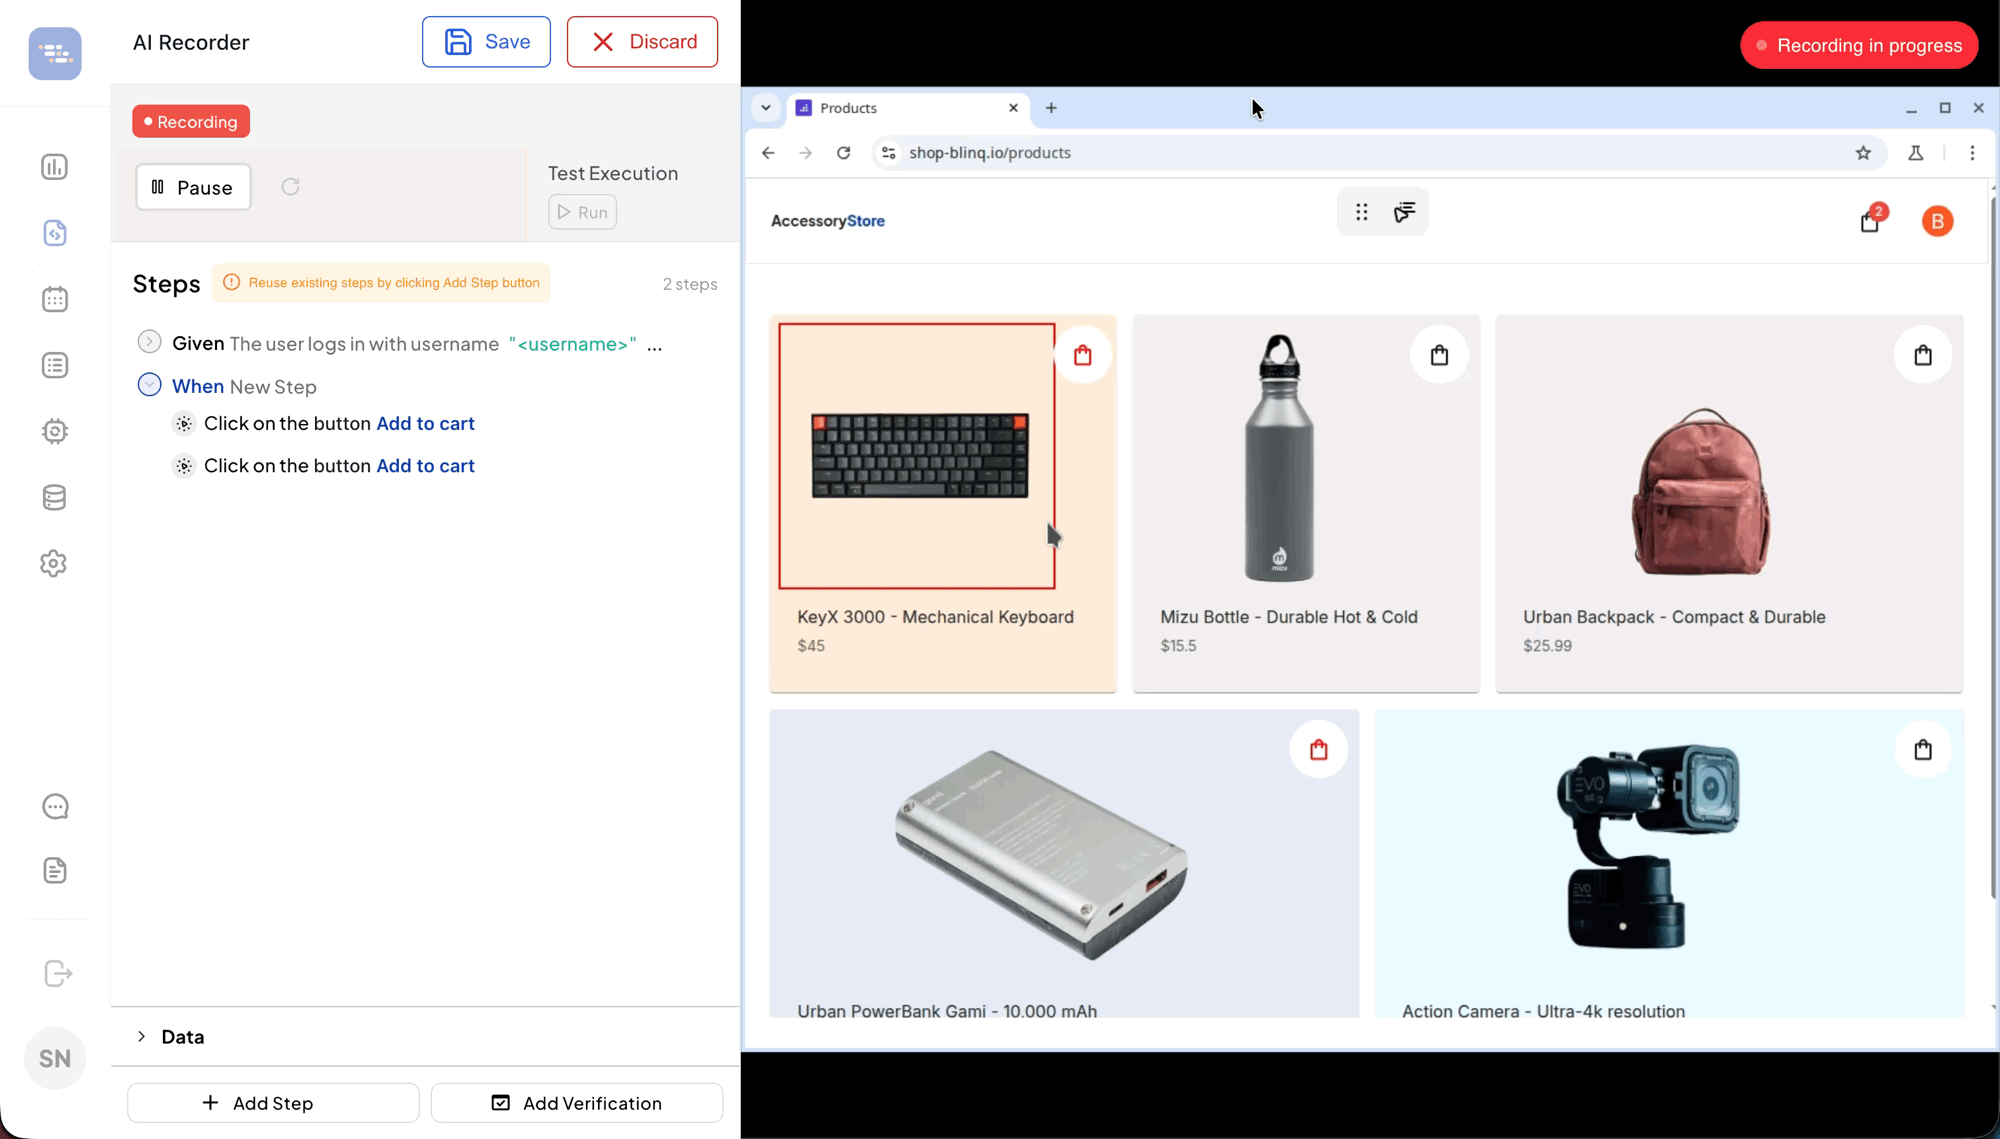
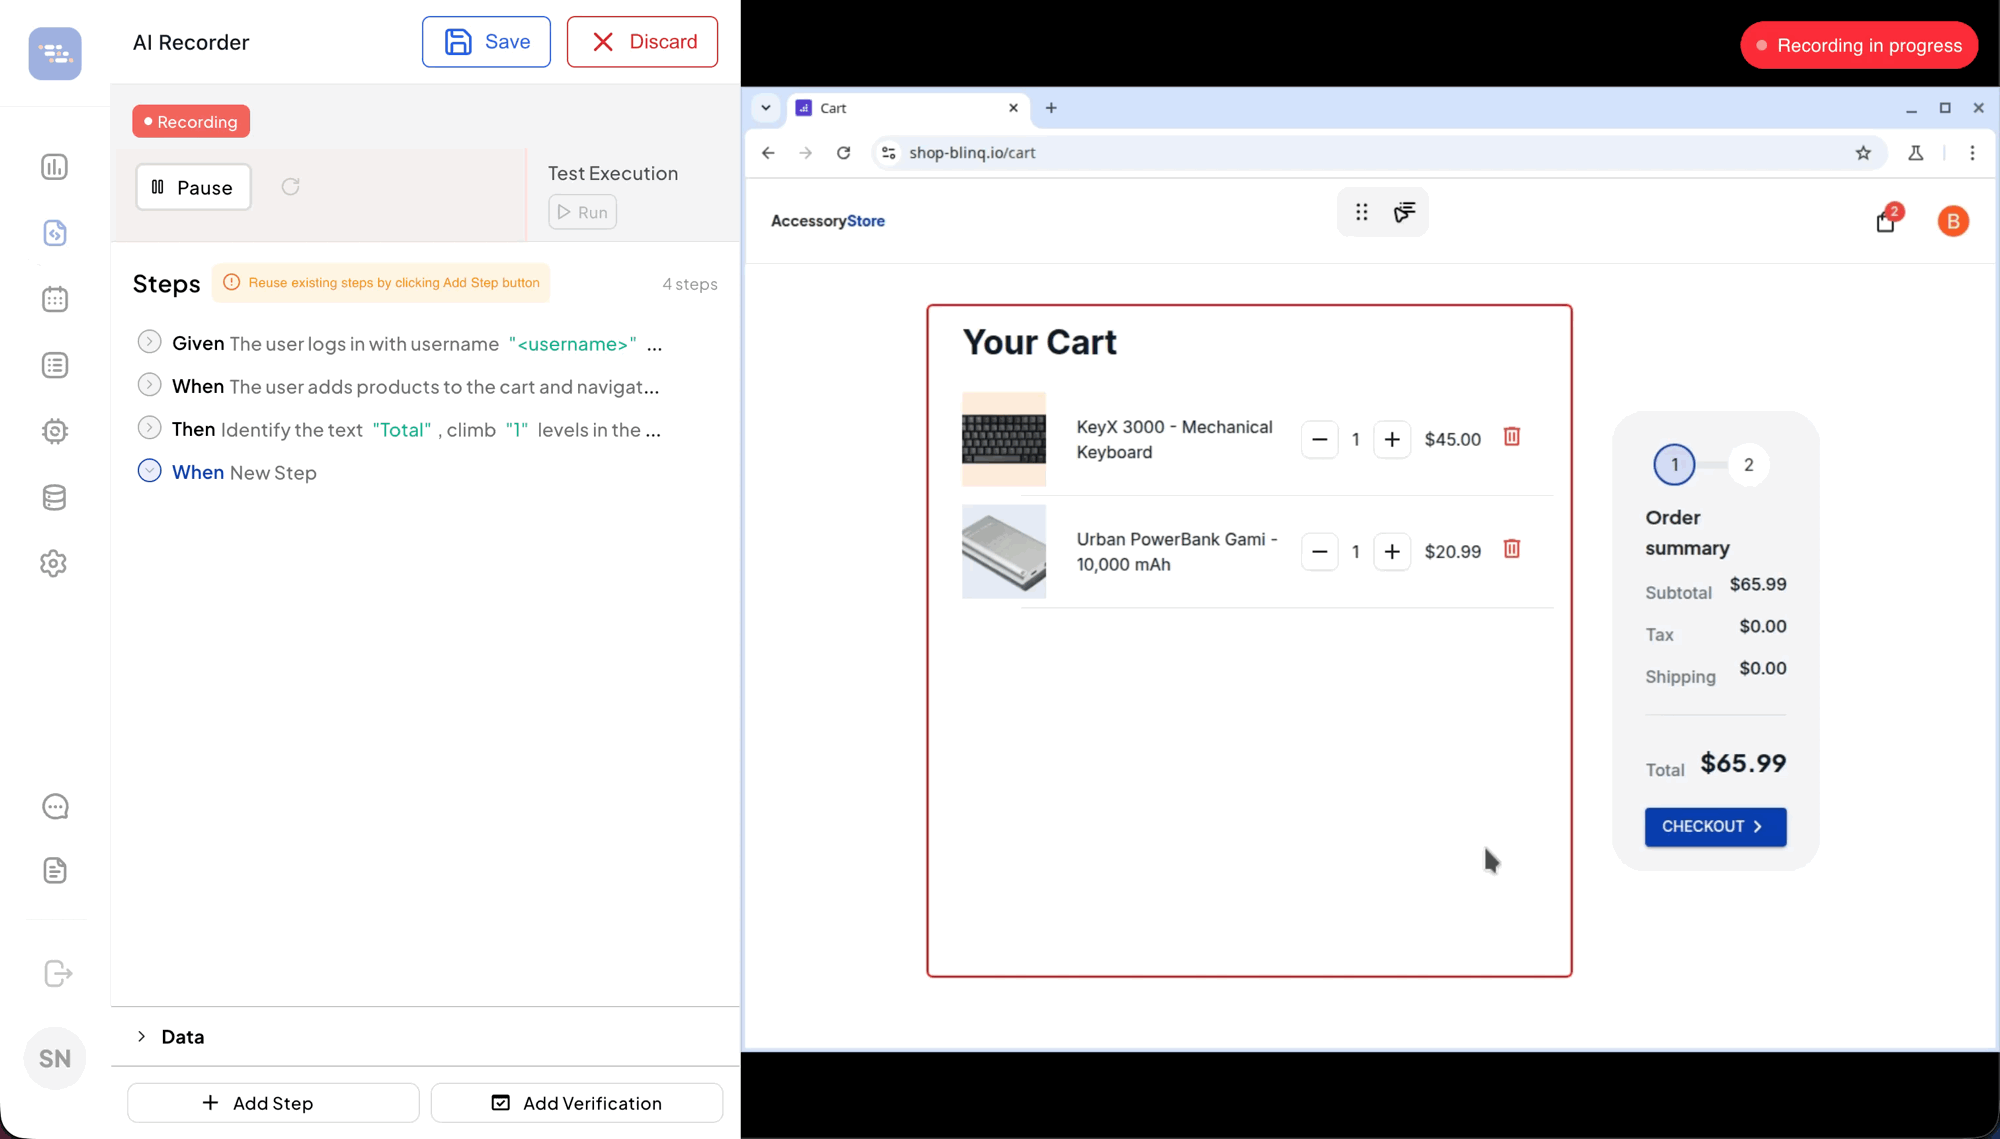
You can now perform your test steps in the browser. The AI Recorder automatically converts them into a readable scenario and generates Playwright test code in the background.
For your first test, we recommend recording a simple test with 5-8 steps.
TIP
Wait for each page or UI state to load before the next action. Use clear, repeatable actions and avoid random selections.
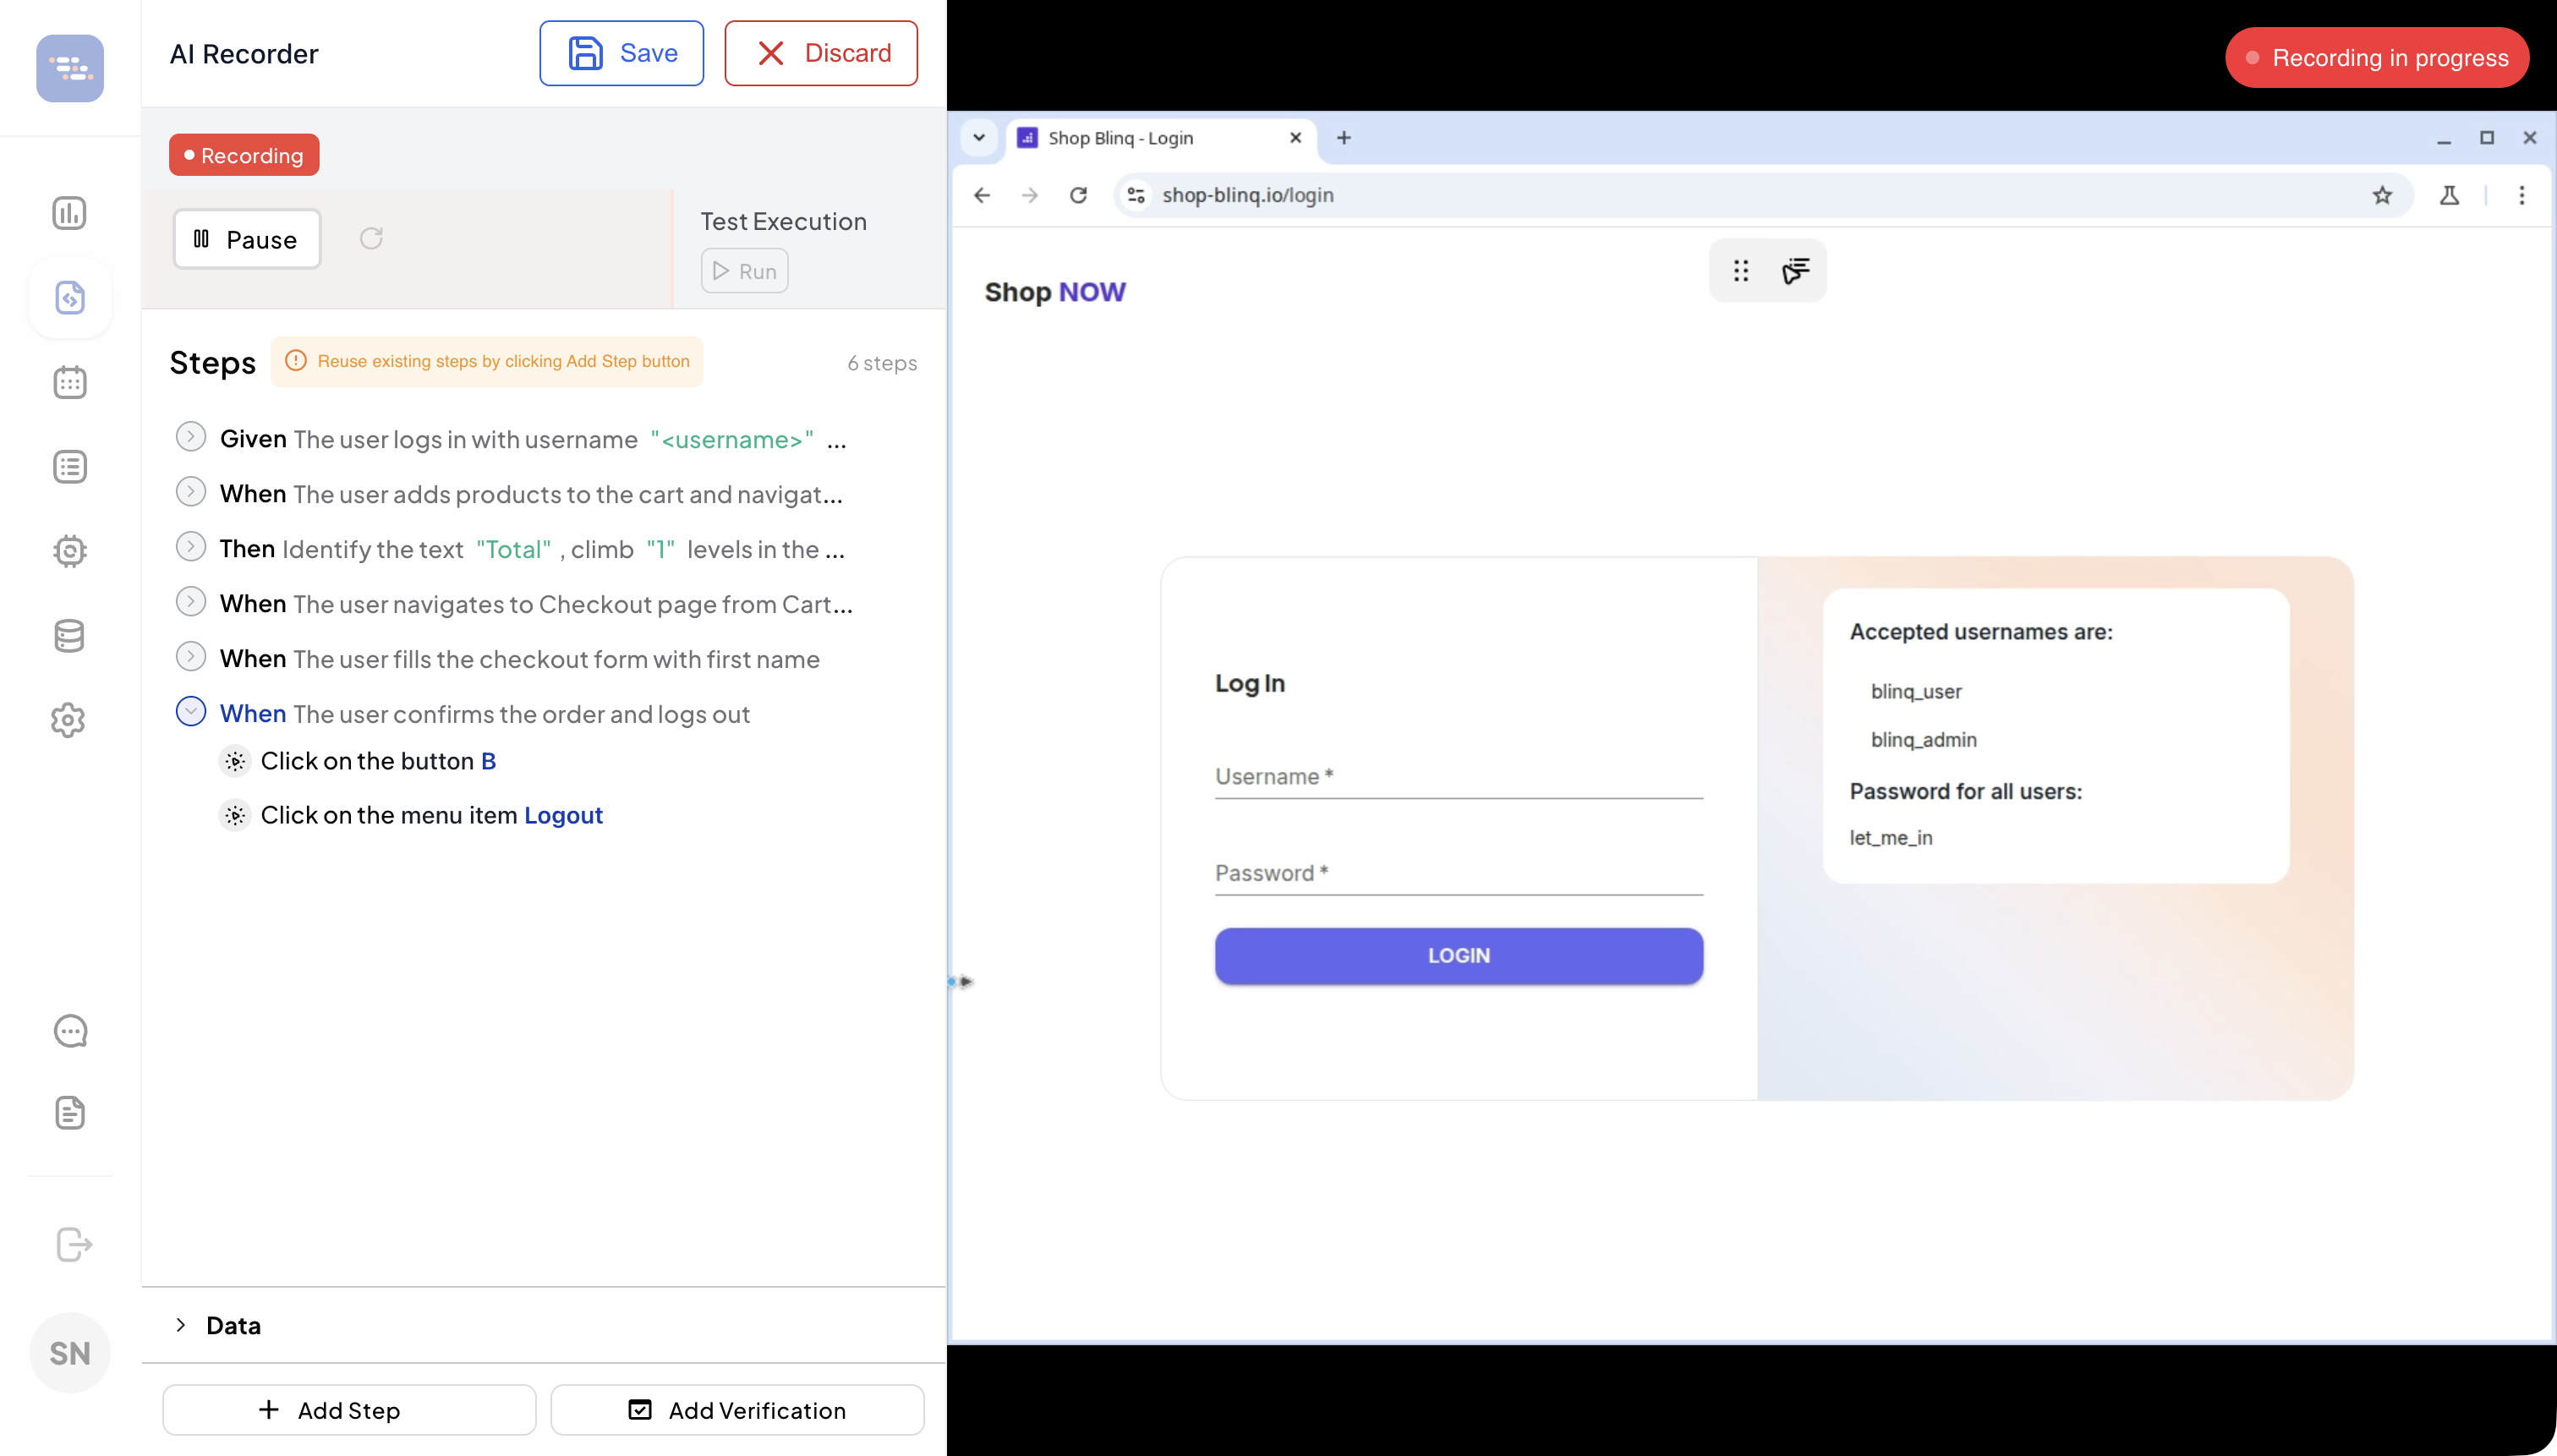
Here's a sample flow if you're using our demo application:
Log in with the demo credentials. (expand to view GIF)
Add a few items to the cart. (expand to view GIF)
Open the cart and add a quick assertion. (expand to view GIF)
Checkout and fill in shipping details. (expand to view GIF)
Log out. (expand to view GIF)

By the end, you should have a few recorded steps similar to what you see below.
Save your scenario
Select Save to save your work. This commits the generated scenario and the Playwright code to the Git branch that powers your project. You'll be redirected back to the AI Tests page.
1 / 3


Run your scenario
On the AI Tests page, ensure the Scenario is selected and click the blue Play button to run the scenario. This opens the AI Terminal and starts running your test.
1 / 5


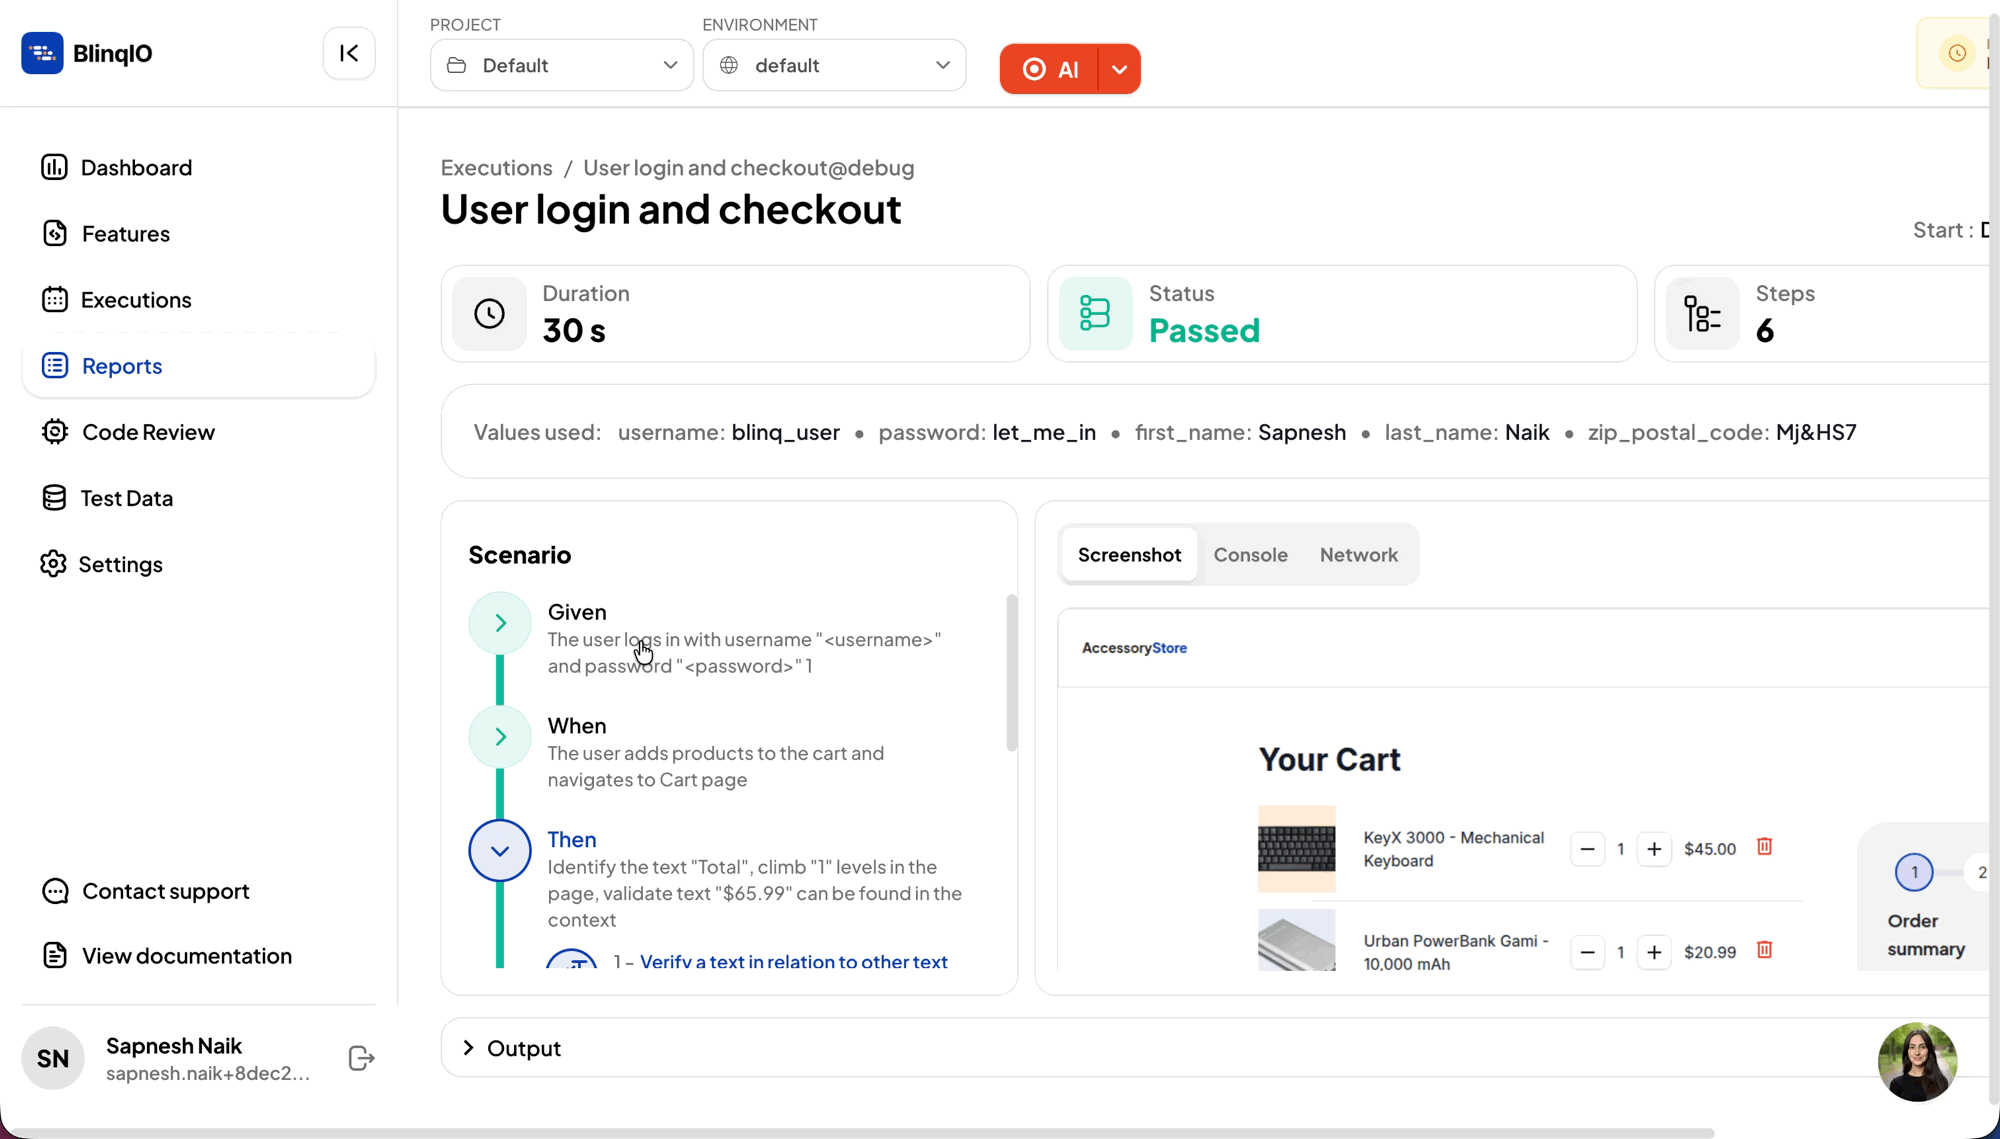
View run report
After the test completes, you're redirected to Run report on the reports page, which contains:
- Step-by-step execution details
- Screenshots for every action
- Run duration and status (PASS/FAIL)
- Environment and test data
- Console and network logs
- Run videos and Playwright trace (failed test only)
View generated Playwright code (optional)
One of BlinqIO's most powerful AI Tests is that it generates real, production-ready Playwright code. All of this code lives in a Git repository, and you can even connect your own Git repository instead of using BlinqIO's.
To view the generated code, select the Advanced > AI Code Editor option for the scenario.
1 / 2


Automating More Tests
Next, feel free to add new scenarios or AI Tests and launch the AI Recorder in a new scenario to record more tests.