Quick Start Guide
Create your first AI-powered end-to-end test in under 5 minutes. This guide walks you through the core workflow: setting your target URL, building test steps with AI, running the test, and saving it.
Prerequisites
- A BlinqIO account (sign up at blinq.io)
- A web application you want to test (or use the demo app)
Step 1: Set your target URL
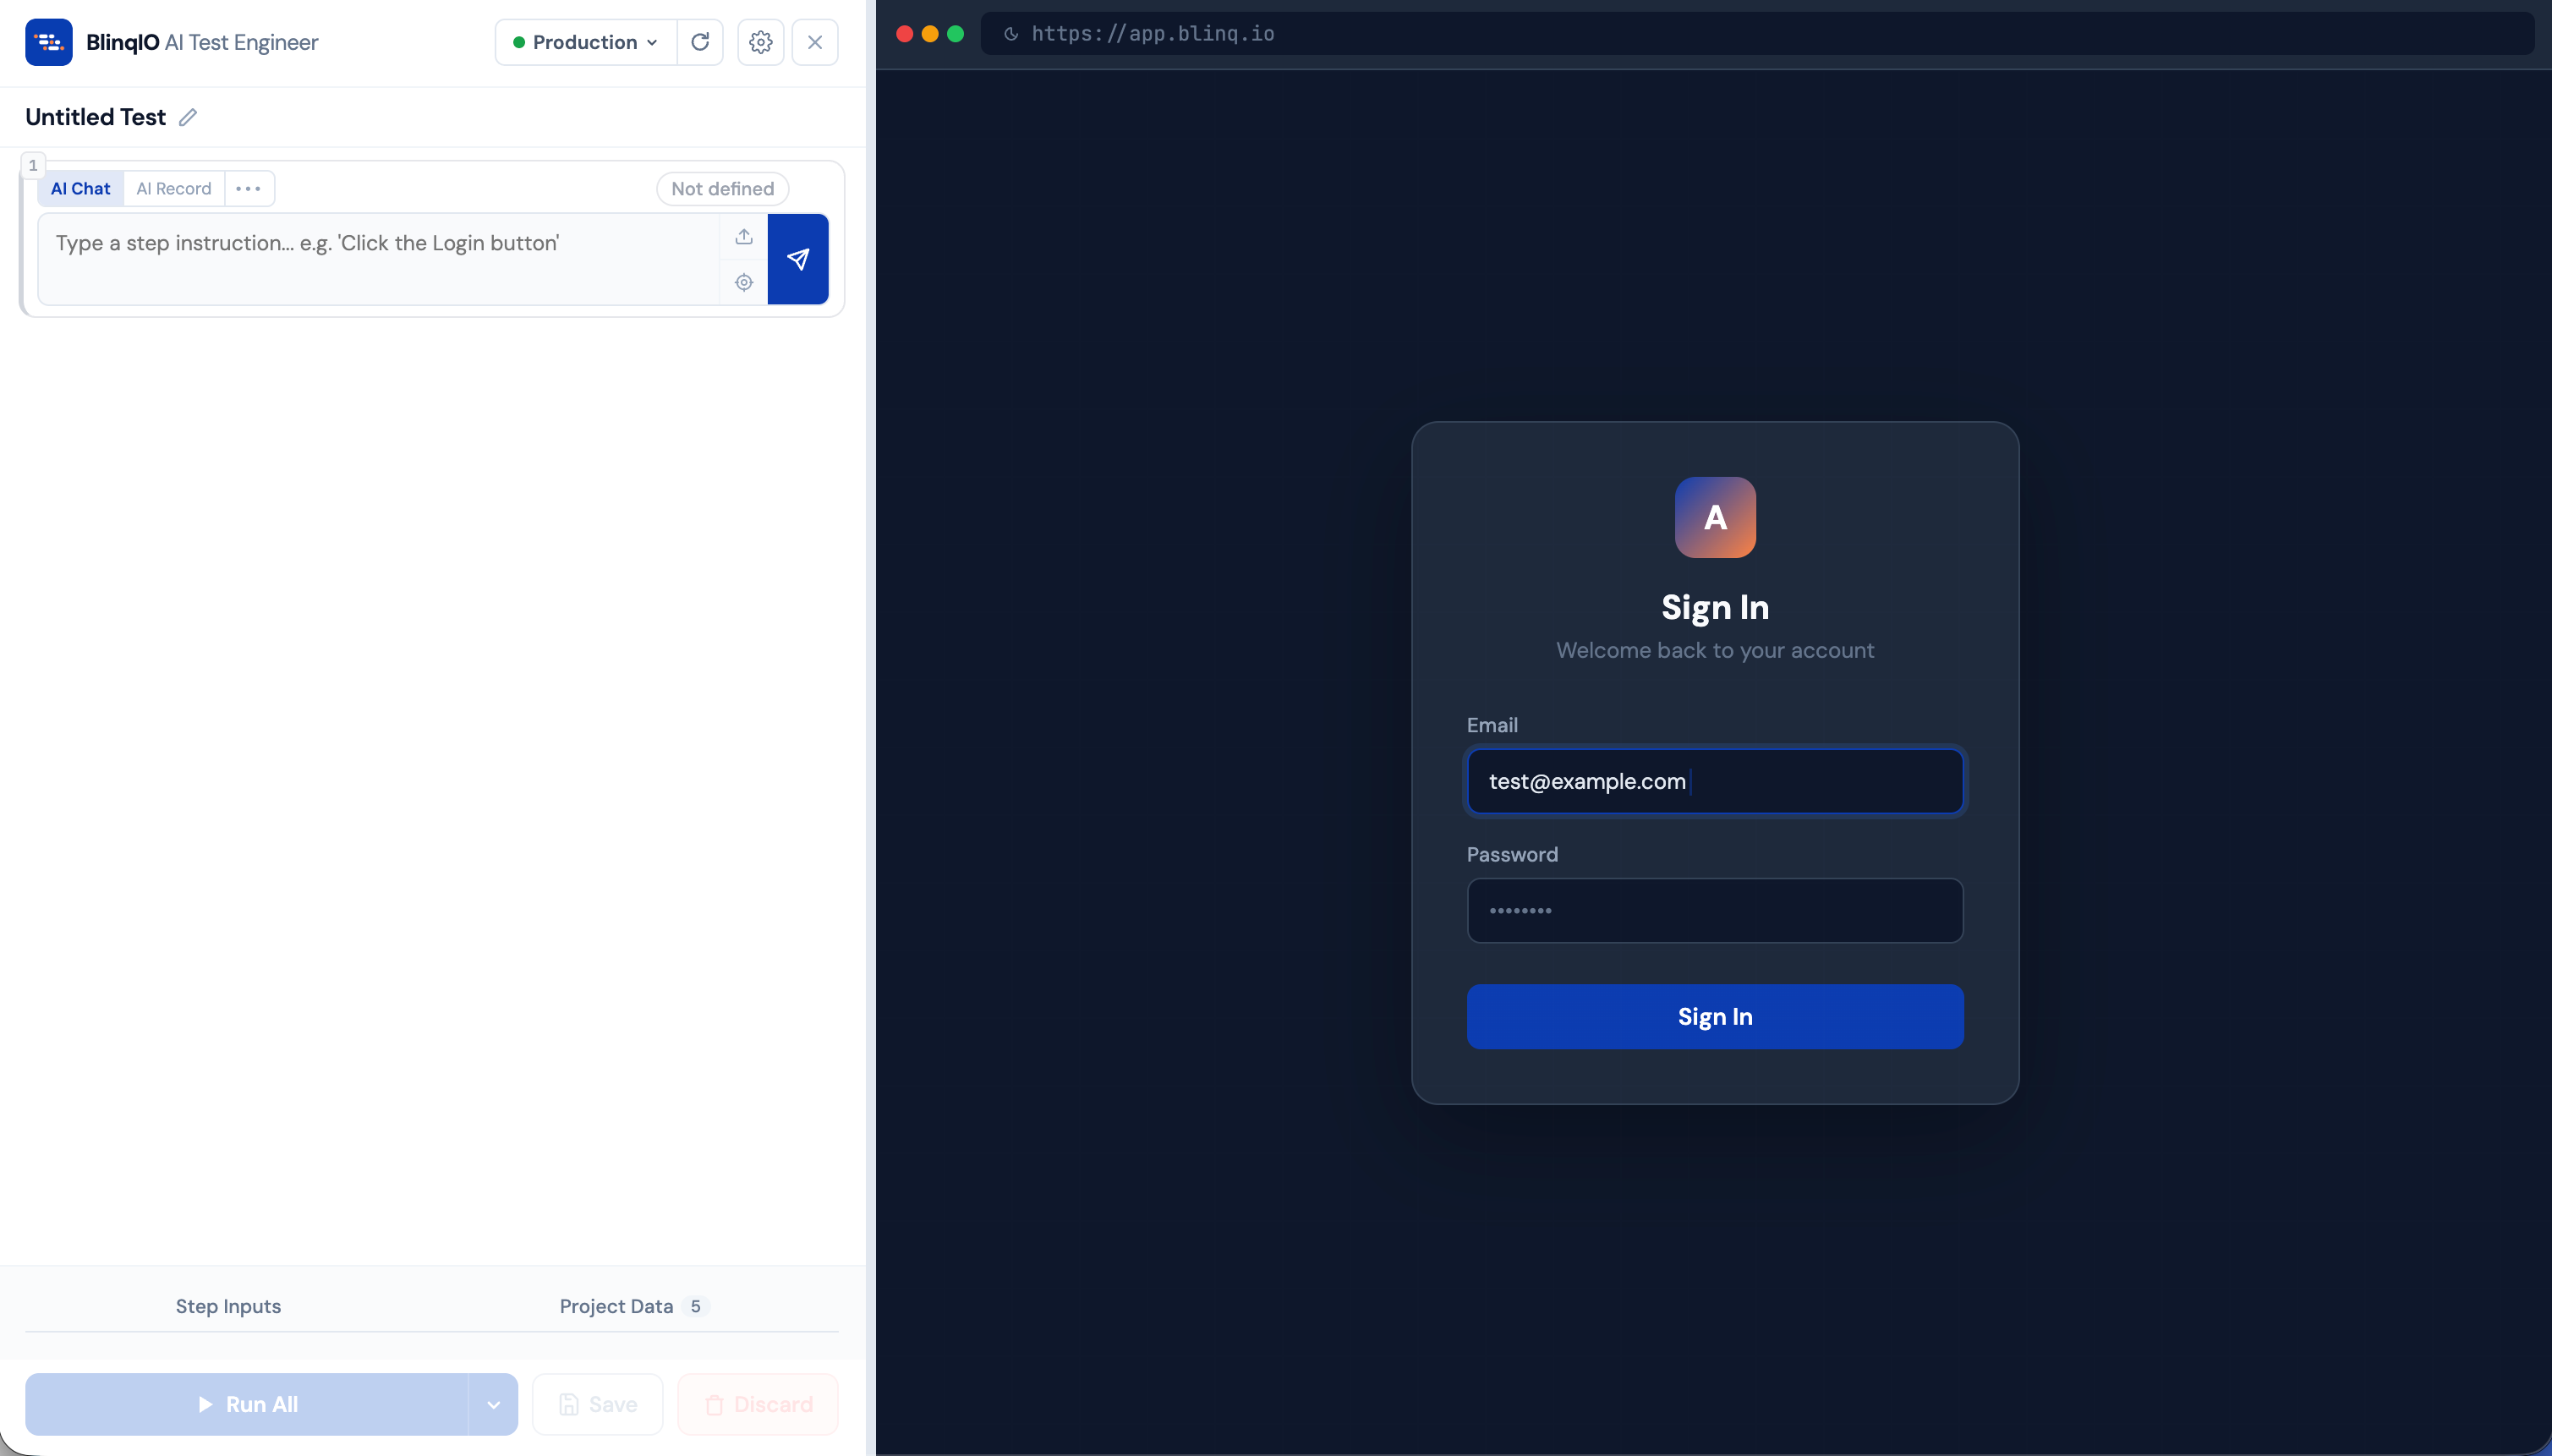
When you first open BlinqIO, the onboarding wizard guides you through the basics. The first thing you'll configure is the Application URL: the website you want to test.
Click the environment pill in the header to see or change the current target URL. You can manage multiple environments (Production, Staging, QA, Dev) per project.
Step 2: Open the AI Test Engineer
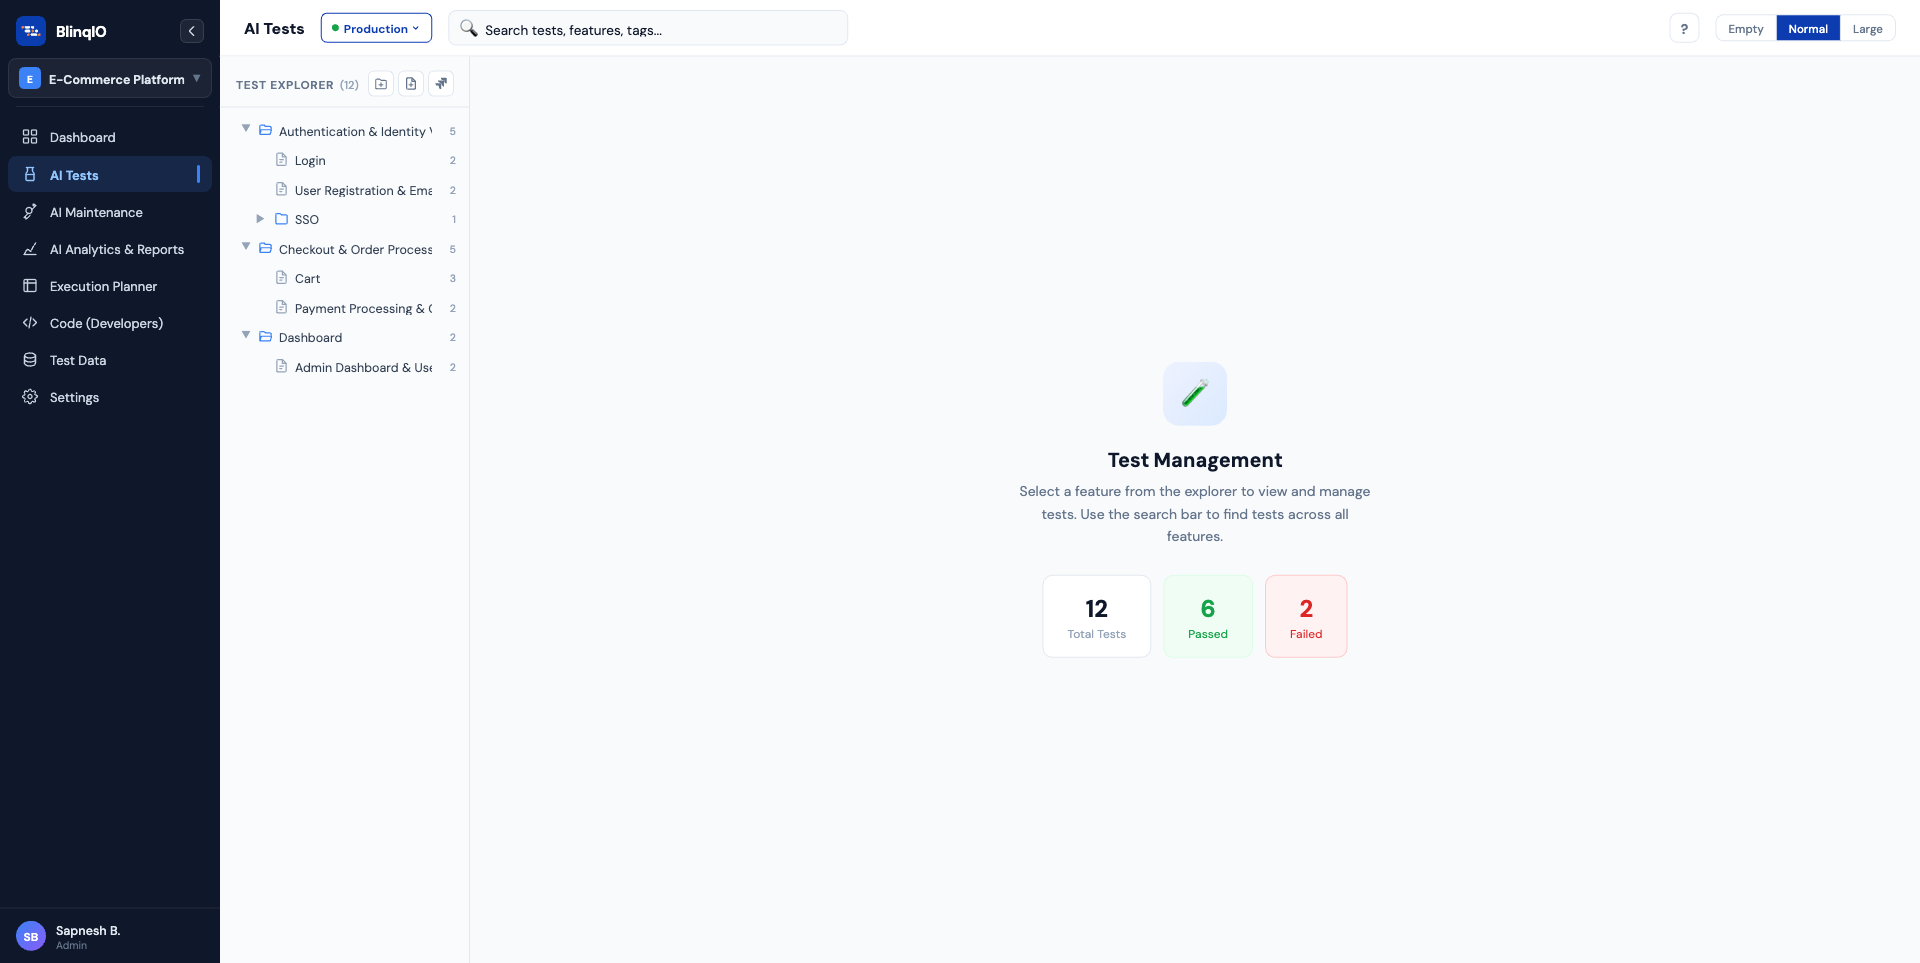
Navigate to the AI Tests page from the sidebar. You'll see your test tree with a starter folder and feature already created.
- Click the feature in the folder tree to select it — your tests will appear in the main panel
- Click Add Test to create a new empty test
- Click Create with AI on the new test card to launch the AI Test Engineer
The AI Test Engineer opens with a blank test and one empty step, ready for you to author.
Step 3: Create a test with AI
- You'll see a blank test with one empty step
- The step defaults to AI Chat mode: type a natural language instruction:
Login with username "admin" and password "secret123"- Press Enter or click Send
- The AI processes your instruction and generates:
- A properly formatted Gherkin step name (e.g.,
Given user logs in with "<username>" and "<password>") - Playwright TypeScript code that automates the action
- Parameters (
<username>,<password>) extracted with their values
- A properly formatted Gherkin step name (e.g.,
AI auto-splitting
If your instruction describes multiple logical actions (e.g., "fill in the form and click submit"), the AI automatically splits it into separate steps for better maintainability.

Step 4: Add more steps
After completing a step, a new empty step appears below. Continue building your test:
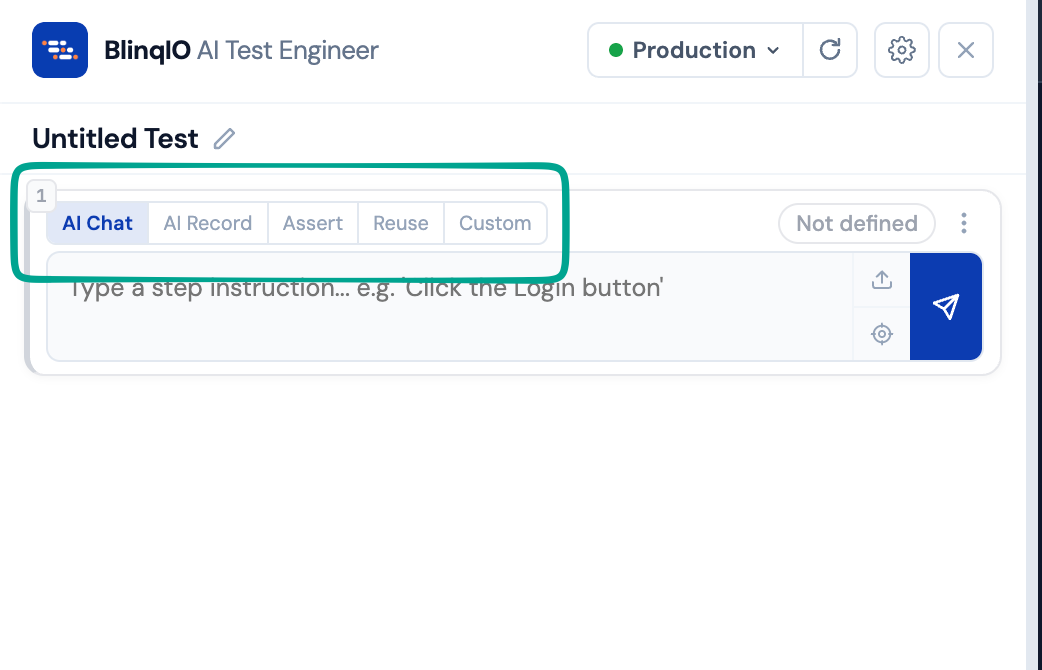
- AI Chat: Type another instruction
- AI Record: Switch to recording mode, interact with the browser, and let AI capture your actions
- Assert: Add verification checks (text exists, element properties, page state)
- Reuse: Select a previously built step from your library
- Custom: Add context clicks, waits, or value extraction
Step 5: Review your test data
Expand the Test Data panel at the bottom of the editor. It automatically extracts all <parameter> tokens from your steps and displays them as editable key-value pairs.
- Edit values to change test inputs
- Use AI Enhance to generate dynamic data (random names, dates, expressions)

Step 6: Run your test
Click Run All in the bottom action bar. BlinqIO executes each step sequentially:
- The currently running step shows a blue spinner
- The browser preview updates in real-time as actions execute
- Passed steps get a green checkmark
- Failed steps get a red X with a detailed Playwright error trace
You can also:
- Pause/Resume execution between steps
- Stop the run at any point
- Run a range of specific steps via the Run All dropdown
Step 7: Save your test
Once all steps pass, click Save:
- If the test is still named "Untitled Test", you'll be prompted to name it (AI auto-suggests a name based on your steps)
- If any steps haven't been validated by a run, you'll see a recommendation to run first
- The test is saved to your project's test tree
Run before saving
BlinqIO recommends running all steps before saving. Untested steps are the #1 cause of false confidence in test suites.
What you've learned
You've just completed the core BlinqIO workflow:
- Set your target application URL
- Open the AI Test Engineer from the AI Tests page
- Build test steps using AI (chat, record, assert, reuse, or custom)
- Review extracted parameters and test data
- Run to validate the test works end-to-end
- Save the tested, working automation
Next steps
- AI Tests: Organize tests into projects, folders, and features
- Step Modes Deep Dive: Master all five ways to create steps
- Test Data & Parameters: Work with dynamic data and AI-enhanced values
- Running Tests: Advanced execution options (pause, range, recovery)