Custom Command in Reports
Use AddCommandToReport to insert a custom command under any step in the Reports page. This feature allows you to add context such as status updates, debug data, screenshots, or structured attachments, making reports more informative and easier to analyze.
What You Can Include
Each custom command supports:
- Command Name – A descriptive label displayed in the report
- Status – One of:
PASSED,FAILED - Screenshot (optional) – Captures the UI state when the command is executed
- Attachment (optional) – Additional data in
.txt,.json,.xml, or.yamlformat
If a screenshot or attachment is included, it is displayed directly in the Reports UI under the corresponding step.
How to Add a Custom Command
Go to the AI Tests page and select the step where you want to insert the custom command.
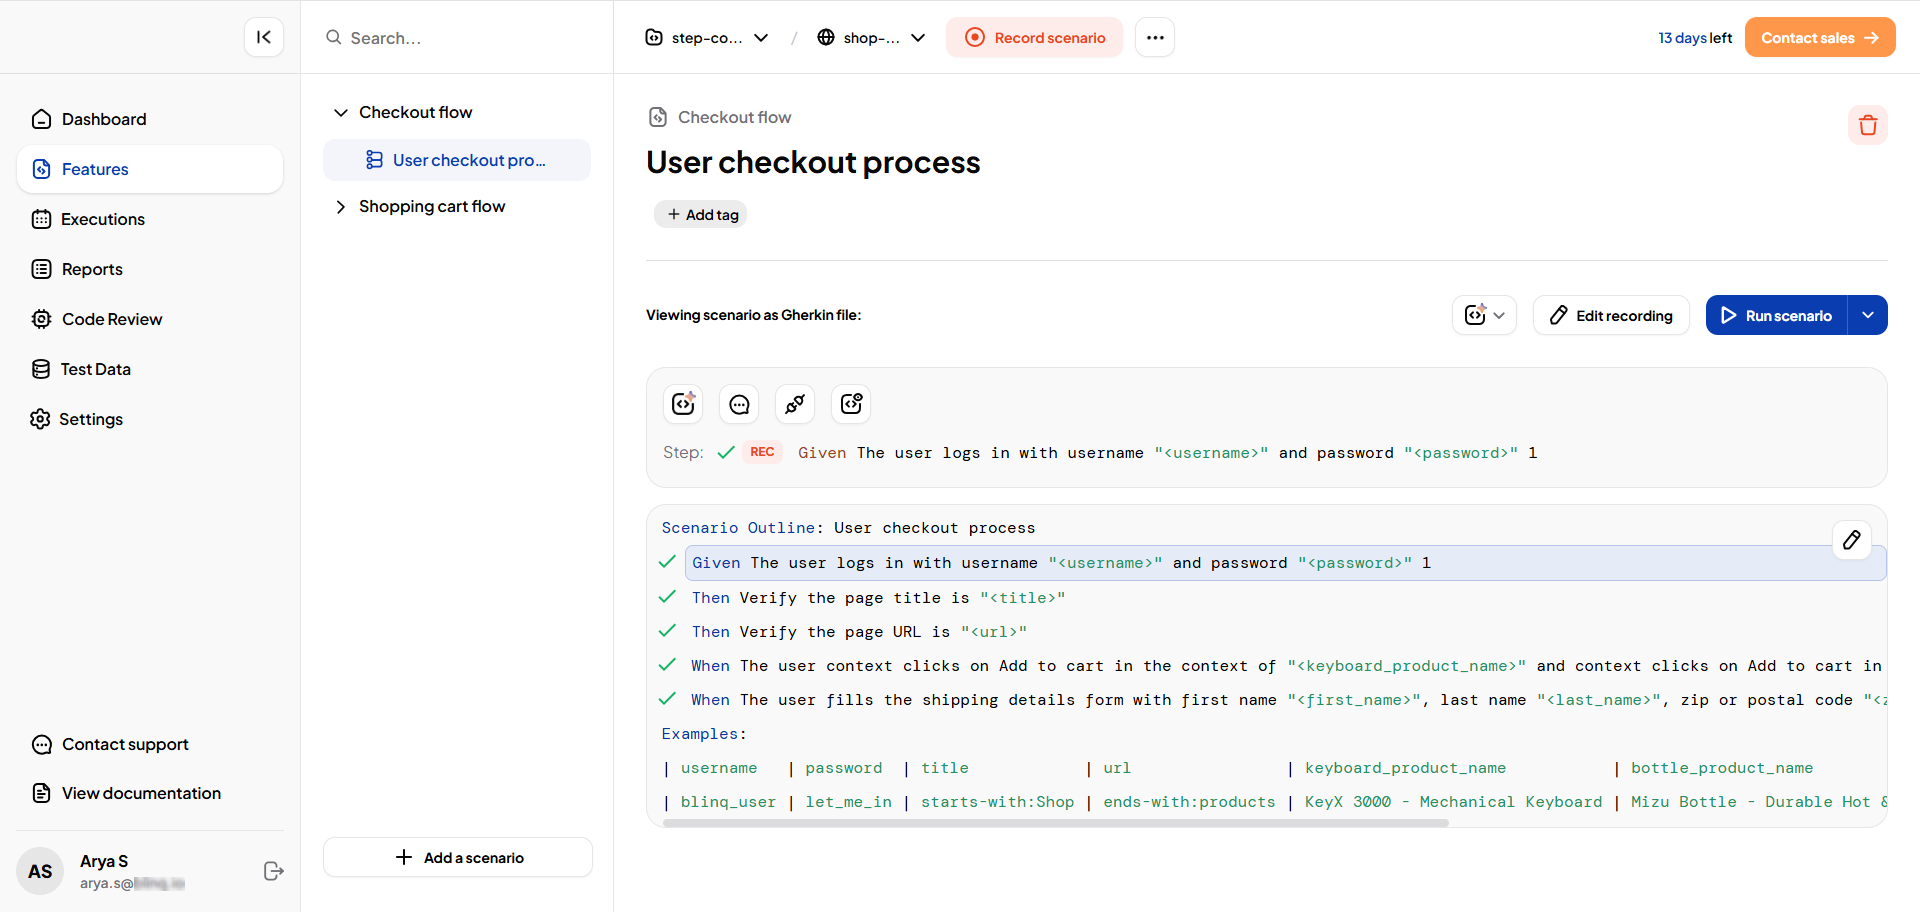
Click View the Code to open the step's automation code.
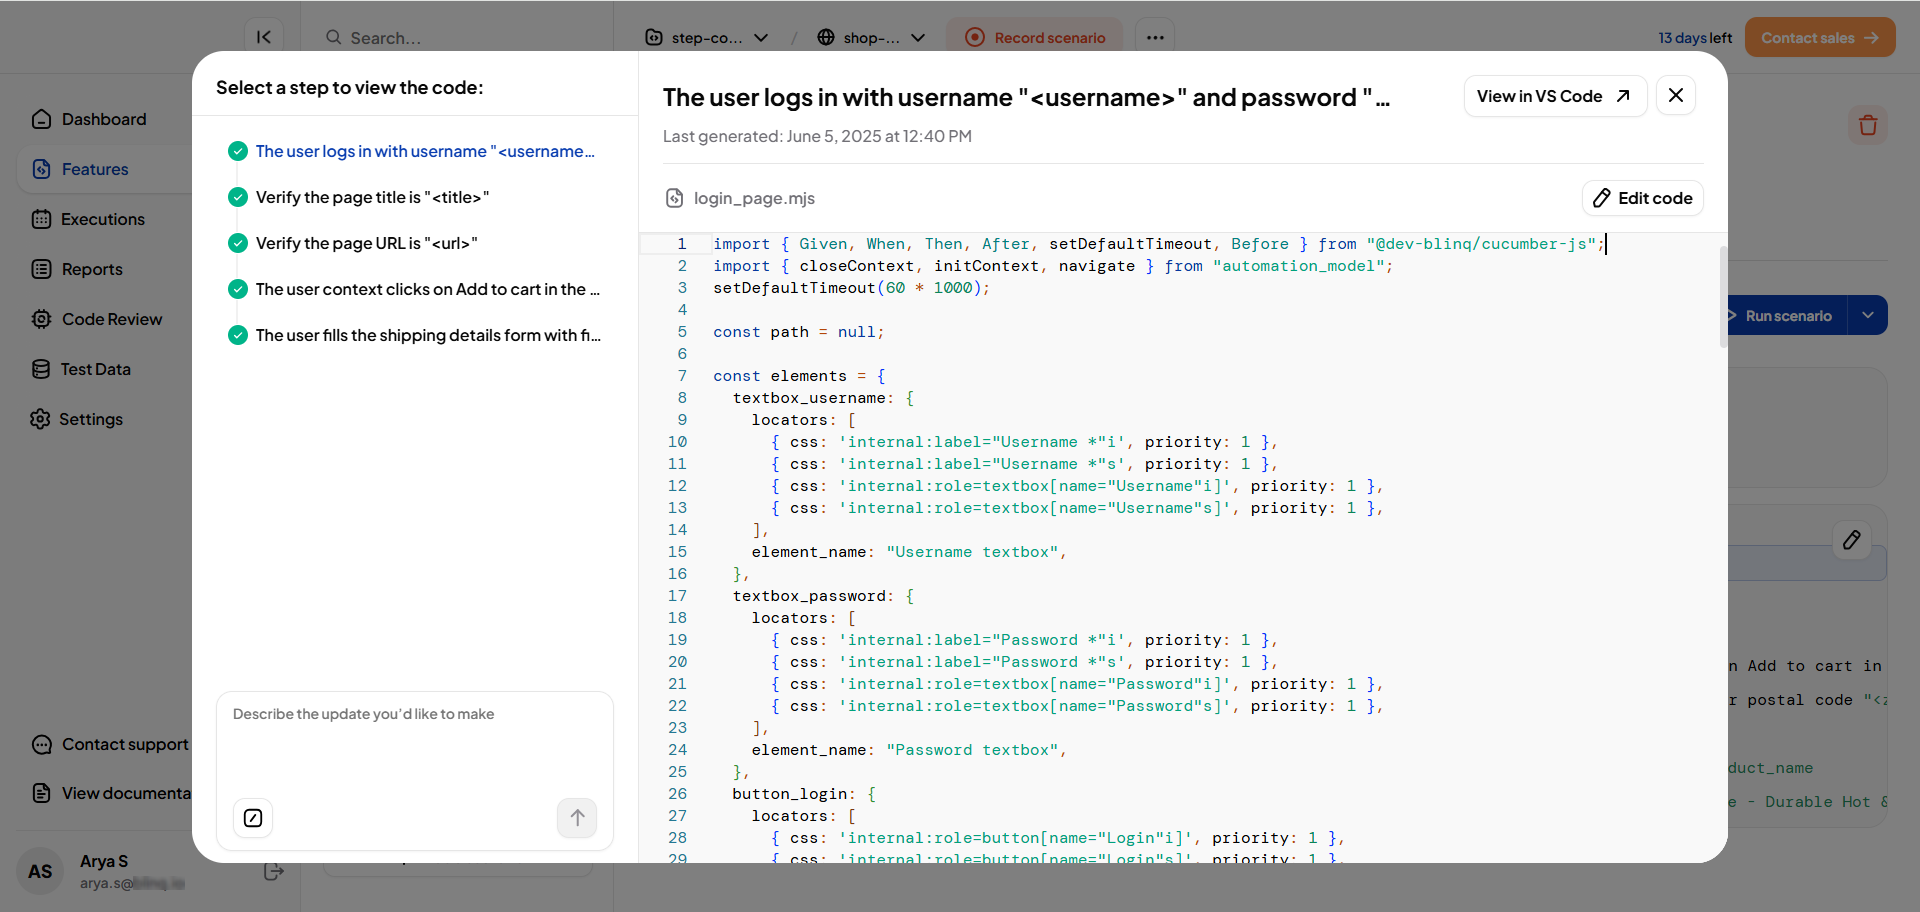
In the editor, add the
AddCommandToReportstatement with the required values.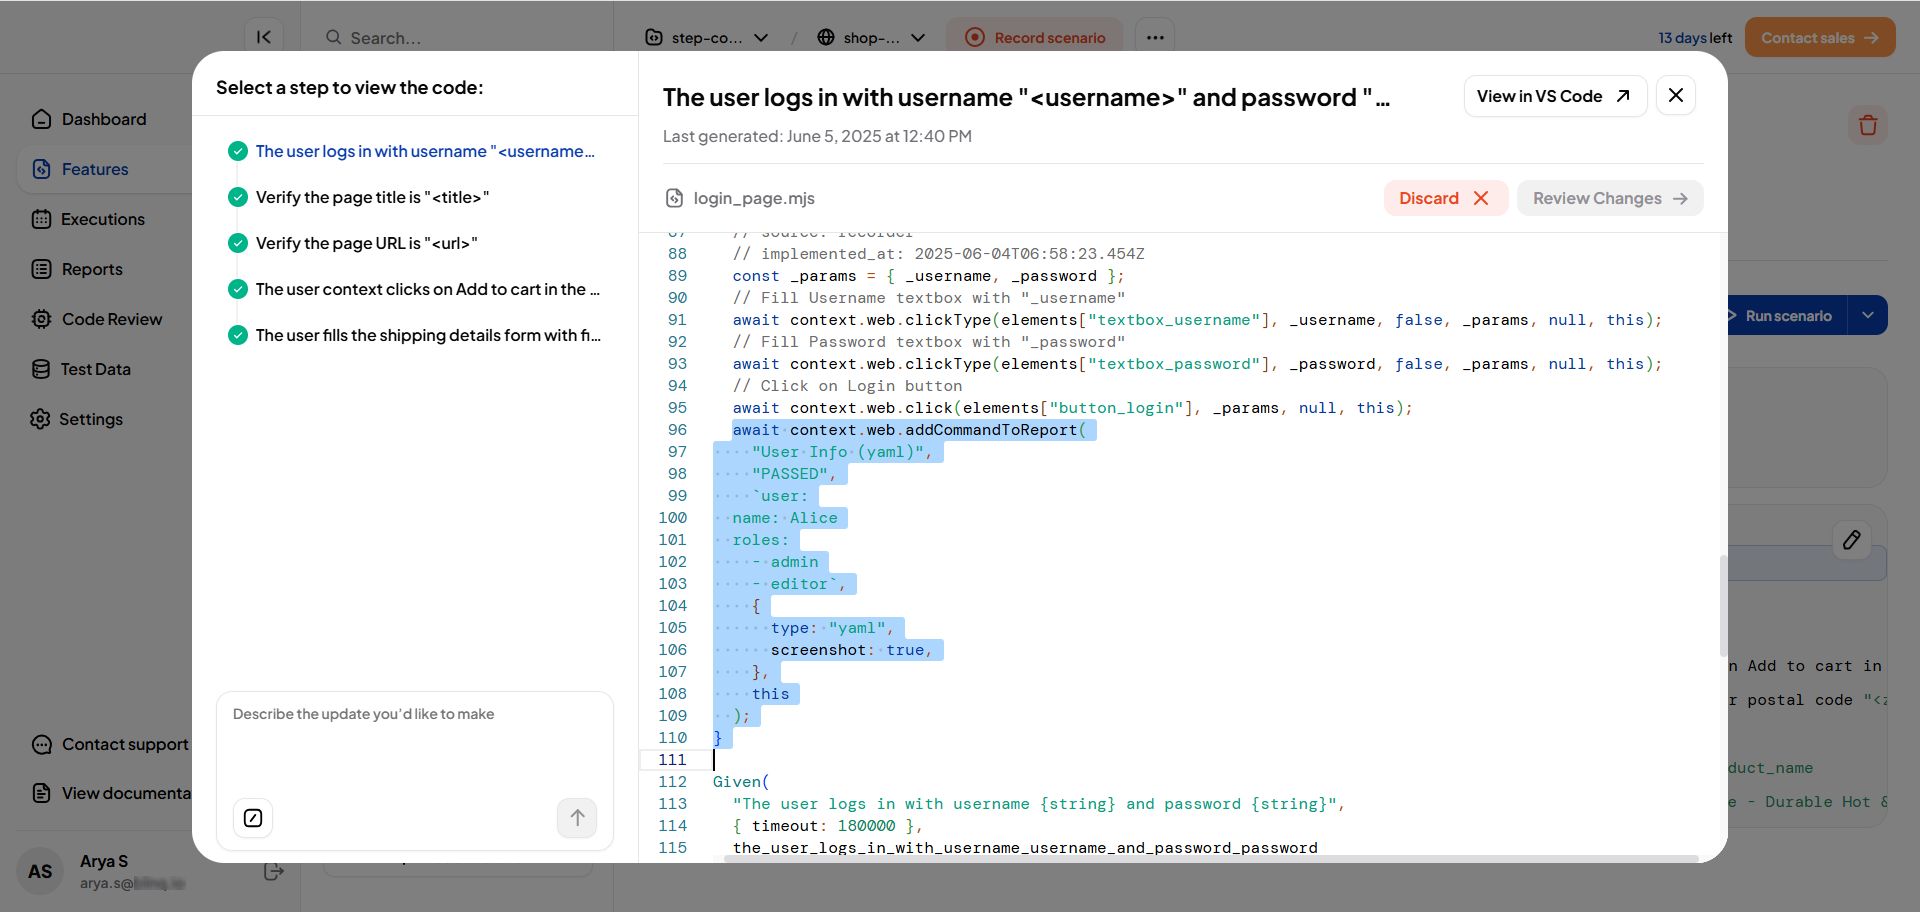
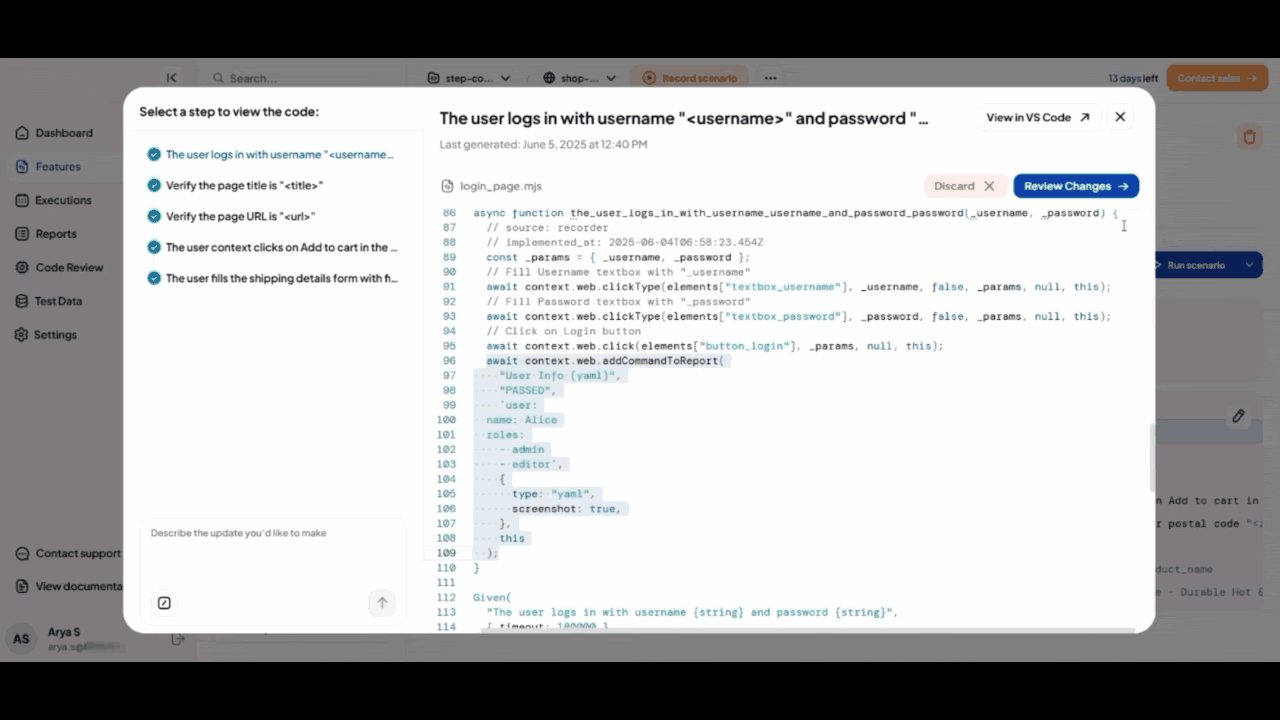
Review and Save your changes in the editor.
Example
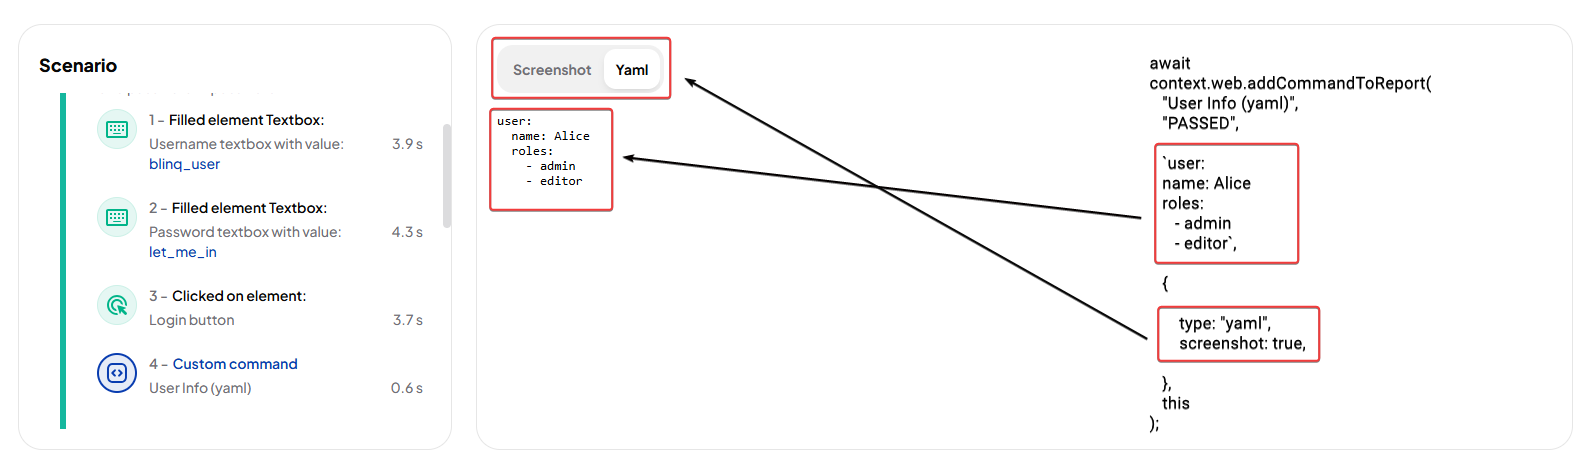
javascript
await context.web.addCommandToReport(
  "User Info (yaml)",
  "PASSED",
  `user:
  name: Alice
  roles:
      - admin
	  - editor`,
   {
       type: "yaml",
       screenshot: true,
   },
   this
);
View the Result in Reports
After saving the changes:
Go to the Reports page once the execution is complete and open the report for the scenario you edited.
The custom command will appear directly under the step with:
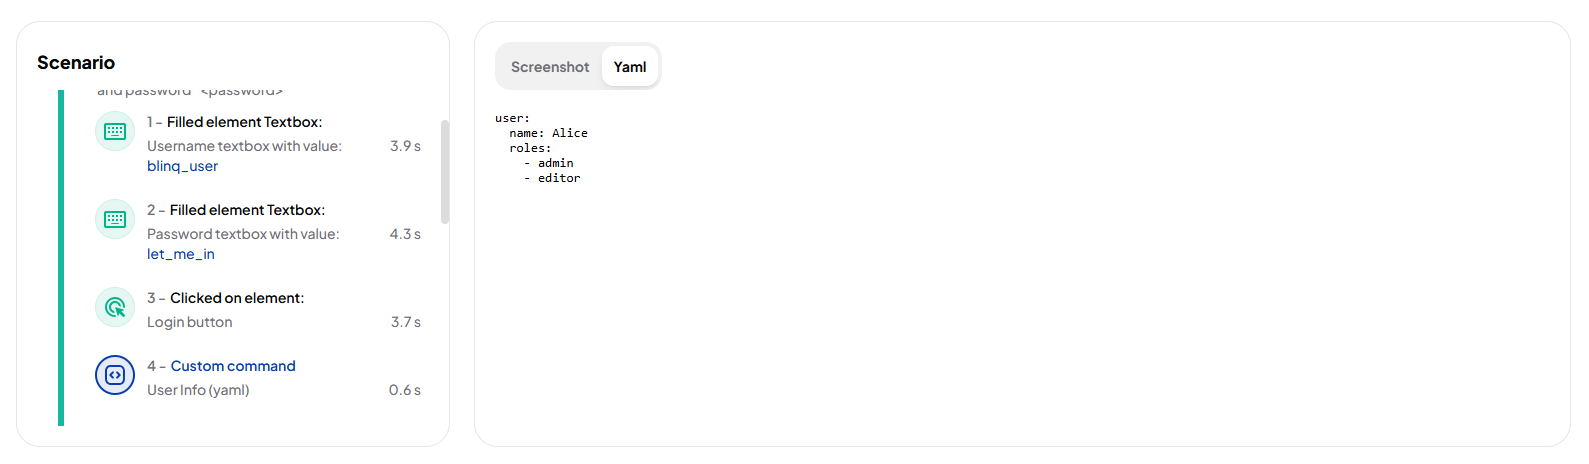
- The command name and status
- A screenshot, if enabled
- An attachment panel displaying the provided content in a readable format
This flow helps you capture additional insights within the test report without altering the core logic of your test steps. It adds visibility and flexibility for debugging, documentation, and communication.