AI Recorder (Mac/Windows Client)
Note: We recommend using the client version of the AI Recorder only when the web recorder does not support a feature you're looking for.
Before you begin
- A BlinqIO account — Sign up here if you haven't already
- Make sure you have the BlinqIO Client installed during sign-up.
- Close any extra tabs or unnecessary applications to improve speed.
Record Your Scenario
After you set a URL, the 3rd step, Record Scenario, is enabled. Now you'll use the AI Recorder to capture your test actions. The AI Recorder watches your interactions and converts them into executable test code.
Launch the AI Recorder
- Open the AI button dropdown and select Client-based Recorder.

- Wait for the recorder window to open: A new browser window will launch with a recording toolbar. Note: This may take several minutes the first time the AI Recorder syncs and sets up your project.
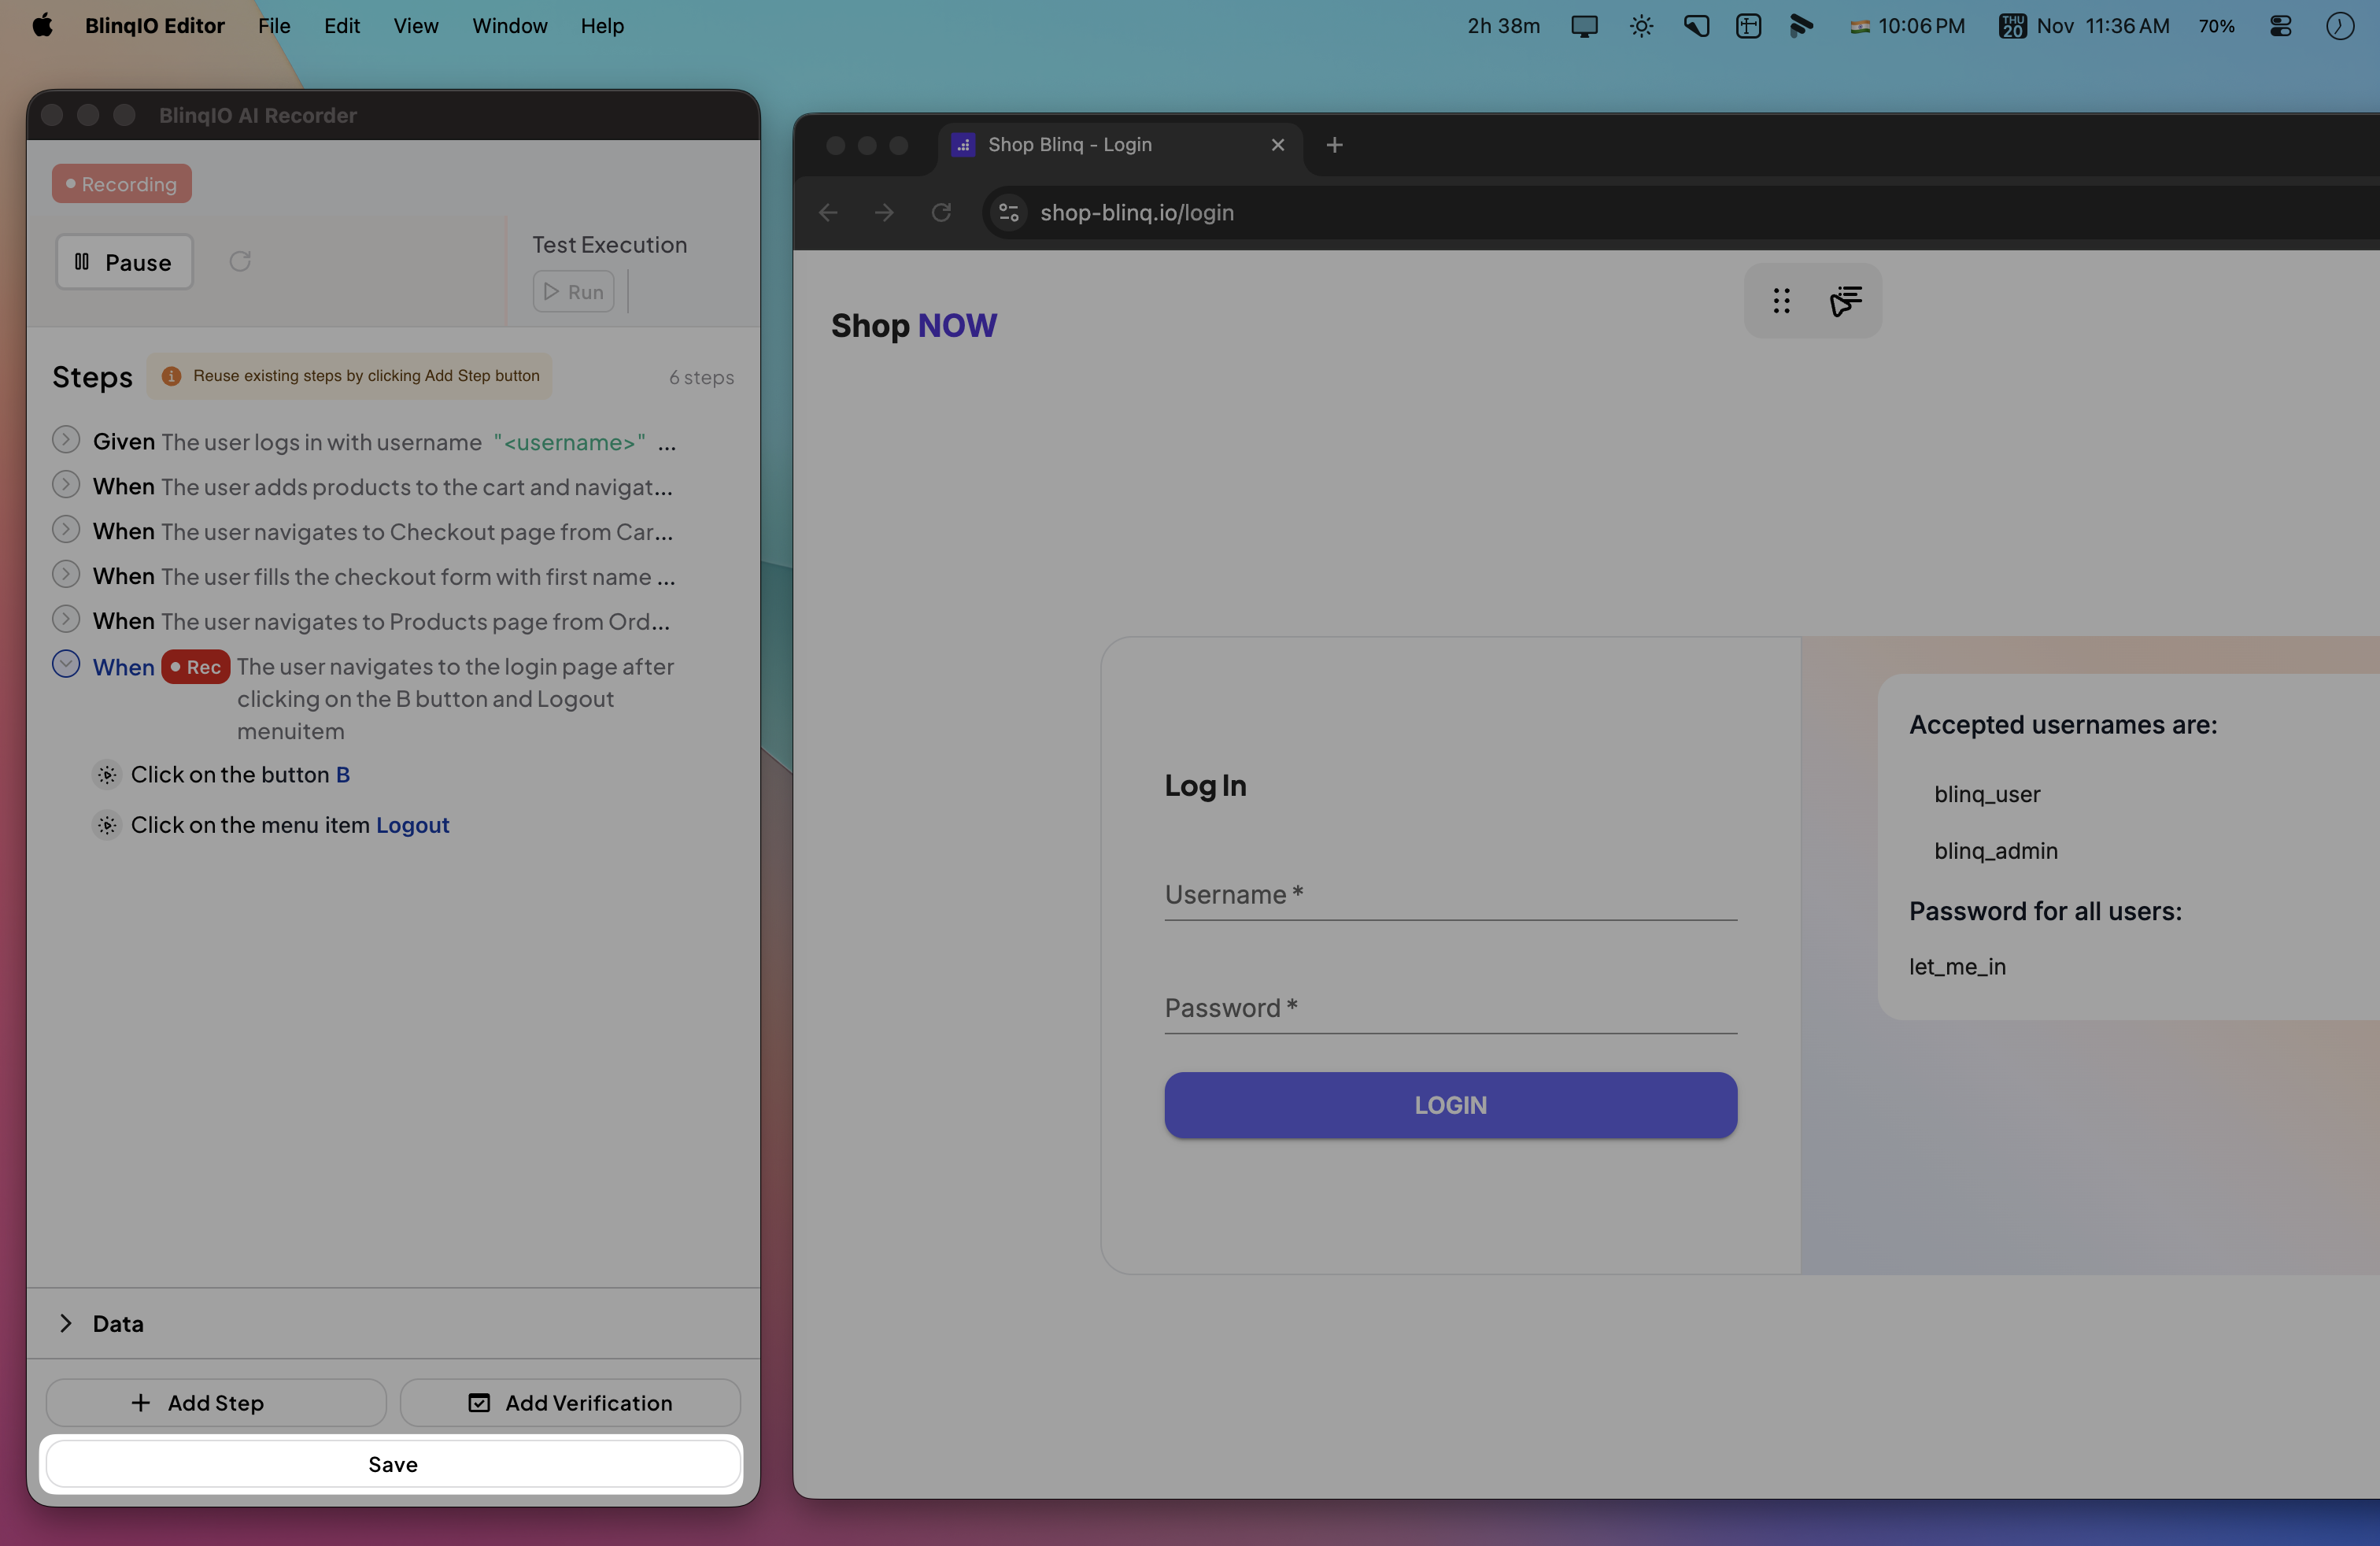
- Observe the recording indicator: You should see a recording badge or indicator showing that BlinqIO is capturing your actions

Record Your Test Actions
For your first test, we recommend recording a complete user journey. Here's a sample flow using the demo application:
- Log in with the demo credentials.
- Add a few items to the cart.
- Open the cart.
- Checkout and fill in shipping details.
- Log out.
Recording tips
- Wait for each page or UI state to load before the next action.
- Use clear, repeatable paths. Avoid random clicks or hover-only interactions.
- If your app uses pop-ups, allow them for the Recorder session.
Save Your Scenario
Once you've completed your test actions, it's time to save your work. The AI Recorder automatically converts your recorded actions into a structured test scenario.
Save the Recording
Click the "Save" button in the AI Recorder
Review the save modal that appears and click "Continue" to save.
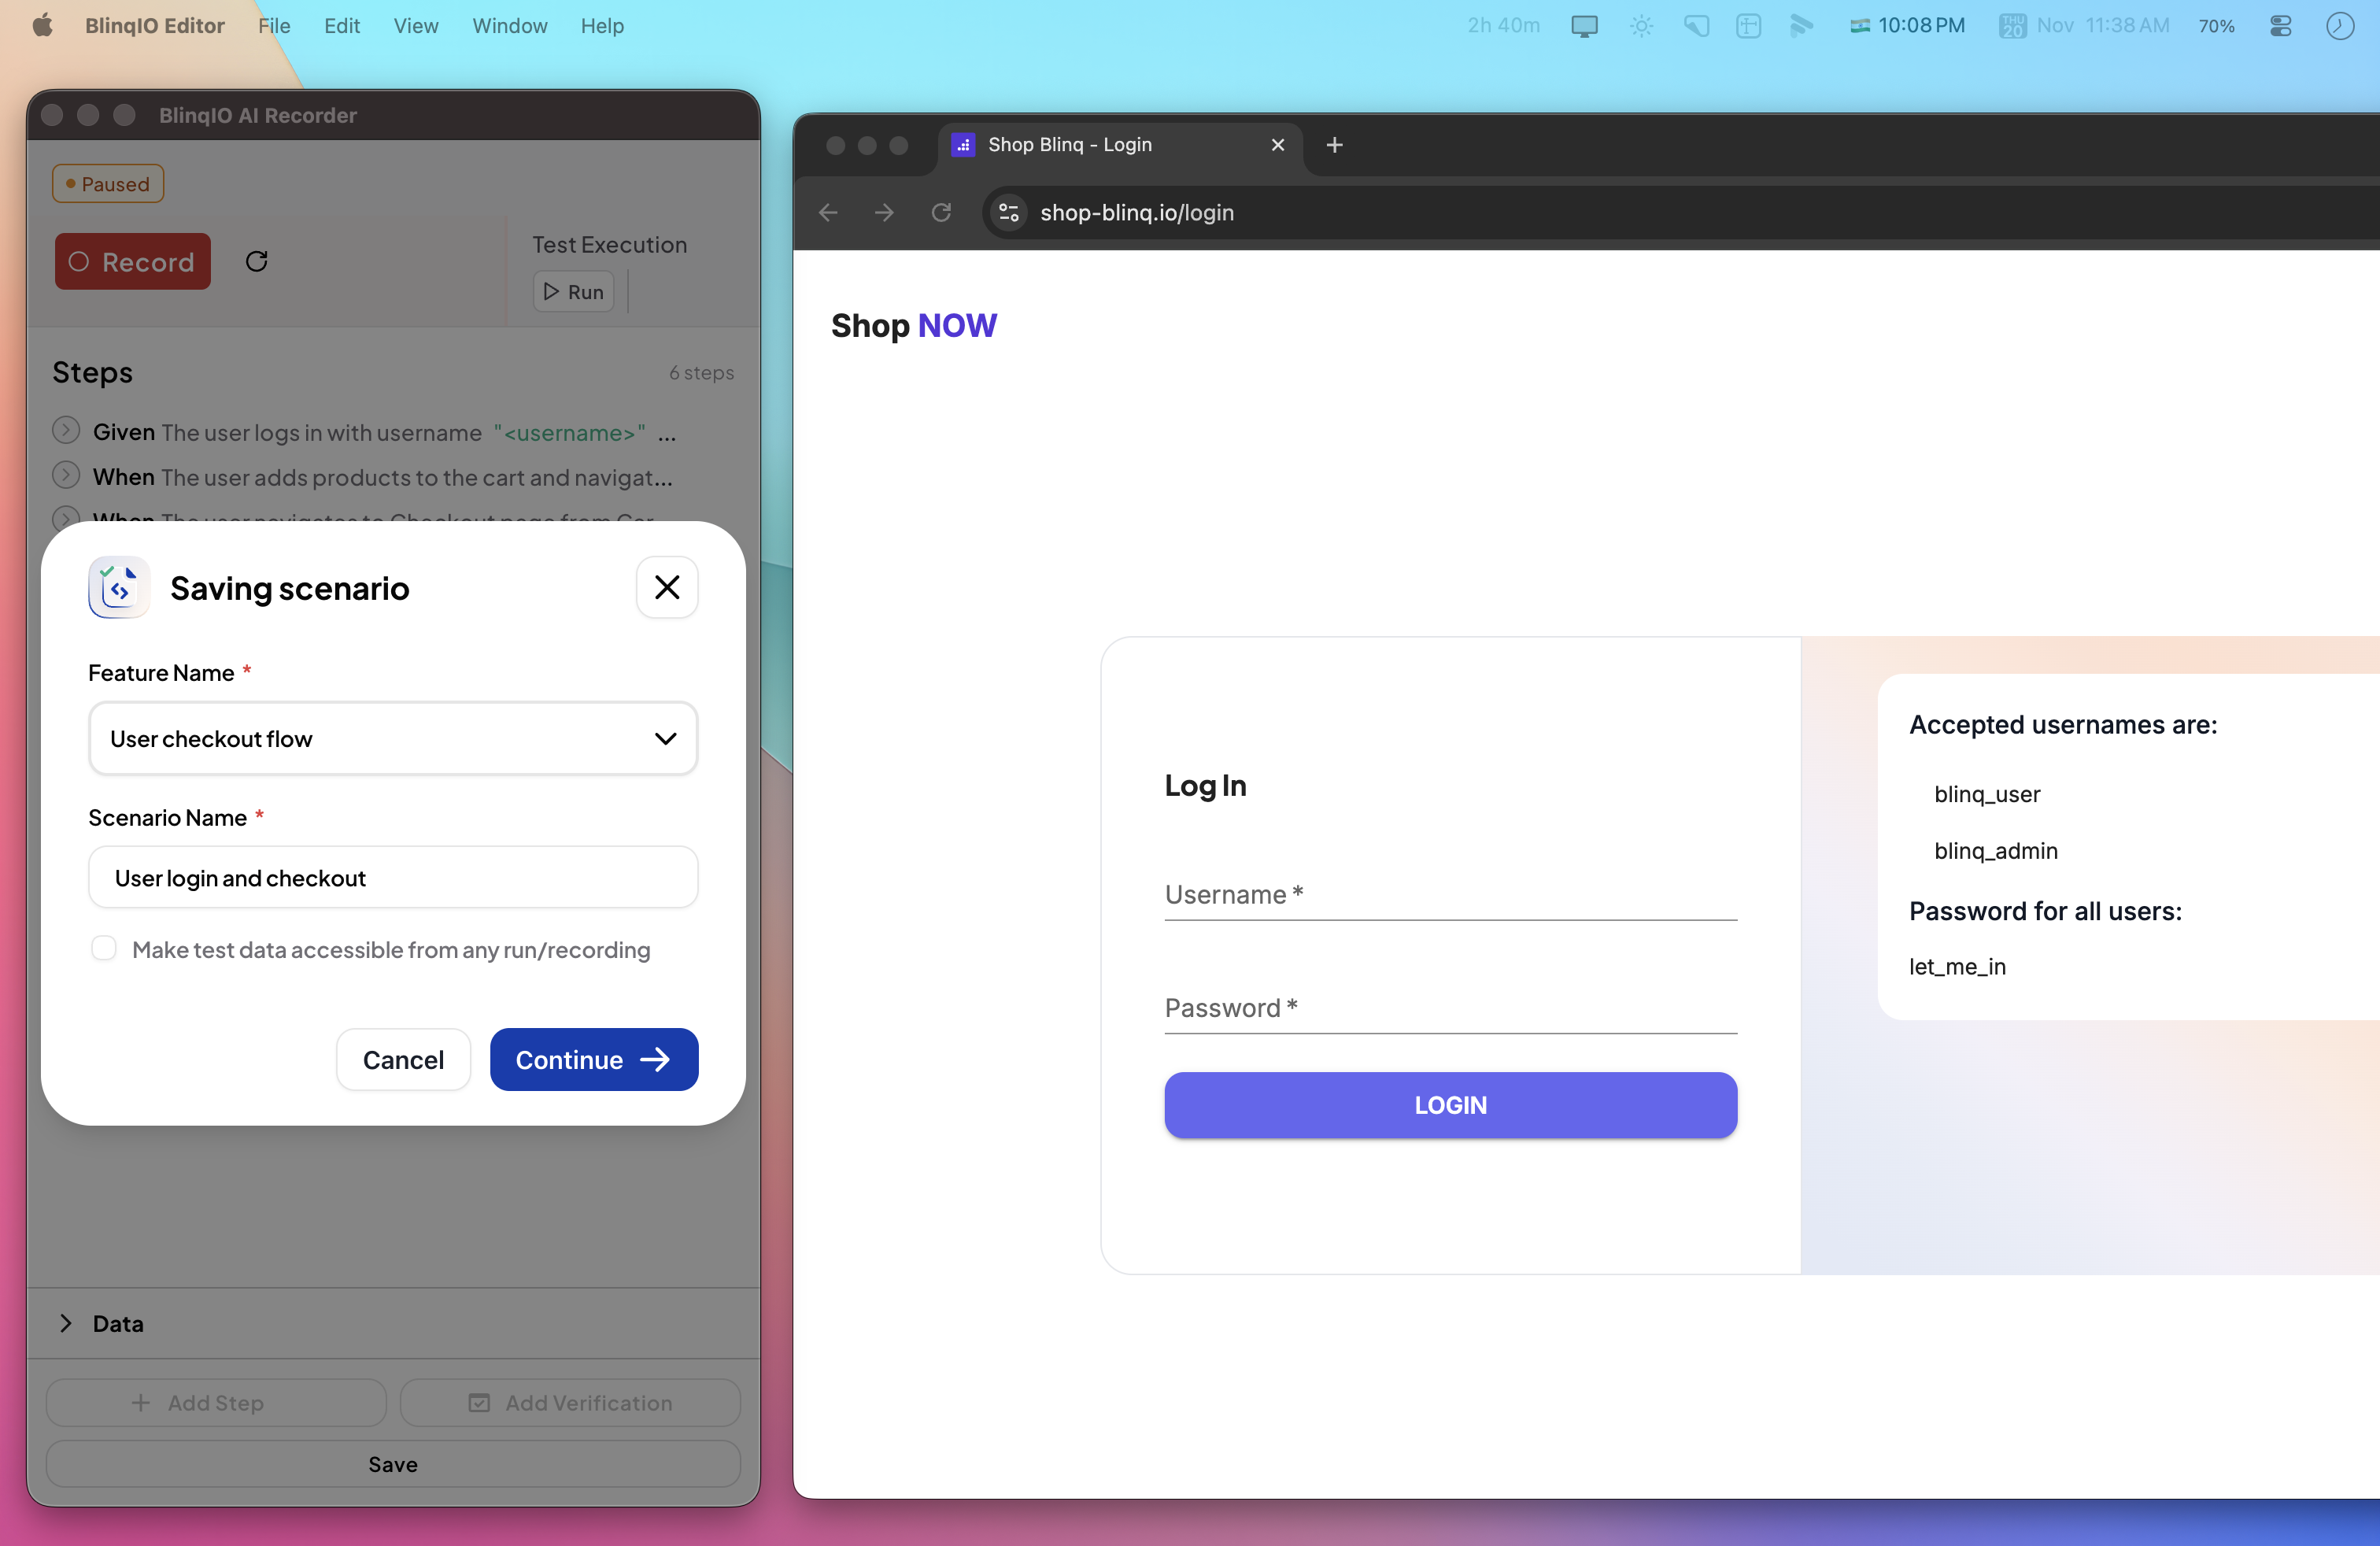
Understanding the Feature and Scenario structure:
- Feature: A collection of related test scenarios (e.g., "Shopping Cart Features" or "User Authentication")
- Scenario: A specific test case within a Feature (e.g., "User can complete checkout" or "User can log in successfully")
What Happens Next
After saving:
- The AI Test Engineer processes your recording and generates:
- Gherkin-style business descriptions (human-readable test steps)
- Playwright JavaScript code (executable test automation)
- A new browser tab opens, navigating you to the AI Tests page, where you can see your new Feature and Scenario

Execute Your Scenario
On the AI Tests page, click the Blue Play button to run the scenario. This brings up the BlinqIO app again and your test should start running after a quick project sync.
If the Editor does not open
- Make sure the BlinqIO Client is running.
- Allow the app through your firewall if prompted.
- Quit and reopen the Client, then try Execute scenario again.
View Your Generated Test Code (Optional)
One of BlinqIO's most powerful features is that it generates real, production-ready test code. You can view, modify, and even export this code.
You can view the generated code by clicking the View Code button for your scenario:

NOTE
BlinqIO has zero vendor lock-in; the generated code can be migrated to your own Git repository (Gitlab, Github, Bitbucket), and the tests can even be run directly from the your git repository (npm run test)
Review Your Scenario Run Report
Go to the reports page to view a report of the test you just ran. BlinqIO generates a detailed report after each run, including:
- Step-by-step execution details
- Screenshots per step
- Run duration and status
- Environment and test data
- Console and network logs
Next Steps
Now that you've successfully created and run your first automated test. It's time to dig deeper into the AI Recorder and learn all the different assertions, custom steps, and parameterization options so you craft your perfect test!
Start reviewing the next documents starting from: AI Recorder Basics