Manually Record Test Steps
BlinqIO Virtual Tester (BVT) can automatically generate cucumber.js test automation code for your test cases. The cucumber.js test files contain the code to execute and verify the test steps. But, you may wish to change the generated test code or add more actions to it that the BVT didn't auto-generate.
BlinqIO provides a powerful Recorder to fine-tune the code generated by BVT. With BlinqIO Editor, you can capture the test steps you perform in a browser and generate new test code based on those actions.
Before you get started
Ensure you have [installed BlinqIO Editor]/introduction/get_started_with_BlinqIO.md.html#install-blinqio-editor) on your system.
Launch BlinqIO Recorder
You can launch BlinqIO Recorder from the Scenario Design page or the Reports page in case of a test failure.
From the Scenario Design Page
Follow these steps to launch BlinqIO Recorder from the Scenario Design page:
Login to the BlinqIO Dashboard. The dashboard page displays.

Navigate to the Features page and expand the required Feature. The scenario list displays.
Click the Scenario you wish to edit. The Scenario Design page displays.
Click the step you wish to record from the Scenario Outline. The selected step is highlighted.
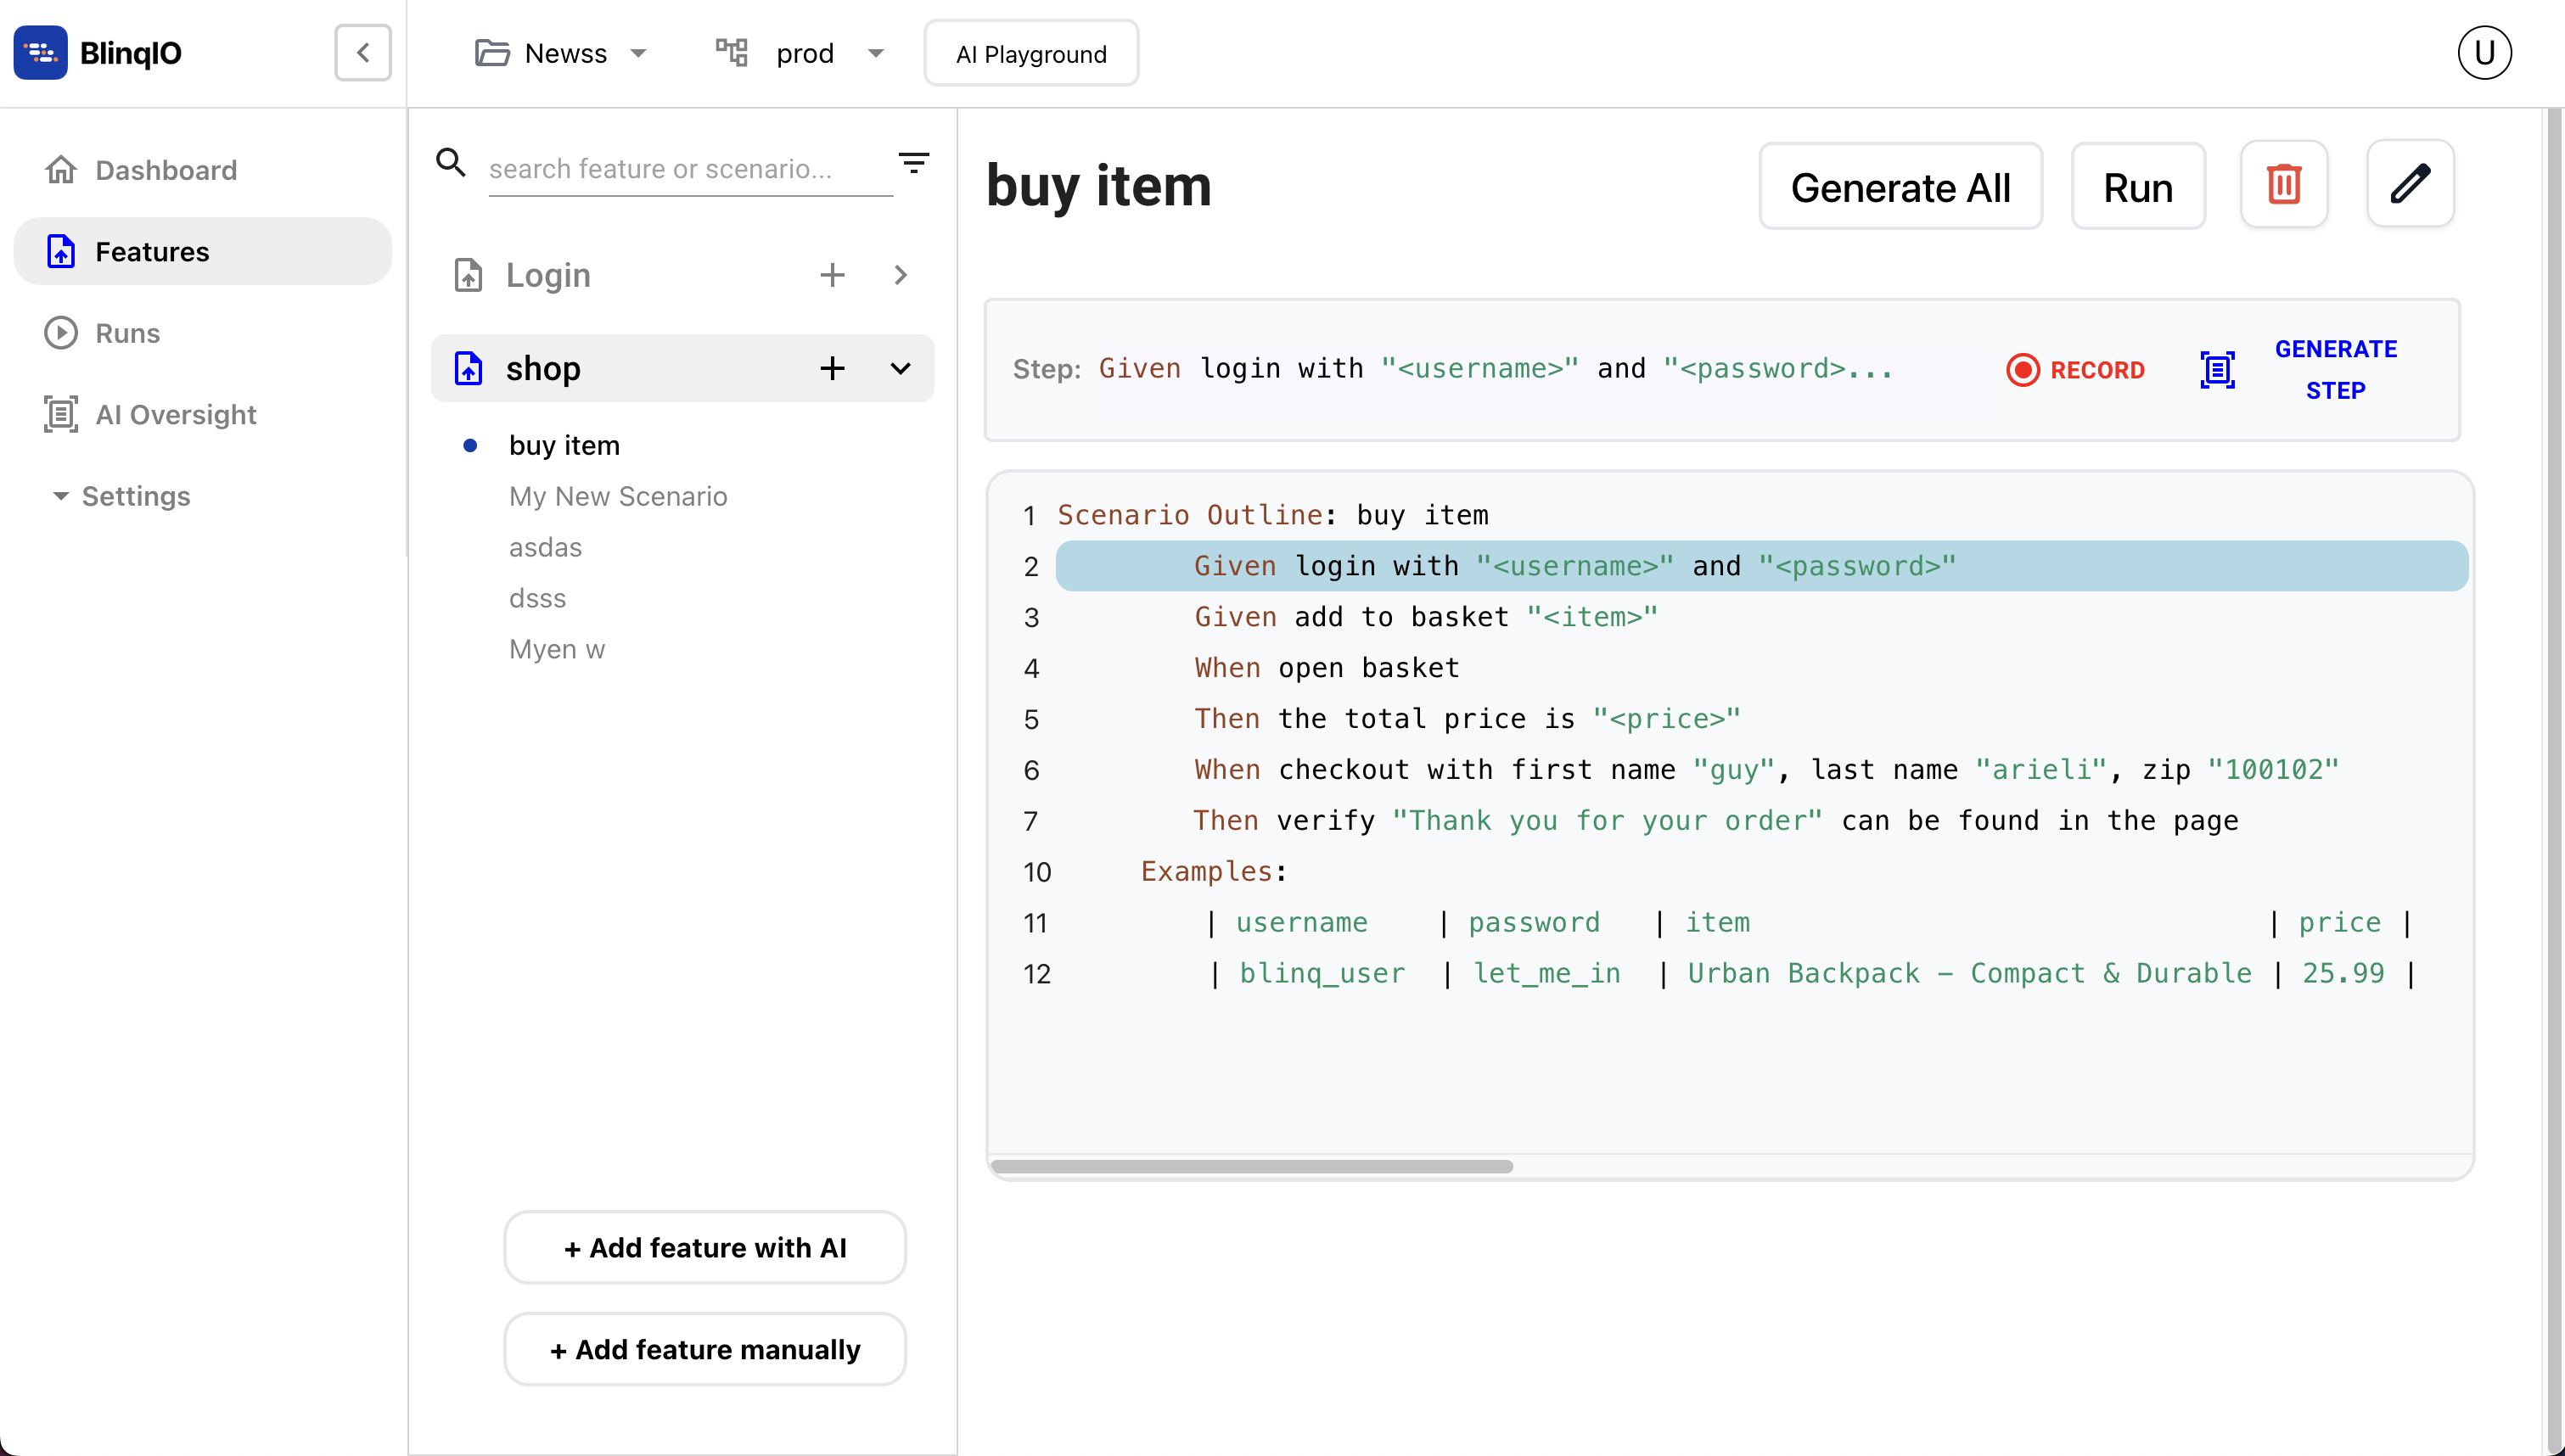
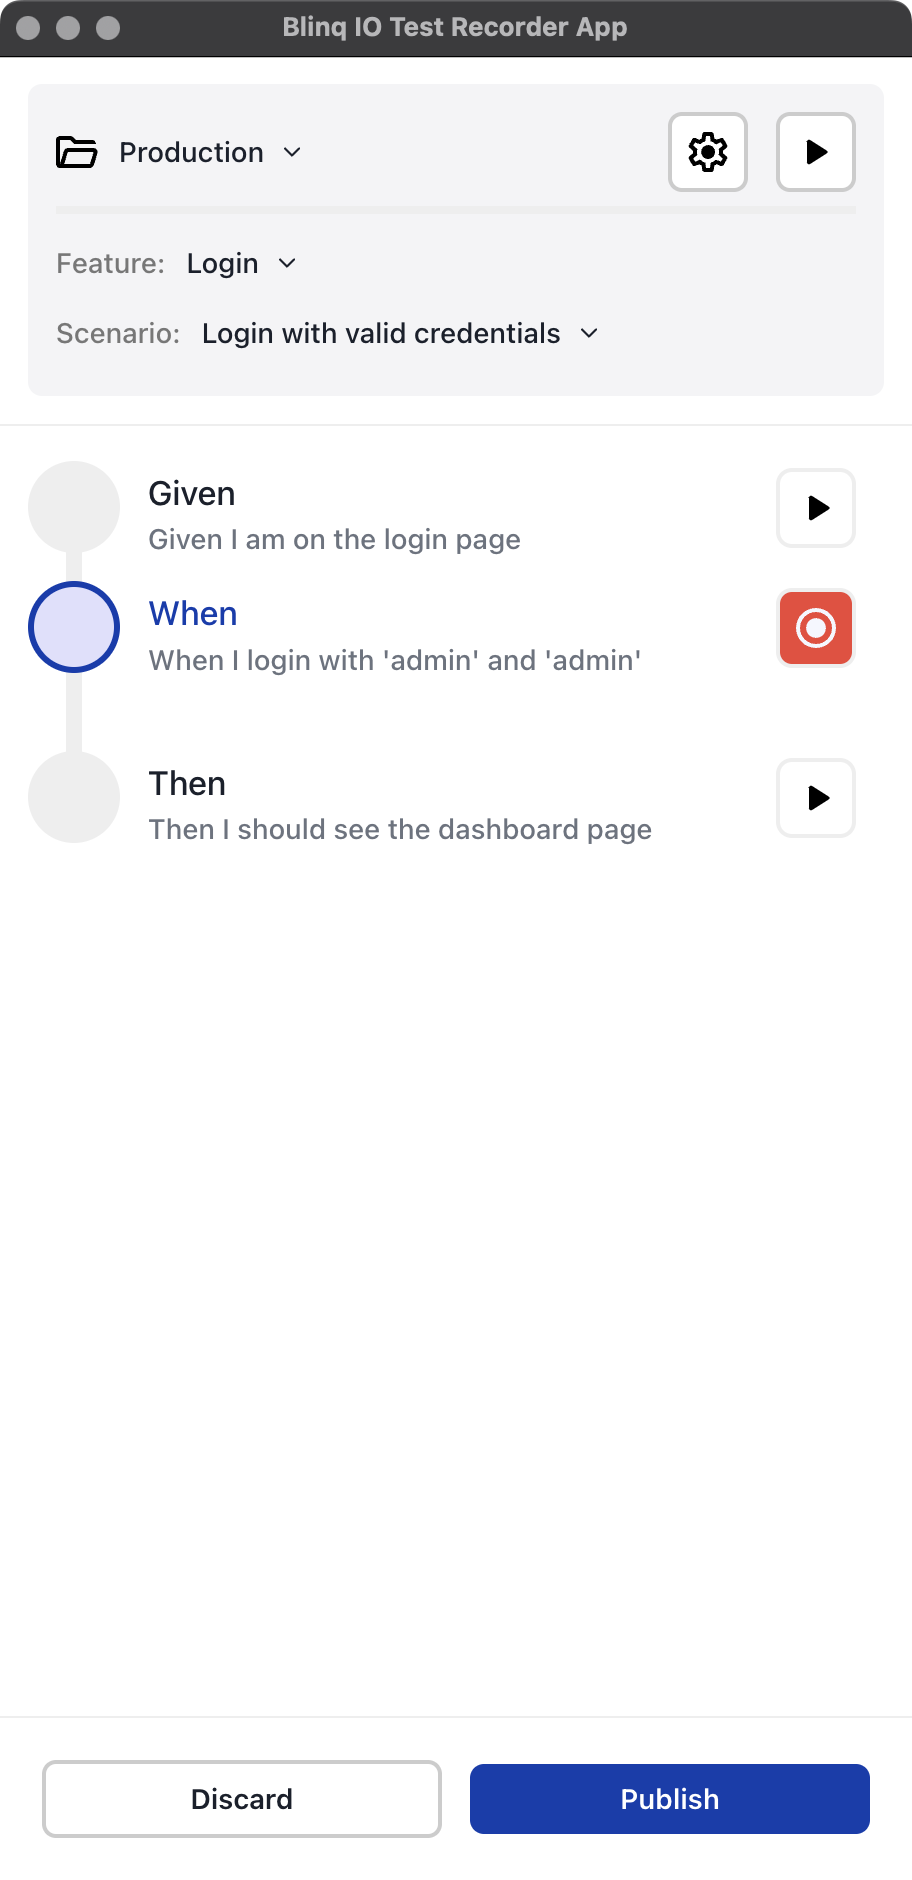
Click Record on the top right to launch BlinqIO Recorder. A record button (⏺️) is available in BlinqIO Recorder for the step you selected.
From a Failed Test Report
The Failed Reports page is being developed. They will be available soon.
Record Steps
Follow these steps to start recording test steps:
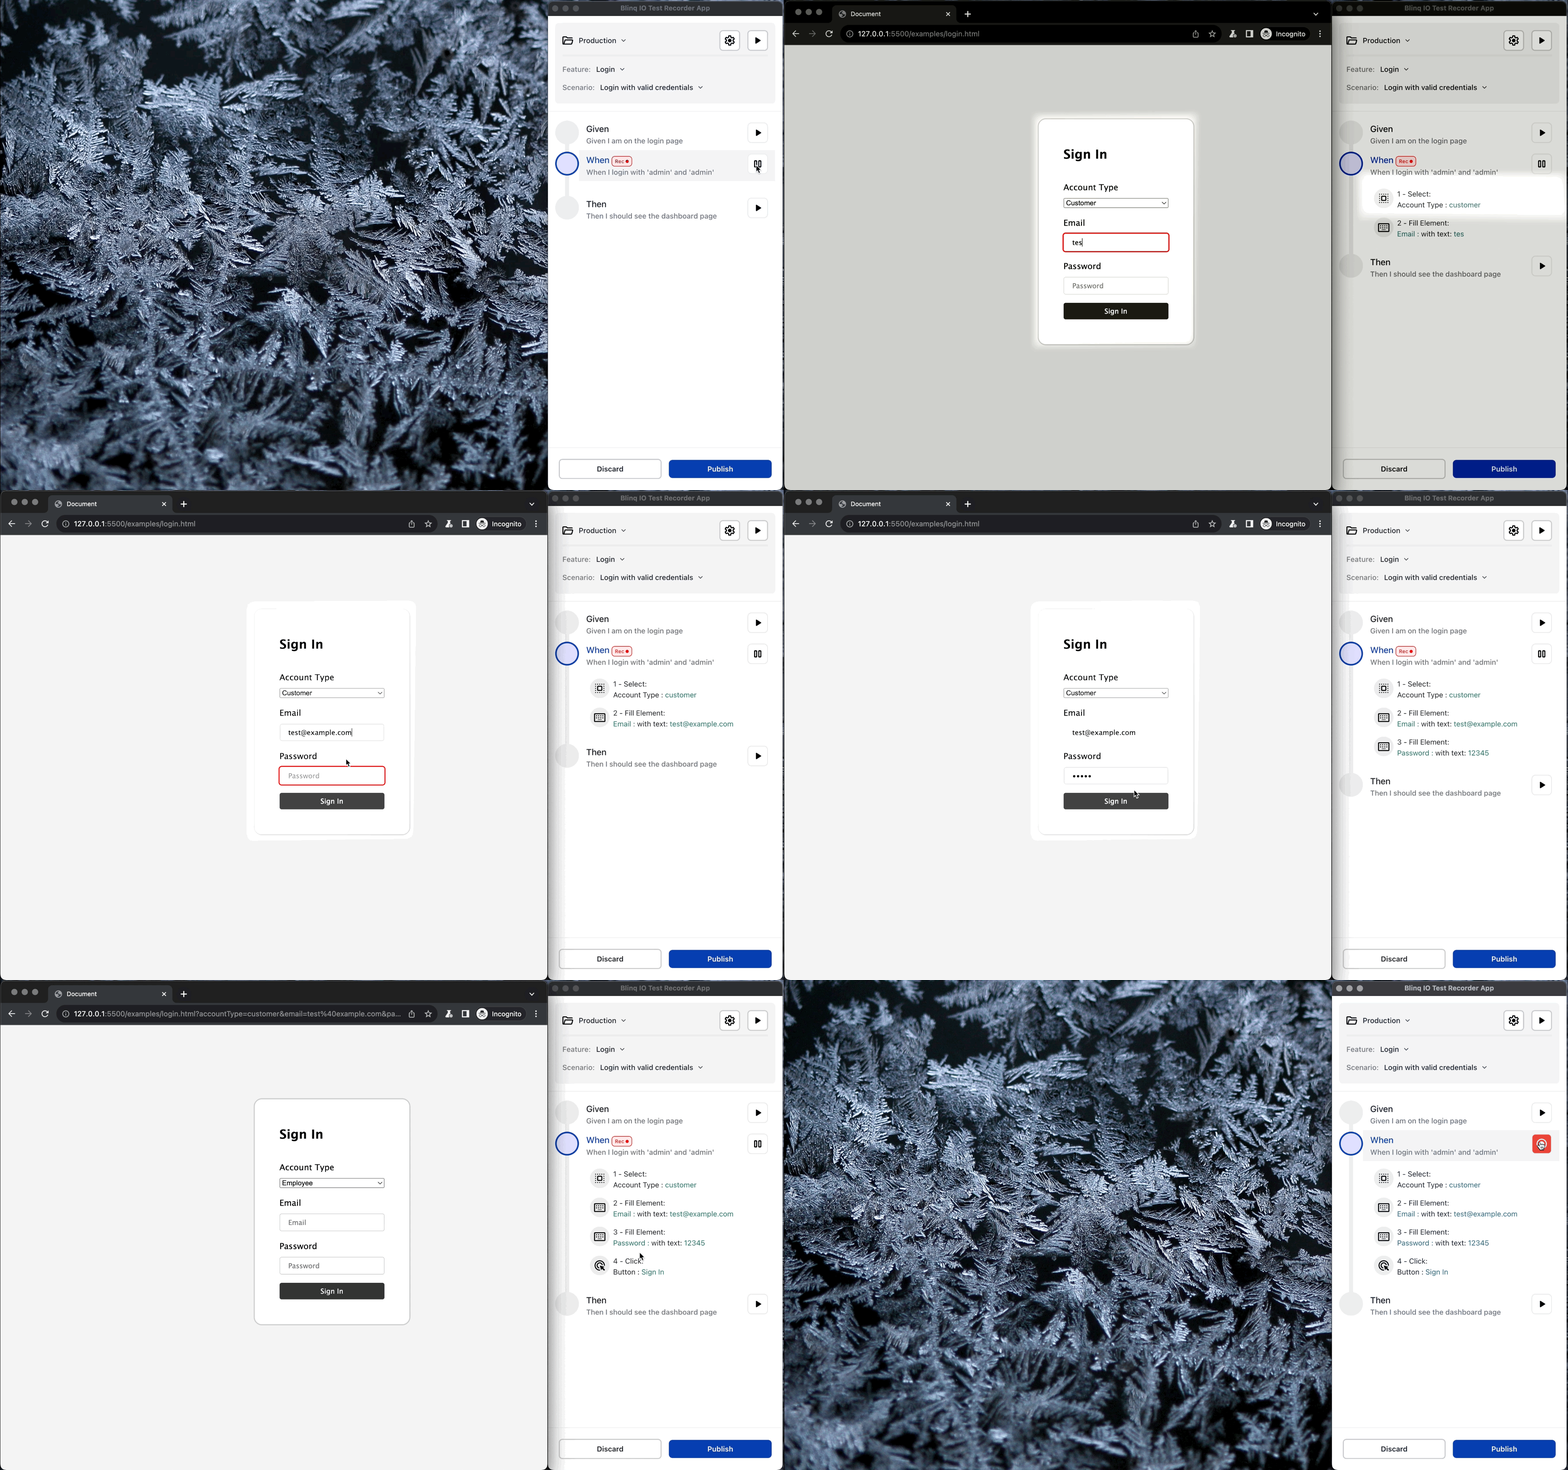
Click Record (⏺️) to start recording. A new Chrome window opens with your target application, and the Record button changes to Pause (⏸️) to show the recording has begun.
INFO
On launching the Chrome window, BlinqIO Recorder automatically executes all steps just before the selected step. This brings the target application state to just before your selected step for manual recording.
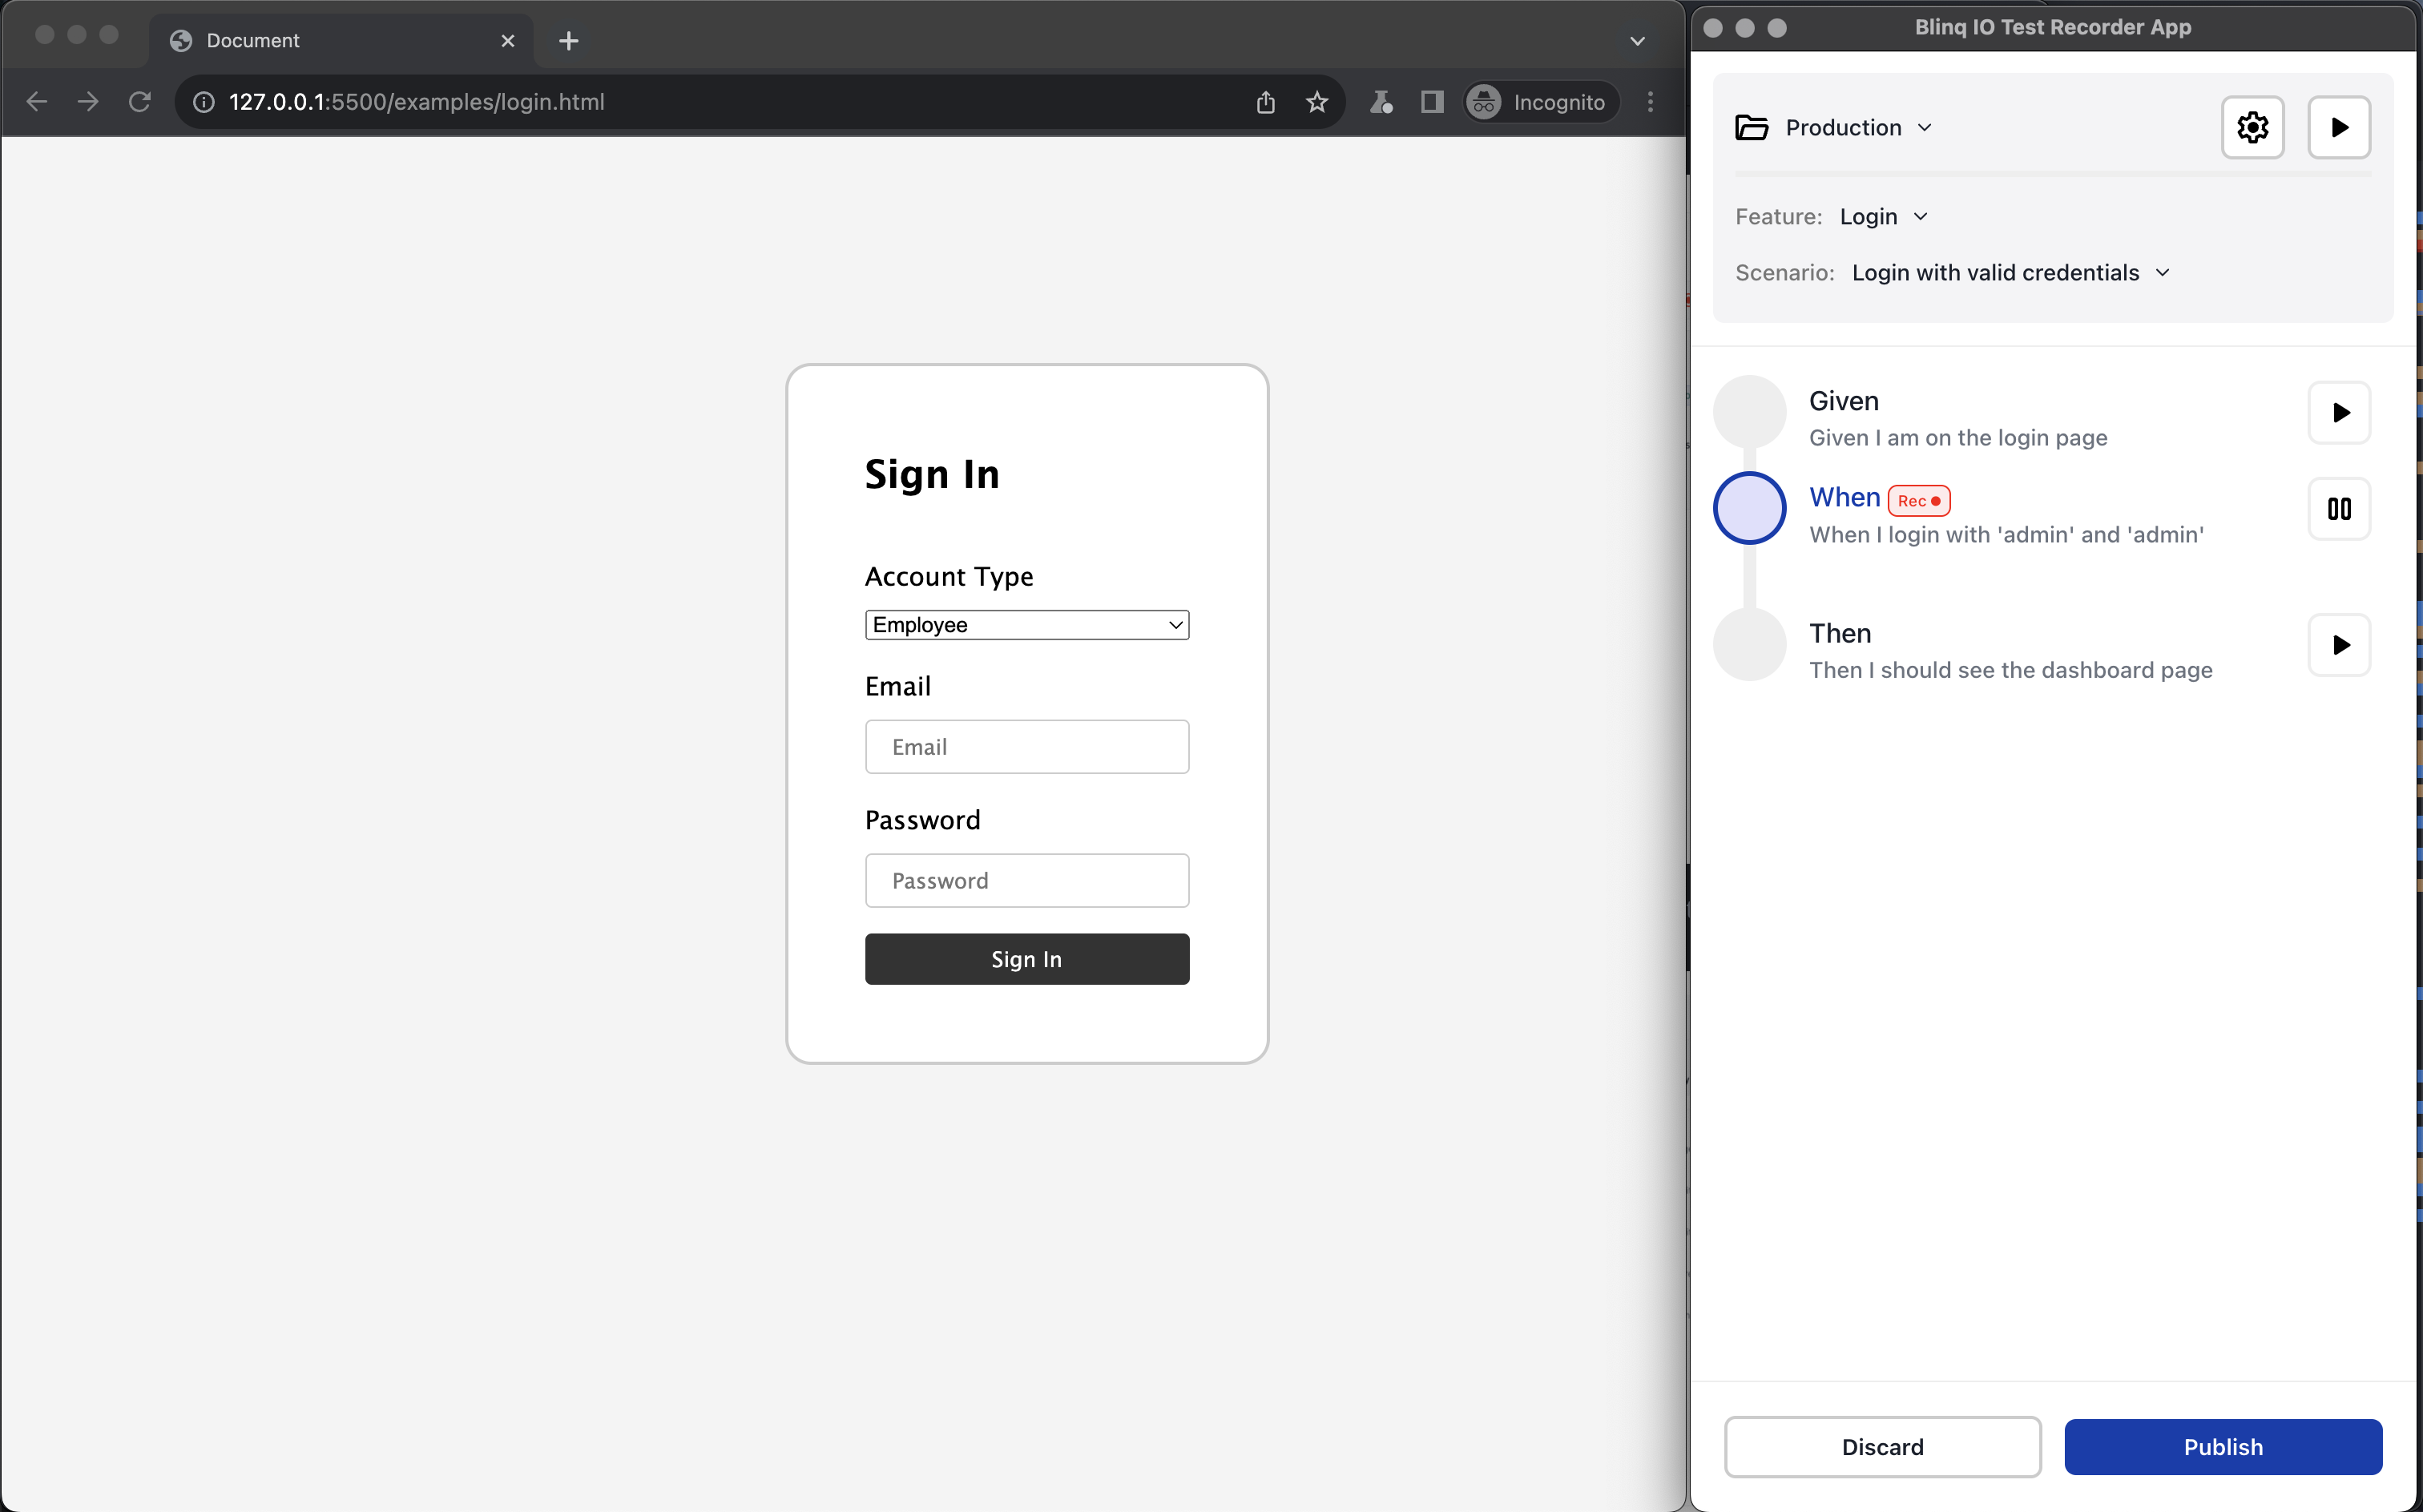
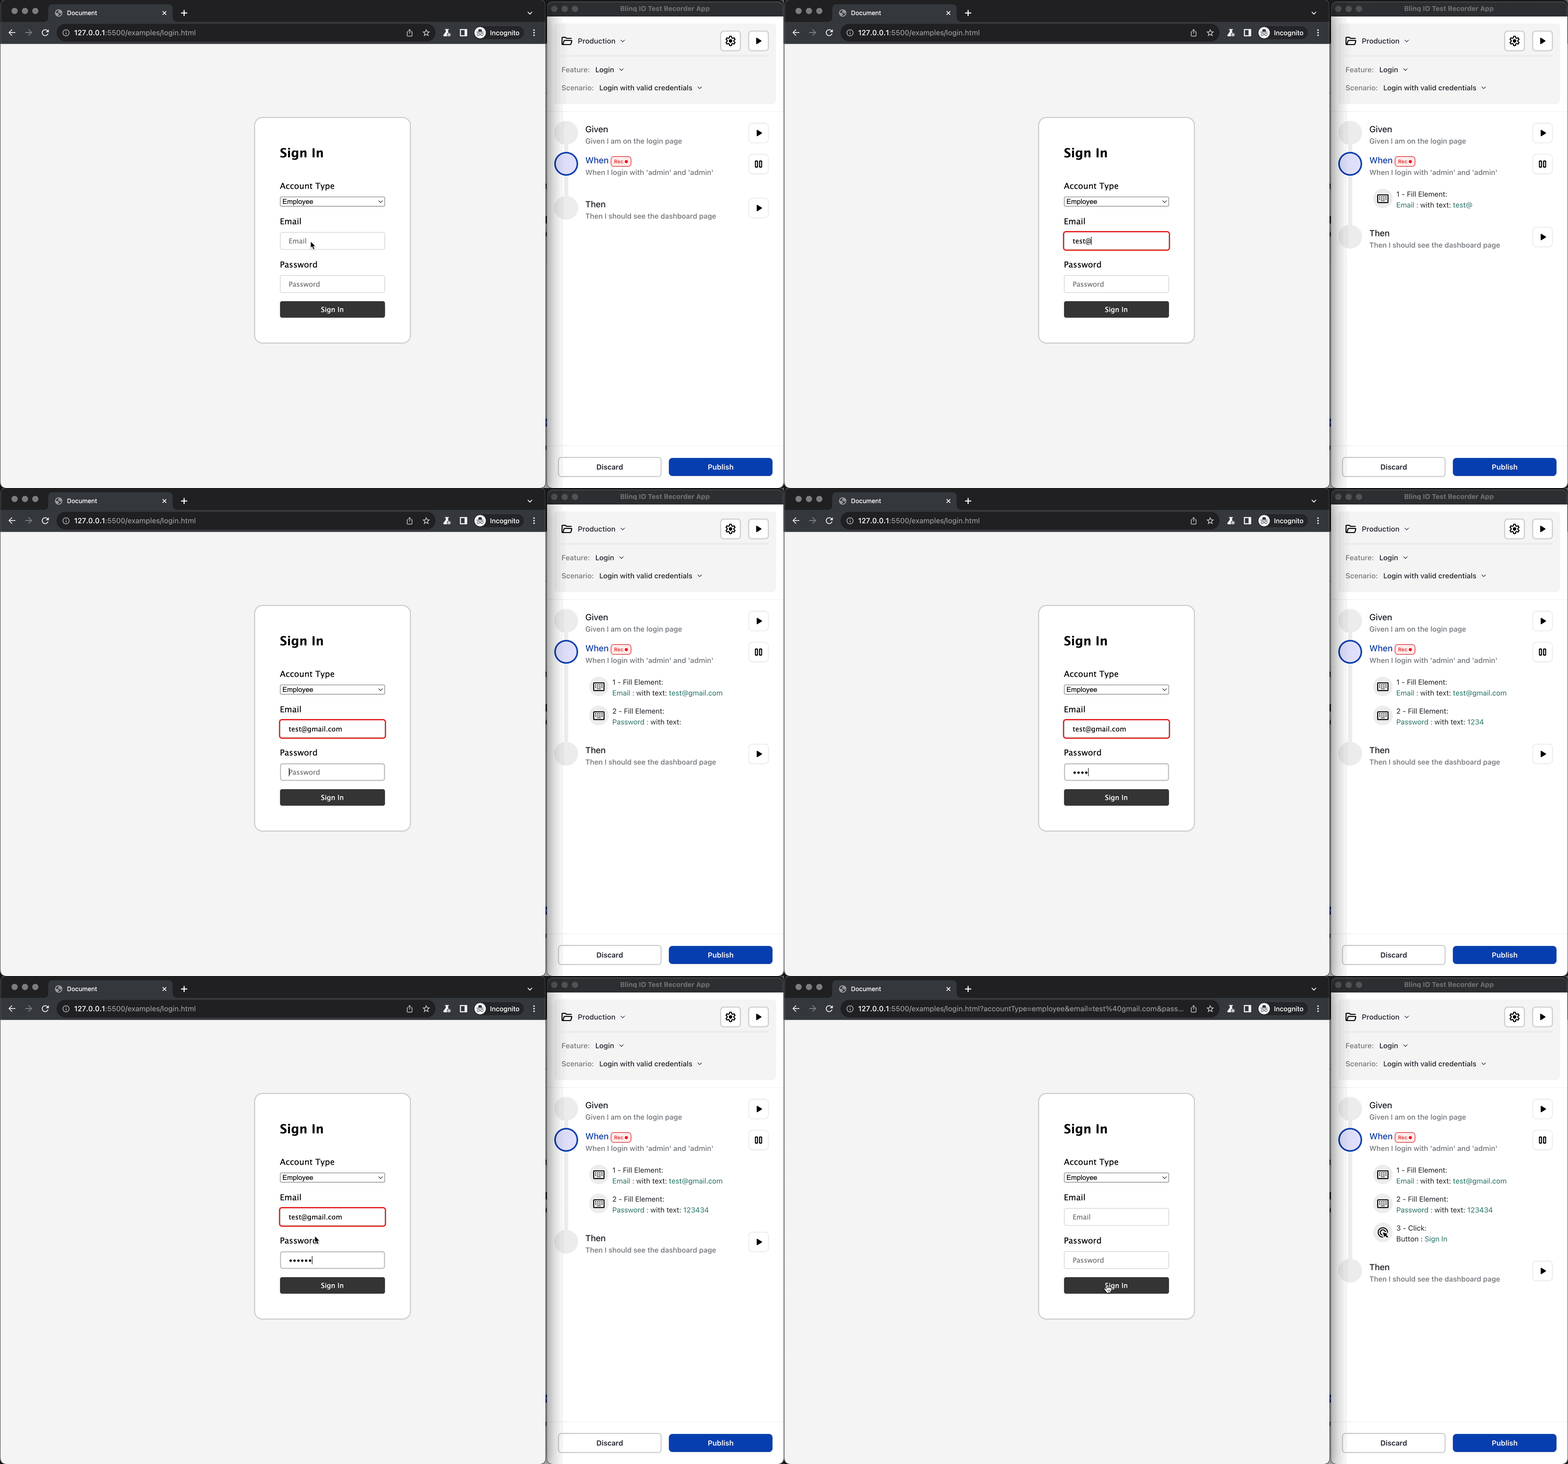
Start performing the test steps in the Chrome browser. The Recorder starts registering the new actions under the selected step.
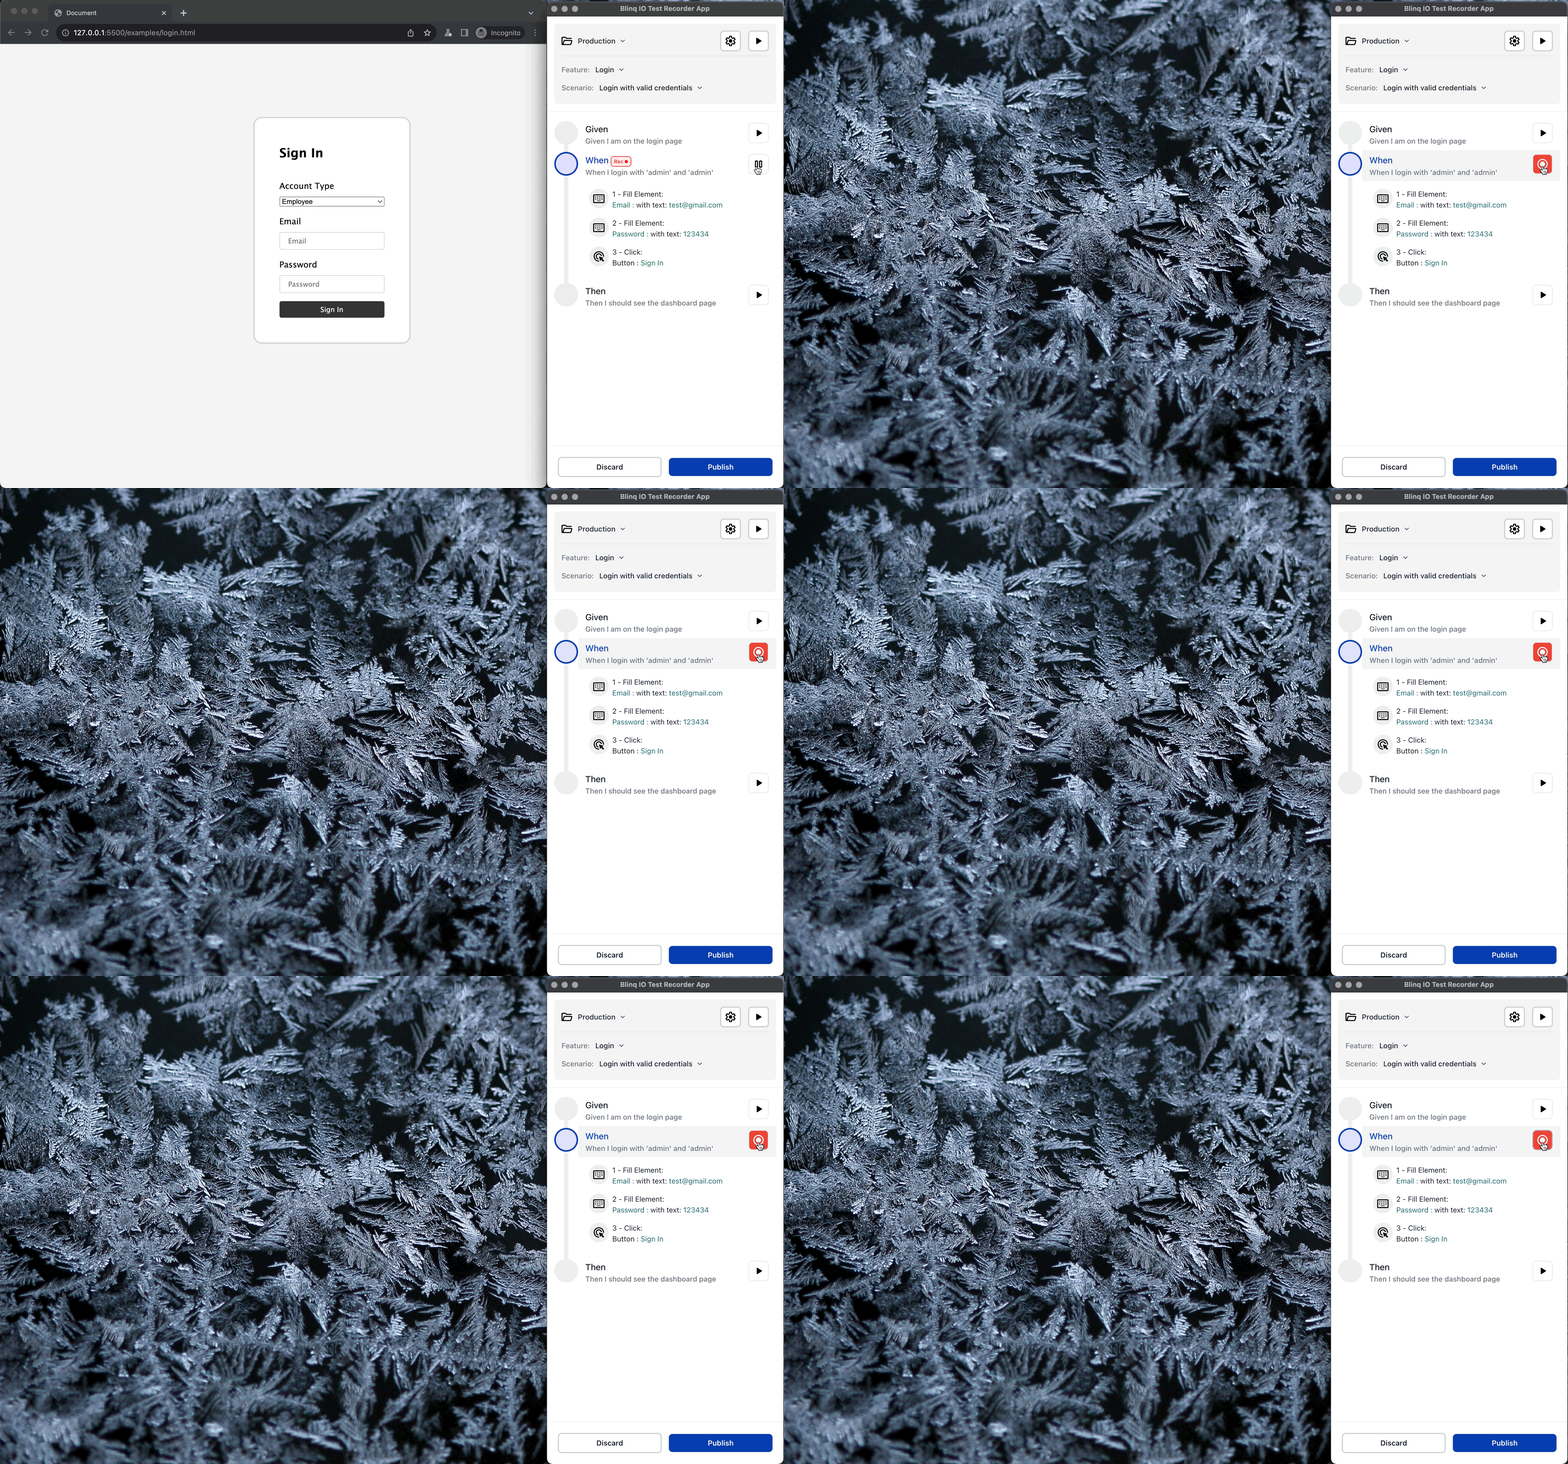
Click Pause (⏸️) to stop recording. The Browser window closes automatically.
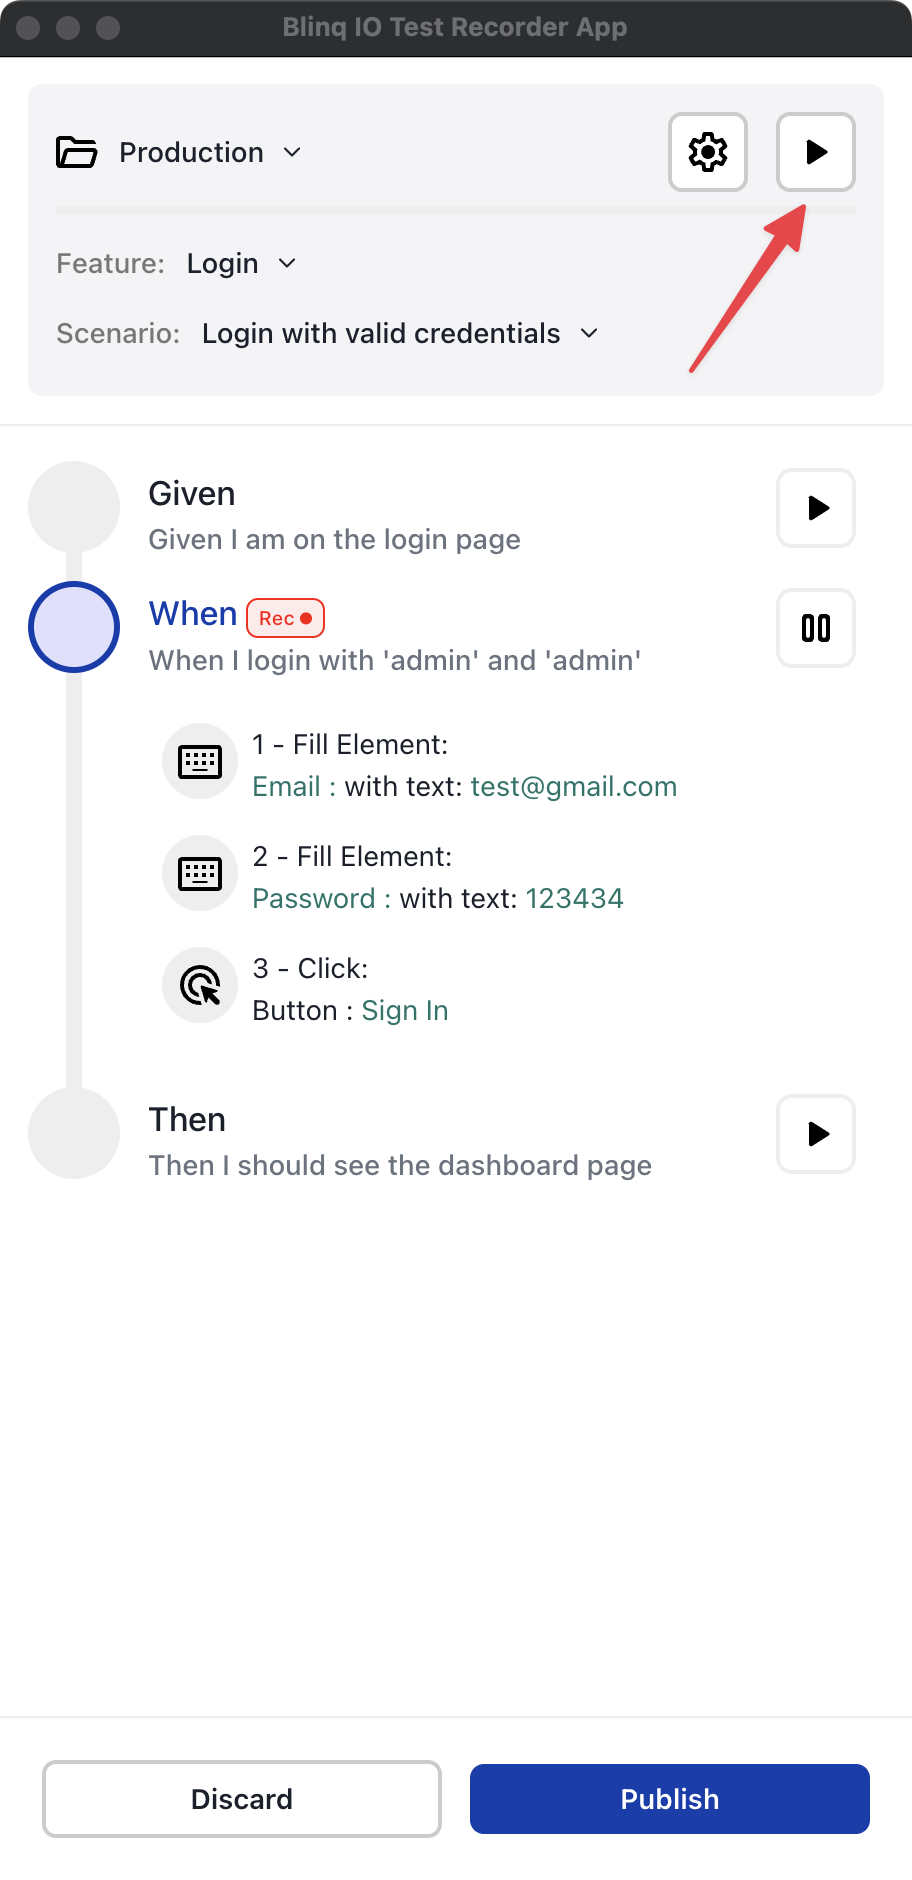
After recording your steps, you can review the entire scenario by replaying it from the beginning.
Click Play (▶️) at the top right to replay the entire scenario. Or click Play (▶️) on each step to replay them individually.
Click Publish to save the changes and generate an updated test code.
Note
Clicking Discard will close BlinqIO Recorder without saving any changes.
Make Additional Changes
If required, you can make these adjustments to the actions under any step:
Relearn Actions
Users can use the Relearn feature to record and update individual actions without recording the entire step.
This feature is currently being developed. The documentation may change in the future.
Follow these steps to relearn an action:
Click the three-dot menu for the required action and select Relearn. The BVT Recorder launches a new Chrome window. It also executes all the steps just before the selected action, bringing the state of the target application to just before your selected action for manual recording.
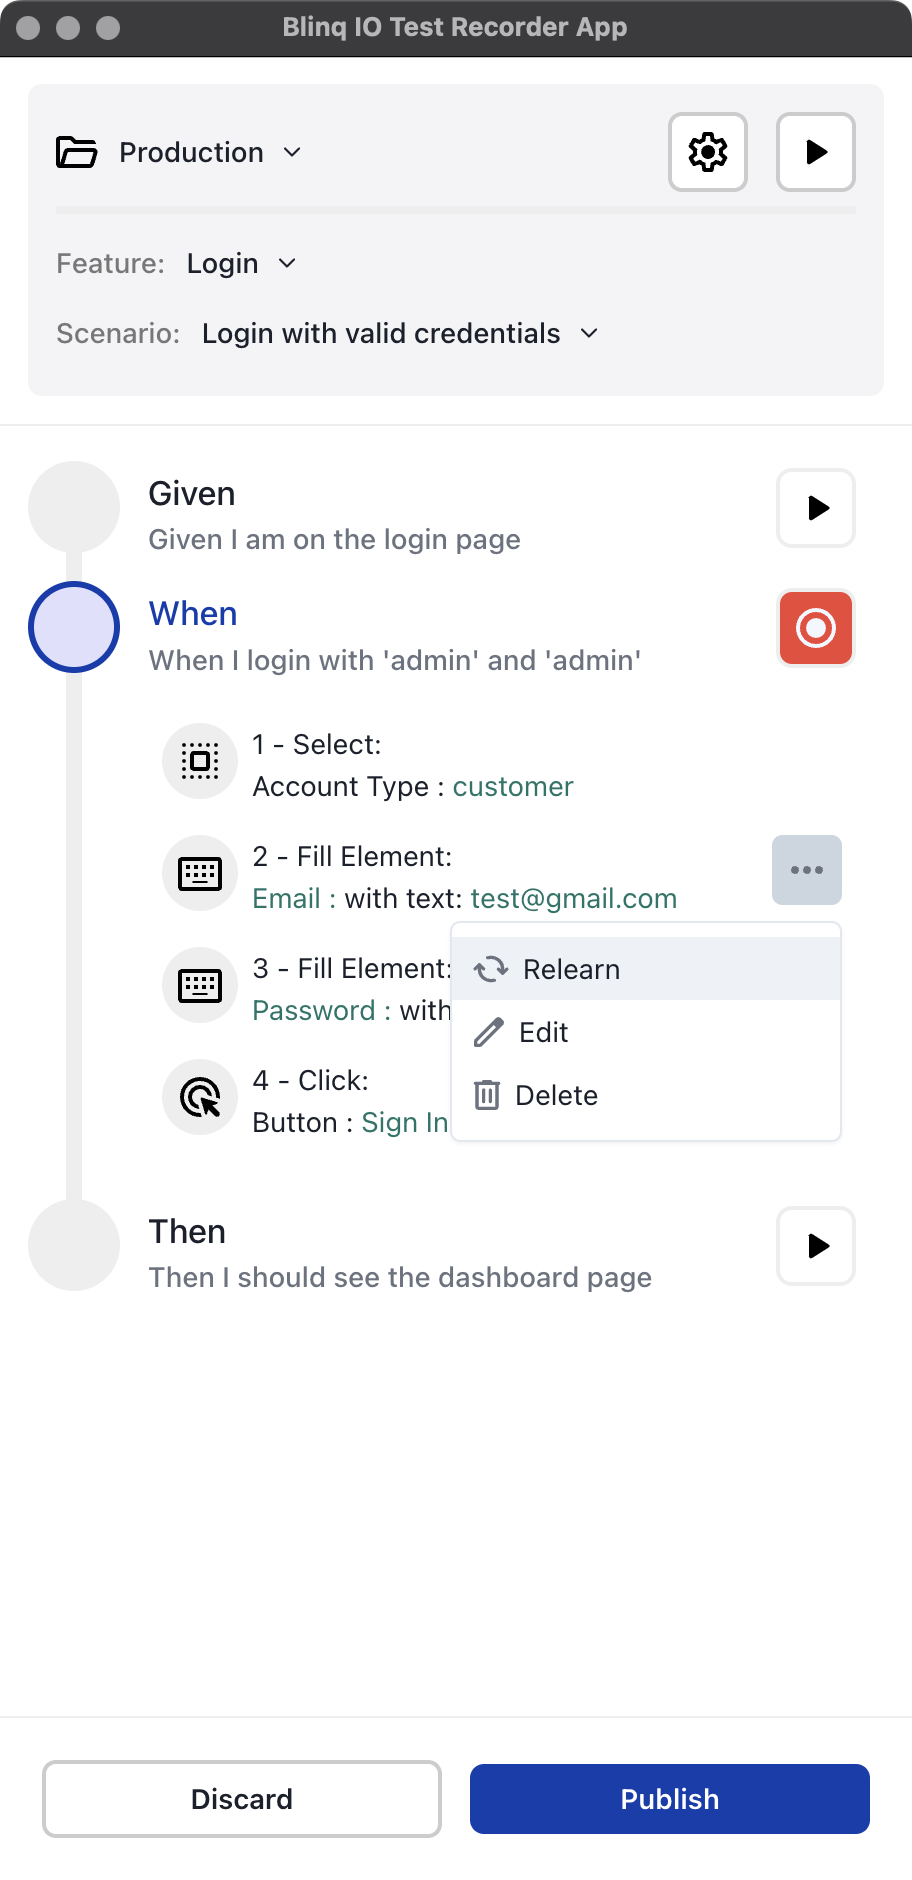
Start executing the selected action in the Chrome window.
Click Publish to save the changes and generate an updated test code.
Change Input Parameters
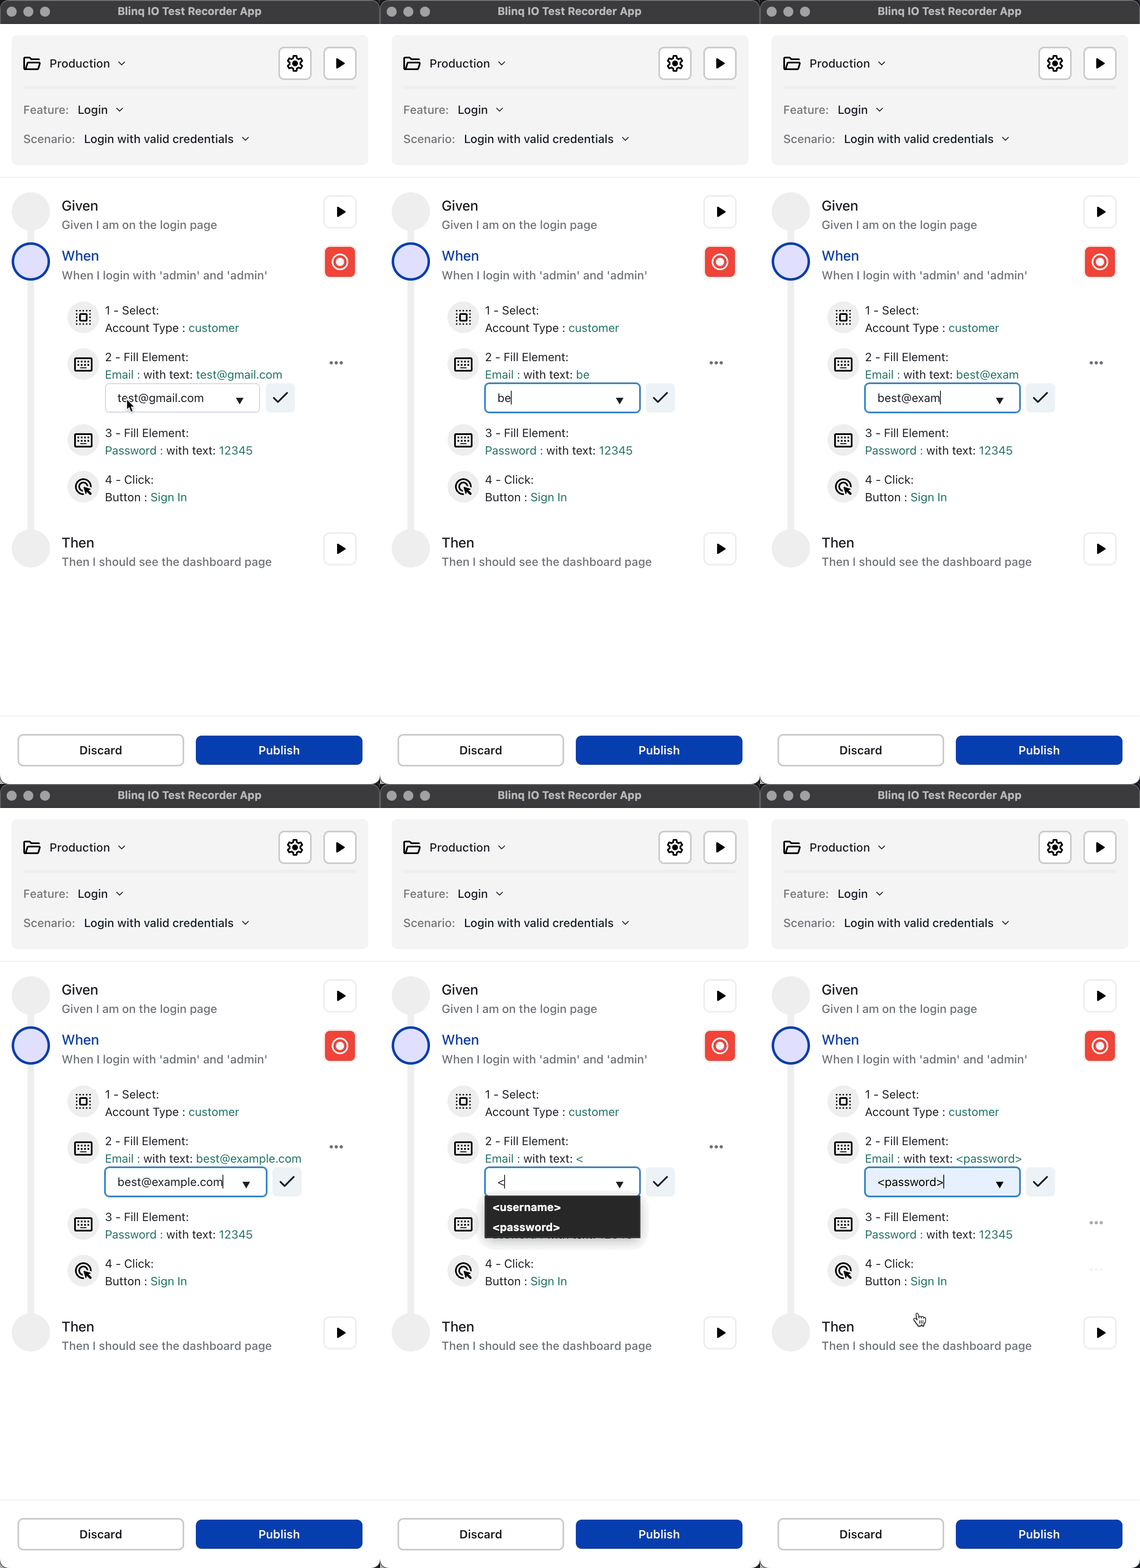
You can change the input value of a Fill input type action to a different value or map it to one of the variables defined in the Scenario Outline's Examples section.
Example:
gherkin
Feature: Login

    Scenario Outline: Login with valid credentials
        # Ensure the repository is private
        Given Fill in the "<username>" and "<password>" on the sign-up page.
        Examples:
            | username             | password            |
            | {{string.alpha(10)}} | {{string.alpha(10)}}|
Follow these steps to change input parameters for an action:
Click the three-dot menu for the action and select Edit. An edit dropdown displays for the action.
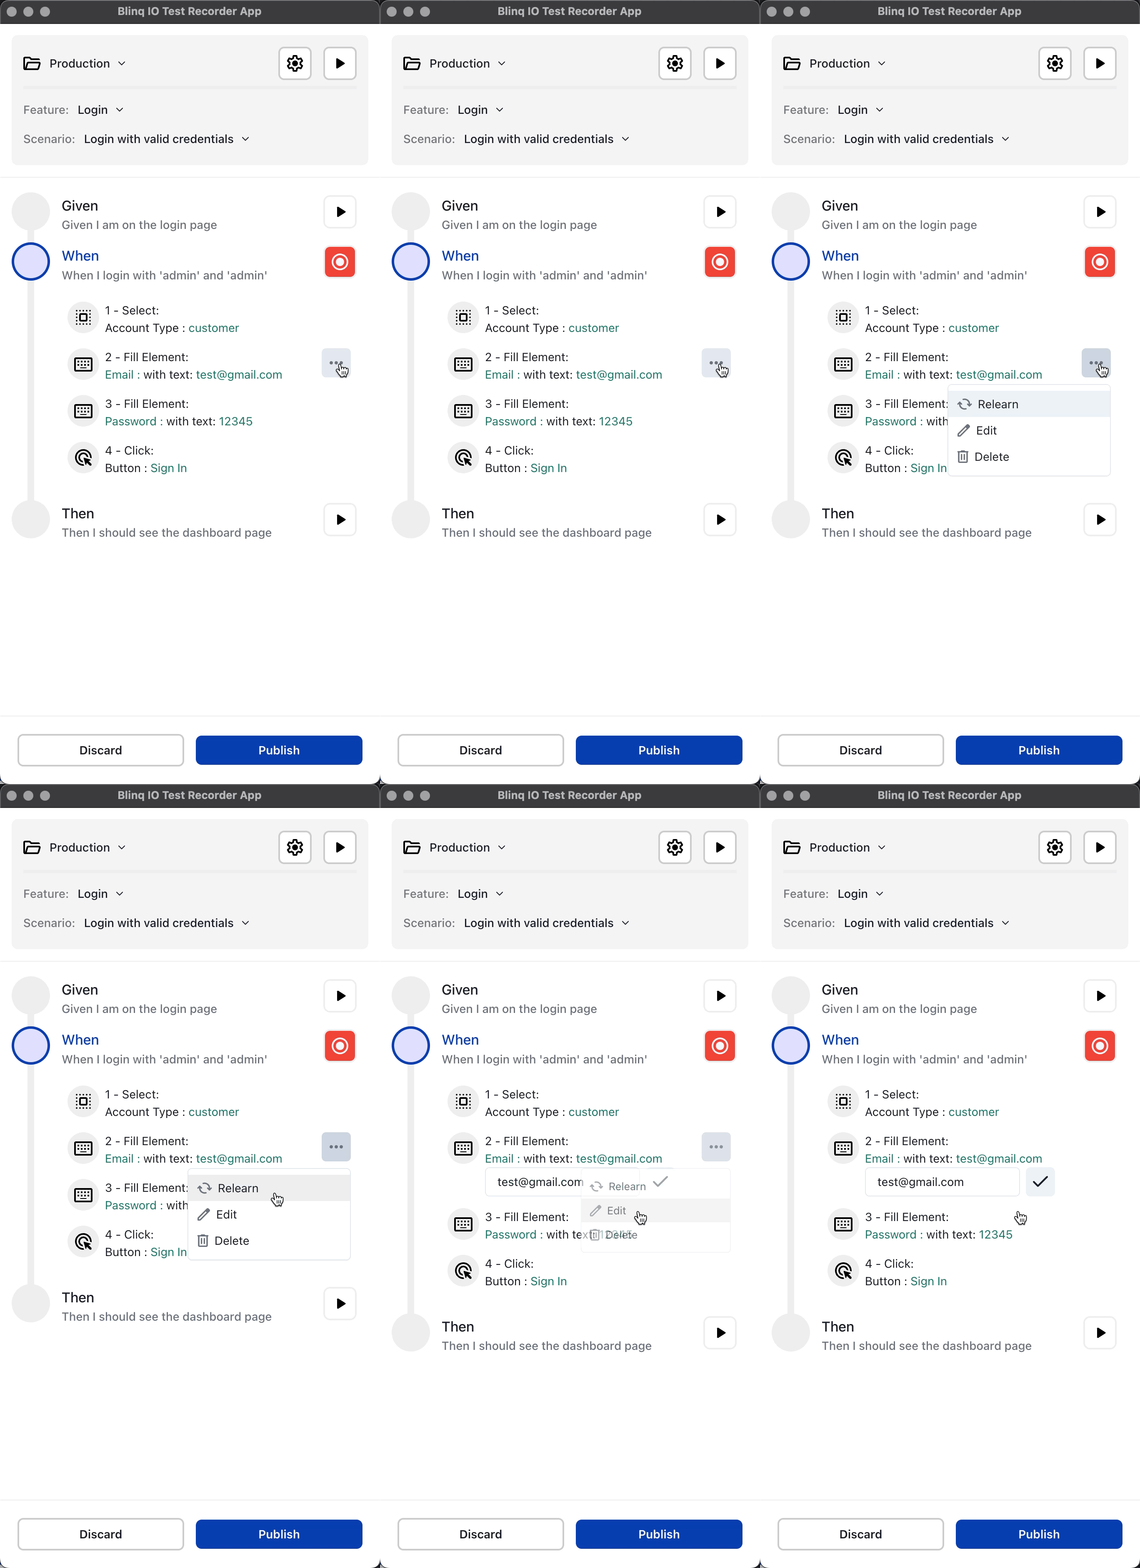
Enter a new input value or select a parameter from the dropdown list.
Click Check (☑️) to apply changes to the action.
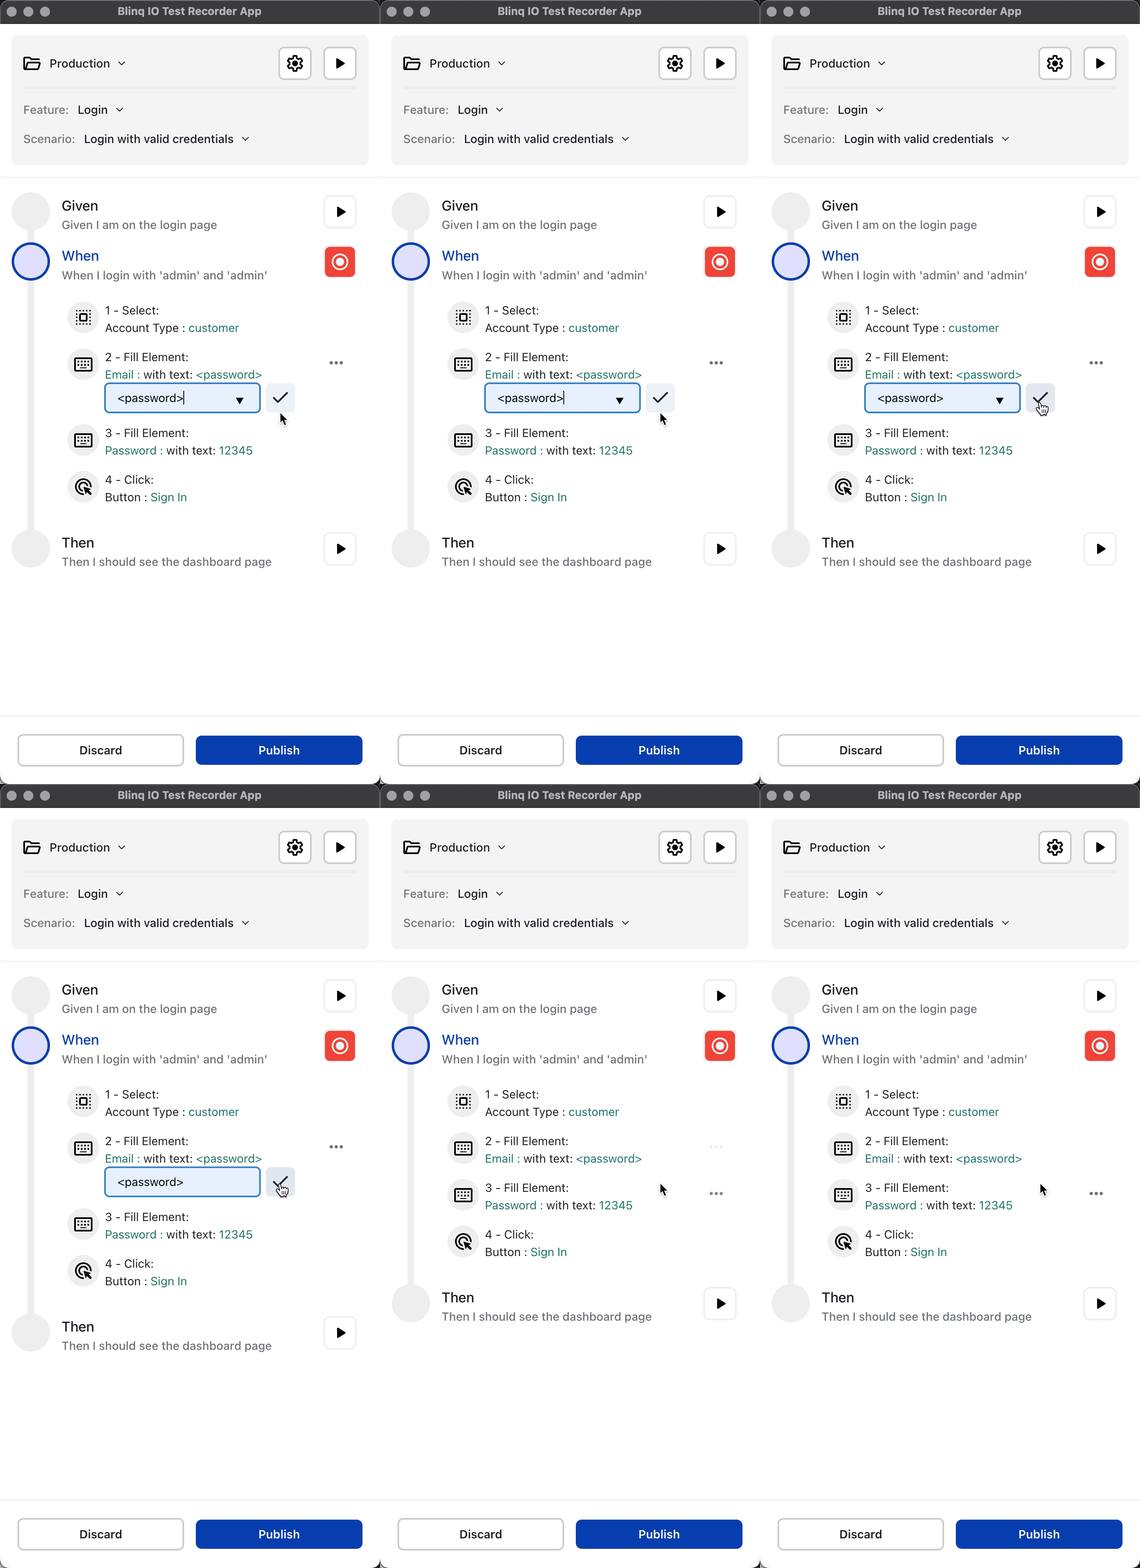
Click Publish to save the changes and generate an updated test code.
Reorder Actions
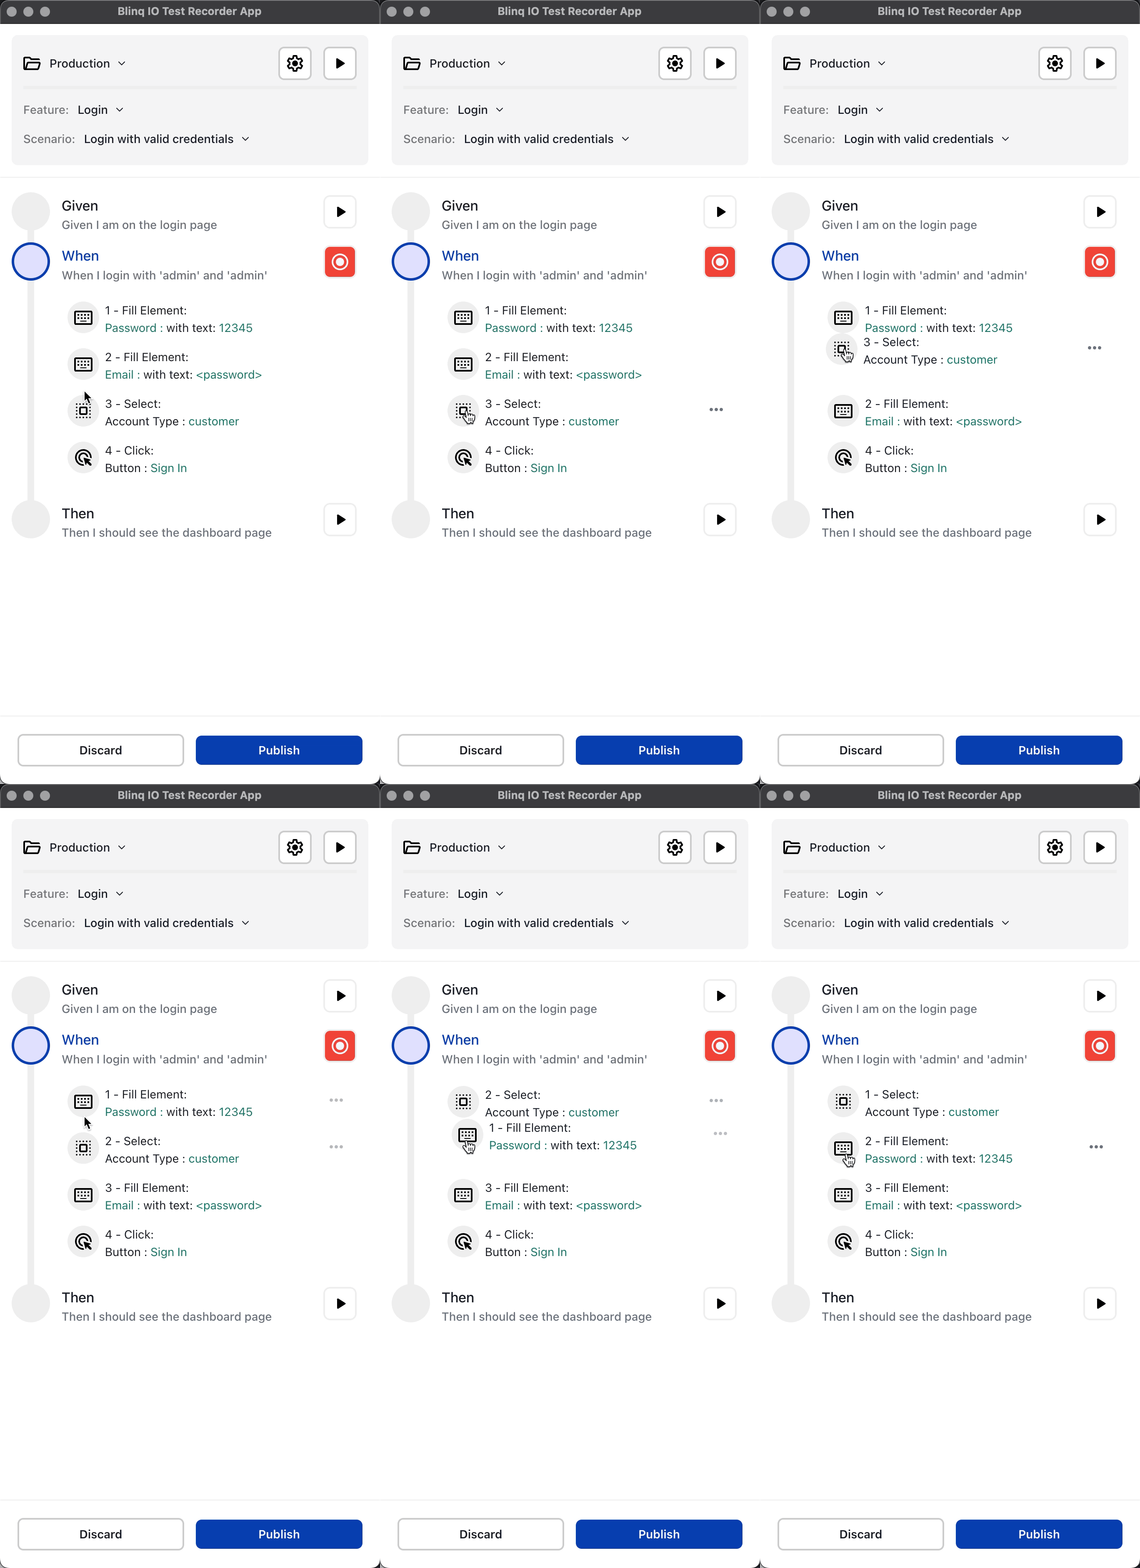
The actions for each step are executed in the order displayed in BlinqIO Recorder. Click the required action and drag it to a new location in the actions list to change its execution order.
Click Publish to save the changes and generate an updated test code.
Delete Actions
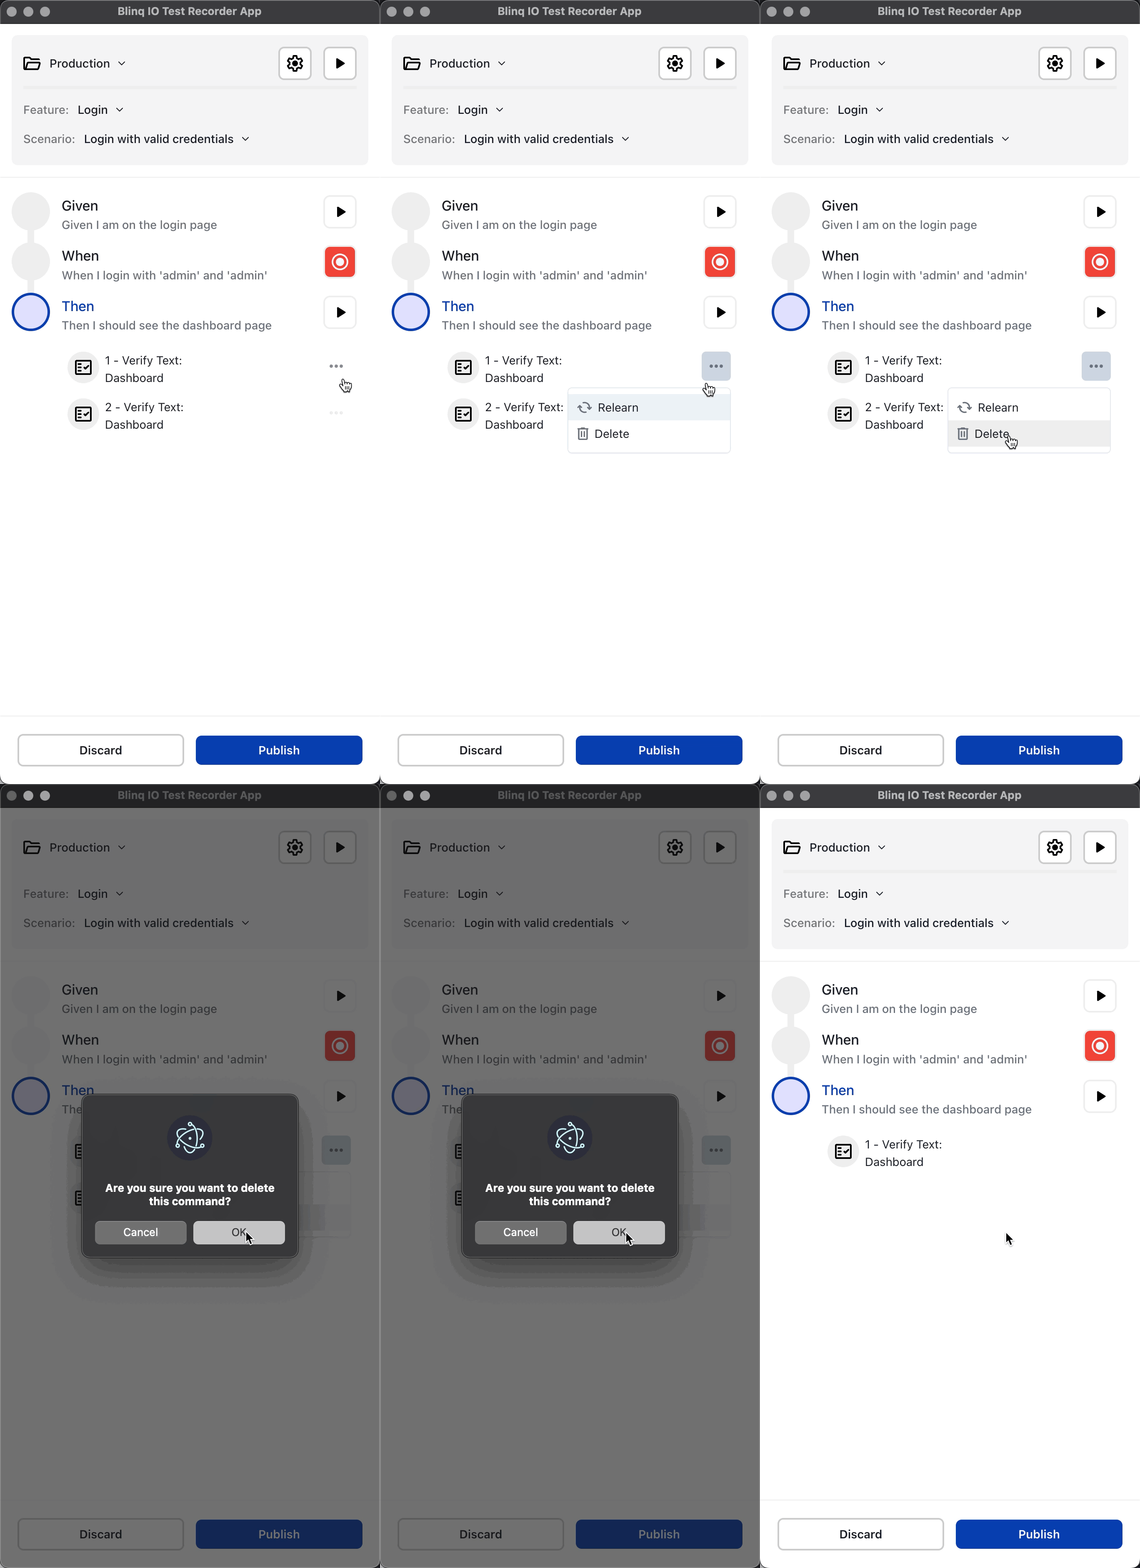
Click the three-dot menu for the required action and select Delete to remove it. You may have to confirm the deletion in the confirmation box.
Make sure to click Publish to save the changes and generate an updated test code.
Switch Environments
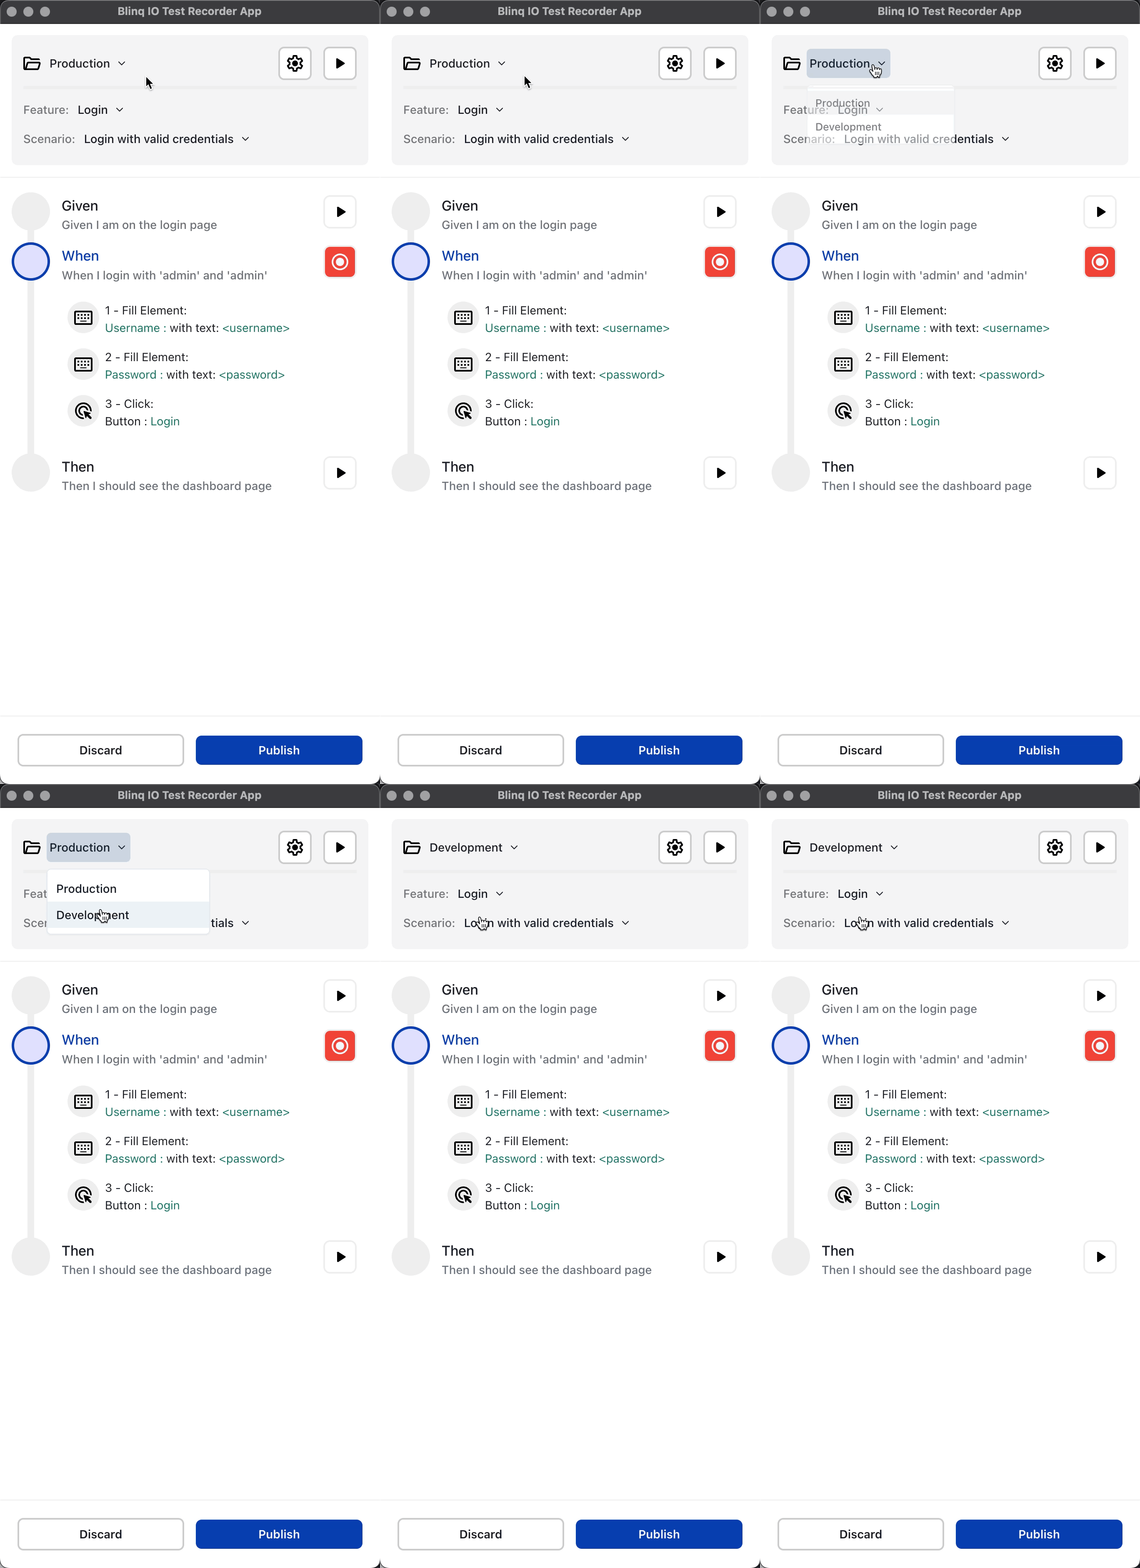
You can switch environments by clicking the dropdown at the top left and selecting a different Environment. This comes in handy when you want to replay the scenario on different environments of your target application.
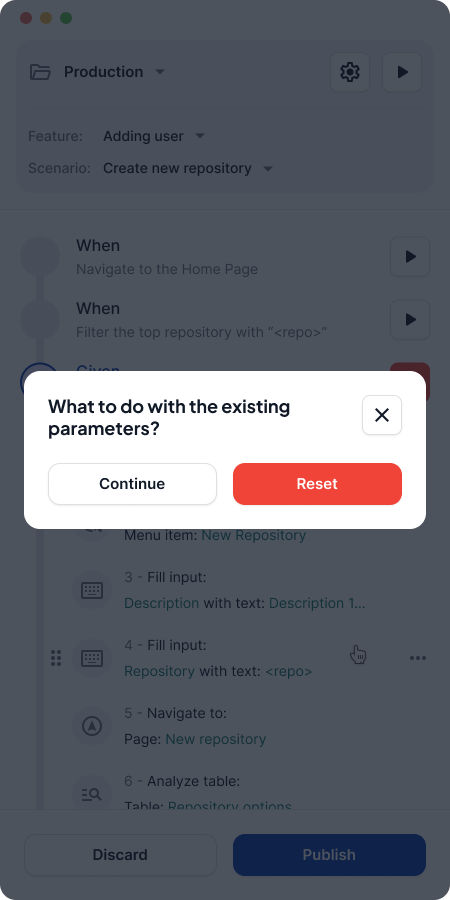
When switching environments, you may see a prompt to carry over any unsaved input parameter changes you have. Click Continue to carry these parameters to the new environment, or click Reset to revert to the default input parameters.
